

To achieve a spotless outdoor area, I recommend using a combination of warm water, mild detergent, and a stiff-bristled brush. This method not only protects the integrity of the wood but also proves effective in eliminating dirt and grime effectively. Ensure that the surface is dry before starting the cleaning process for better adherence of the cleaning solution.
Mix a few drops of dish soap with warm water in a bucket and stir until it’s bubbly. Dip your brush into this mixture and scrub the surface in sections, applying more solution as required. Pay special attention to any stubborn spots or discolouration, and don’t hesitate to apply a little extra elbow grease where necessary.
After scrubbing, rinse your outdoor area thoroughly with a garden hose to remove any soap residue. Allow it to air dry completely before applying a protective sealant to enhance its lifespan and keep it looking fresh. Regular maintenance using this technique will make your outside area look inviting and well-kept year-round.
Effective Techniques to Refresh Your Outdoor Space
Mix a solution using one cup of dish soap, one cup of white vinegar, and two gallons of hot water. This combination tackles dirt and mildew safely while being gentle on your surface. Use a stiff bristle brush and apply the mixture, scrubbing in a circular motion. Rinse thoroughly with a hose, making sure no residue remains.
Natural Approach with Baking Soda
For stubborn stains, sprinkle baking soda directly onto the affected areas. Add water to create a paste and let it sit for about 15 minutes. Scrub with a brush, then rinse. This method is particularly effective for removing tough grime and restoring the original appearance.
Regular Maintenance Routine
To prevent accumulation of dirt and maintain a fresh look, establish a routine. Sweep the surface weekly to remove debris. Additionally, every couple of months, apply the soap-vinegar mixture to keep it in optimal condition. This proactive strategy will extend its lifespan and enhance your outdoor experience.
Choosing the Right Cleaning Solution for Your Deck Material
Select a solution that aligns with the specific material of your outdoor surface. For wood, opt for a gentle cleaner formulated for timber to avoid damage. Ensure it penetrates well, lifting dirt and mildew without stripping the protective finish.
For composite surfaces, use a cleaner specifically designed for synthetic materials. These products typically contain mild detergents that won’t harm the surface while effectively removing stains.
If your flooring is made of vinyl, a mild soap mixed with water will suffice. Aggressive chemicals can dull the finish, so stick to pH-balanced options to maintain its integrity.
Concrete requires a stronger approach; consider a mixture with oxygen bleach. This choice disinfects while lifting stains, making it ideal for fixing tougher spots. However, always test a small area first to gauge the reaction.
Finally, always read labels and follow the manufacturer’s instructions for dilution and application to achieve optimal results and extend the lifespan of your outdoor flooring.
Gathering Necessary Tools for Hand Cleaning
Start with a sturdy broom to remove loose debris like leaves and dirt. A push broom is ideal for larger areas, while a handheld option can help with corners and tight spots.
Brush Selection

Choose a brush with stiff bristles that can handle tough stains without damaging the surface. Look for one with a long handle to reach deeper areas and to minimise strain on your back.
Bucket and Safety Gear

A durable bucket is essential for mixing cleaning solutions. Consider the following:
- Ensure it holds at least 5 gallons for efficiency.
- Use gloves to protect your hands from harsh chemicals.
- Don safety goggles to shield your eyes from splashes.
Sponges and Rags

Microfiber or sponge pads are effective for applying cleaners uniformly. Have plenty of old rags on hand for wiping surfaces dry or removing excess solution.
Hose and Water Source
A reliable garden hose with a spray nozzle attached can help rinse off any residues. Make sure your hose is long enough to reach all areas without stretching too much.
Cleaning Solutions
Ponder over suitable non-toxic formulas for various materials, ensuring they’re safe for your specific surface type. Read instructions carefully to mix properly.
Equipping yourself with these tools will facilitate a thorough process without a pressure apparatus, yielding commendable results in caring for your outdoor space.
Step-by-Step Process for Scrubbing the Deck
Begin with sweeping the surface thoroughly to remove debris such as leaves, twigs, and dirt. This preparation is crucial for effective scrubbing.
Next, mix the appropriate cleaning solution based on the material of the surface. For wood, a mix of warm water and a gentle detergent works well; for composite materials, opt for a cleaner specifically designed for that purpose. Follow manufacturer guidelines for dilution ratios.
Using a long-handled scrub brush, apply the cleaning solution liberally. Work in small sections to avoid letting the solution dry out. For stubborn stains, let the solution sit for a few minutes before scrubbing.
With the scrub brush, vigorously scrub the surface in a circular motion. Pay extra attention to corners, edges, and any areas showing heavy soiling. Rinse the brush frequently to avoid spreading dirt back onto the surface.
After scrubbing, rinse each section with clean water using a bucket or a garden hose. Ensure all soap residue is washed away, as it can attract dirt if left on the surface.
For tough spots, repeat the scrubbing process with an additional application of the cleaning solution. Use a sponge or cloth for concentrated cleaning on those specific areas.
Finally, allow the area to dry completely before placing furniture back or walking on the surface. This ensures that the surface is safe and properly maintained for future use.
Dealing with Stains: Natural Remedies and Treatments
For persistent marks, try a mixture of baking soda and vinegar. Combine one cup of baking soda with half a cup of vinegar to form a paste. Apply it directly to the stained area and let it sit for about 15 minutes. Scrub gently with a stiff brush to lift the stain, then rinse off with water.
Oil Stains
To tackle oil-based blemishes, sprinkle cornstarch or talcum powder over the spot. Allow it to absorb the oil for several hours, then sweep it away. For further treatment, mix dish soap with warm water and scrub the area until the residue is gone.
Mildew and Mold
A solution of one part hydrogen peroxide to two parts water can effectively fight mildew. Apply it with a spray bottle, letting it sit for about 10 minutes before scrubbing with a brush. Rinse thoroughly to eliminate any leftover solution.
Techniques for Rinsing and Drying Without a Pressure Washer
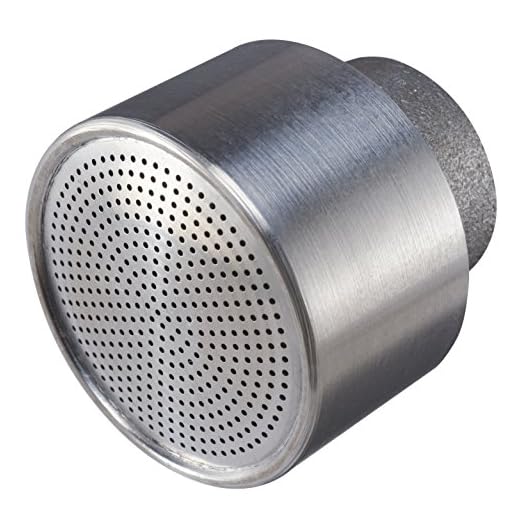
To achieve an optimal rinse after manual scrubbing, utilise a garden hose equipped with a spray nozzle. This nozzle should have adjustable settings to allow for a gentle mist or a concentrated stream, making it suitable for various surfaces.
Begin rinsing from one corner and move horizontally across. Position the nozzle approximately 12 to 18 inches away from the surface to avoid excessive water pooling. Maintain a steady motion to effectively wash away soap residues and loosened debris.
For more stubborn areas, consider filling a bucket with water and using a sponge to manually rinse. Dip the sponge into the water and apply it to the targeted spots before wiping with a clean cloth to ensure thorough removal of any remaining cleaning solution.
After rinsing, proper drying is crucial to inhibit mildew growth and protect the surface. Employ a squeegee for larger flat areas; this device efficiently pushes excess water off the surface. For corners and intricate patterns, utilise absorbent towels to blot away moisture.
In warm, sunny conditions, allow the surface to air dry naturally. If the environment is humid, increase air circulation by using fans, ensuring quick evaporation of moisture. Avoid covering the area with furniture or mats until completely dry to prevent mould or staining.
| Technique | Description |
|---|---|
| Garden Hose with Spray Nozzle | Use a hose with adjustable spray settings to rinse the surface effectively. |
| Manual Rinse with Sponge | Dip sponge in water for spot rinsing; follow up with a clean cloth. |
| Squeegee Application | Utilize a squeegee on larger areas to remove excess water. |
| Towel Blotting | Employ towels to absorb moisture from corners and detailed areas. |
| Air Drying | Let the surface dry naturally; use fans in humid conditions for faster results. |
Regular Maintenance Tips to Keep Your Deck Looking Great
To preserve its appearance, regularly sweep away debris such as leaves and dirt. Doing this prevents mould growth and keeps surface pores clear, enhancing the natural beauty of the material.
Inspect the surface for any signs of wear or damage, such as splinters or loose boards. Address these issues promptly to avoid further degradation. A simple sanding can smooth out rough patches effectively.
Consider applying a protective sealant or stain every couple of years. This acts as a barrier against moisture and UV rays, helping to maintain colour and prevent deterioration.
Routine checks for mildew or algae growth are crucial. A mixture of vinegar and water can be an excellent natural solution for treating these problems without harsh chemicals.
Pay attention to the furniture and accessories placed on the surface. Use coasters and mats to avoid scratches and indentations, and rearranging items periodically can prevent uneven fading.
Implementing a biannual deep clean, even without mechanical assistance, will allow for the thorough removal of built-up grime while ensuring a fresh appearance year-round.


