

Start with a bucket filled with warm water and a high-quality car shampoo. The solution should be mixed according to the manufacturer’s instructions; this will ensure maximum effectiveness in dirt removal. Using a microfiber cloth or a soft sponge, apply the mixture directly onto the surface, working from the top down to prevent any grime from settling on cleaned areas.
For areas with stubborn residues, a detailing brush can be used. Focus on grilles, wheel wells, and any crevices where dirt accumulates. Rinse these sections with clean water frequently to ensure that no soap residue remains, which can lead to streaks and damage over time.
After thoroughly cleaning the exterior, consider using a dedicated glass cleaner to tackle windows and mirrors for optimal visibility. Wipe with a separate microfiber cloth to avoid cross-contamination from any remaining cleaning agents. This attention to detail not only enhances the appearance but also improves safety while driving.
Finally, drying the surface is key to preventing water spots. A soft, lint-free towel is ideal for this purpose. Wipe gently, using a blotting technique to absorb moisture rather than rubbing, which could scratch the finish. Regular maintenance using these methods can keep your vehicle looking pristine and extend the life of its finish.
Choosing the Right Cleaning Products for Hand Cleaning
Select a pH-balanced shampoo specifically formulated for automotive surfaces. These products are gentle on paint but effective in removing dirt and grime. Avoid household detergents as they can strip wax and damage finishes.
Consider the Type of Soiling
If your vehicle has stubborn stains or contaminants like tree sap or bird droppings, look for a pre-treatment solution. Apply it according to the instructions and allow it to work before using your primary cleaning product.
Eco-friendly Options
Opt for biodegradable cleaners if environmental impact is a concern. These products break down naturally and are safe for nearby plants and wildlife. Always check for eco-certifications on the label to ensure compliance with environmental standards.
Preparing Your Vehicle for a Thorough Clean
Before diving into the cleaning process, ensure you have a plan to tackle any stubborn dirt and grime effectively. Here are specific steps to follow:
-
Choose the Right Location: Find a shaded area with good drainage to prevent soap and water from drying too quickly. Avoid direct sunlight to prevent streaks.
-
Remove Loose Debris: Start by removing items from the interior and boot to eliminate potential distractions. Next, use a broom or a soft brush to sweep away dirt or leaves from the exterior.
-
Address Areas of Concern: Inspect for specific blemishes such as tree sap or bird droppings. Pre-treat these spots using a suitable solvent or soapy water to loosen their grip on the surface.
-
Gather Your Supplies: Collect all necessary products, including buckets, sponges, soft cloths, and appropriate cleaning solutions. Ensure that everything is within arm’s reach to streamline the process.
-
Check the Wheels and Tyres: Pay special attention to the wheels, as they often accumulate brake dust and road grime. Use a dedicated brush or sponge to clean them separately from the rest of the vehicle.
By following these preparation steps, you lay the groundwork for a successful and satisfying cleansing session for your vehicle. Each action contributes to a more thorough and skilled finish, ensuring your efforts yield impressive results.
Techniques for Rinsing Off Dirt and Grime
Utilising a bucket and a hose can effectively remove dirt and residue. I suggest filling a bucket with clean water to dip a sponge or microfibre cloth into for targeted cleaning. Soak the cloth, wring it out, and use it on specific areas, such as the wheels and lower panels where grime accumulates.
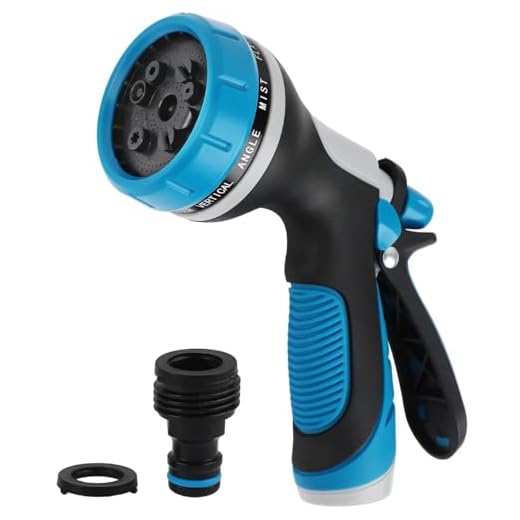
For rinsing, if you have access to a standard garden hose, leverage a nozzled attachment. A nozzle with adjustable settings allows you to change the flow from a gentle spray to a more forceful jet. Start at the top and work your way down; this prevents dirt from settling back on already cleaned areas.
In case of stubborn stains, consider preparing a vinegar solution. Combine equal parts of water and white vinegar in a spray bottle. Apply directly to stains, allow it to sit for a few minutes, then rinse off with warm water using your hose or a bucket. This method breaks down tough residues without harsh chemicals.
Utilising a second bucket filled with rinsing water keeps your solutions cleaner. After applying soap from the first bucket, rinse your sponge in the second before continuing. This reduces cross-contamination, ensuring that you’re only applying clean solutions to the surface as you go.
For enhanced reach, use a sponge mop or a long-handled brush. These tools allow for easy access to the top of the vehicle and hard-to-reach areas. For rinsing, a gentle spray attachment on the hose can direct water precisely where needed.
Here’s a quick comparison of tools that can be used for rinsing:
| Tool | Effectiveness | Best For |
|---|---|---|
| Garden Hose with Nozzle | High | General rinsing |
| Sponge Mop | Moderate | Reaching high areas |
| Bucket with Clean Water | High | Stain removal |
| Vinegar Solution | Moderate | Tough stains |
How to properly clean different surfaces of your vehicle
Start with the roof, using a microfiber cloth and a gentle, pH-balanced shampoo. Apply the solution from the centre outward to prevent streaks. Rinse thoroughly to avoid soap residue.
Bodywork
For the sides and front, use a soft wash mitt. Work in sections, ensuring each area is rinsed before moving to the next to prevent dirt from scratching the paint. Pay extra attention to the lower panels where grime tends to accumulate.
Wheels and Tyres
- Utilise a separate brush to tackle the wheels, as brake dust can be abrasive.
- Apply a dedicated wheel cleaner, allowing it to dwell for a few minutes, and scrub with the brush to lift dirt.
- For tyres, use a sponge or dedicated tyre applicator to ensure an even application of tyre shine or protectant.
Carefully clean the wheel wells with a plastic brush to remove mud and debris, ensuring you don’t miss this often overlooked area.
Windows
For glass surfaces, employ a glass cleaner that is safe for automotive use. Use a clean, lint-free cloth to avoid streaks and ensure a clear view through the windows. Don’t forget to clean the mirrors; clarity is essential for safe driving.
Trim and Plastics
- Utilise an all-purpose cleaner for plastic and rubber components, applying it with a soft cloth.
- Wipe down door sills and bumpers, and ensure to remove any wax residue that may have inadvertently tarnished the trim.
Finally, regularly treat the trim and plastic elements with UV protectant to maintain their appearance and avoid fading. This attention to detail not only enhances the look but also prolongs the life of these surfaces.
Drying methods to avoid water spots
To prevent unsightly water spots, use ultra-soft microfiber towels for drying. I recommend using several towels to ensure you don’t spread moisture around. Start by gently blotting the surface, as this reduces streaking compared to dragging the towel across the paint.
For larger areas like the roof and bonnet, a dedicated drying towel with a waffle texture works wonders. These towels trap water effectively while being gentle on the finish. Always wring out the towel frequently to maintain optimal absorbency.
Using a dedicated drying aid can also be beneficial. Spraying a quick detailer or carnauba wax as you dry enhances shine and provides an extra layer of protection against water spots. It’s best to work in sections, ensuring each part dries completely before moving on to the next.
Consider employing a leaf blower or air blower to displace water from hard-to-reach areas like mirrors and grilles. This technique removes excess moisture without contact, preventing potential scratches.
Finally, ensure that you dry the vehicle in a shaded area. Direct sunlight can cause water to evaporate too quickly, leaving you with water spots. By following these techniques, you can achieve a spotless finish without the risk of blemishes.
Detailing your wheels and tyres
Begin by ensuring your wheels are cool to the touch. Selecting a dedicated wheel cleaner will target built-up brake dust and grime effectively. Apply the cleaner generously, allowing it to dwell for a few minutes to break down the contaminants.
Use a soft-bristled brush to agitate the cleaner, reaching into recessed areas and along spokes. A dedicated tyre brush can help scrub the sidewalls thoroughly. Rinse each wheel with a bucket of clean water and a hose or spray bottle, ensuring all cleaning product and debris are removed.
For tyres, after rinsing, apply a tyre dressing for a refreshed appearance. This can be applied with a foam applicator to avoid overspray. Allow the dressing to dry for optimal results.
Don’t forget about the wheel wells; these areas accumulate dirt quickly. A mix of soapy water and a stiff brush can clean them effectively. Rinse again to achieve a comprehensive clean.
Tips for removing stubborn stains and residues
To tackle persistent blemishes, first, identify the type of stain. For tree sap, apply rubbing alcohol on a soft cloth and gently wipe the affected area. For stubborn bird droppings, a mixture of warm water and mild dish soap can break down the residue – let it sit for a few minutes before wiping it away.
Use a clay bar treatment for embedded contaminants such as industrial fallout or paint overspray. Lubricate the surface with a dedicated detailing spray, then glide the bar over the area to lift the debris without scratching the finish.
For grease stains, a degreasing agent can be effective. Apply it directly to the stain and allow it to penetrate for approximately 5-10 minutes before wiping with a clean microfiber cloth. Ensure you rinse thoroughly to remove any residue from the cleaning solution.
In cases of wax or sealant buildup, a dedicated wax remover will help. Apply the product as instructed, using an applicator pad, and follow up with a clean microfiber towel to prevent streaking.
Don’t overlook the need for a soft brush–especially useful for intricate areas like grilles or wheel arches. A brush can reach angles that cloths can’t, making it easier to dislodge stubborn dirt.
For those persistent marks on glass, a glass cleaner designed to cut through grime will yield the best results. Apply the cleaner and use a dedicated glass cloth or paper towel to achieve a streak-free shine.
Finish by applying a quality wax or sealant to protect the surfaces and resist future stains, maintaining that clean appearance longer.
Maintaining Your Vehicle’s Finish After Cleaning
To prolong the lustrous appearance of your vehicle’s exterior, applying a high-quality wax or sealant post-cleaning is essential. This protective layer shields against UV rays, dirt, and environmental pollutants.
Regular Touch-Ups
Frequent applications of wax every few months will enhance shine and protection. Choose a product compatible with your paint type for optimal results.
Using Microfiber Cloths

During the application of wax or sealant, always employ soft microfiber cloths. These reduce the risk of scratching while ensuring an even finish.
Incorporating a quick detailing spray into your routine can help maintain the finish between thorough cleanings. This aids in refreshing the shine and removing minor contaminants without needing a complete surface scrub.
Washing the vehicle in the shade prevents water spots, making it easier to keep the surface immaculate after each clean.
Regularly inspecting the finish for swirl marks or scratches and using a suitable polish can revive the luster when necessary.
For maintaining tyres and trim, a dedicated dressing product will protect against UV damage and enhance appearance. This will keep all surfaces looking new much longer.
Ultimately, the longevity of your vehicle’s exterior largely depends on the care and maintenance routine established after each thorough clean.


