Filling the tank with paint and connecting the necessary nozzles allows for the application of a coating via high-pressure equipment, but results may vary significantly. For optimal use, ensure that the equipment is designed for liquid application, as not all models suit this task. Contaminated surfaces can hinder bonding; thorough cleaning in advance boosts adhesion.
Select a suitable nozzle that produces a fine, even mist, avoiding excessive pressure to prevent paint splatter. Adjusting the spray pattern is crucial; a narrow spray can deliver detail, while a wider pattern covers broader areas efficiently. Take care to maintain a consistent distance from the surface for uniform results.
It’s advisable to conduct a test on a small, inconspicuous area before proceeding with the main project. Coverage will depend on the paint viscosity; thinning may be necessary for proper flow through the nozzle. Regular cleaning of the system post-application is essential to avoid clogs and preserve performance for future tasks.
Understanding the Mechanics of High-Pressure Cleaners
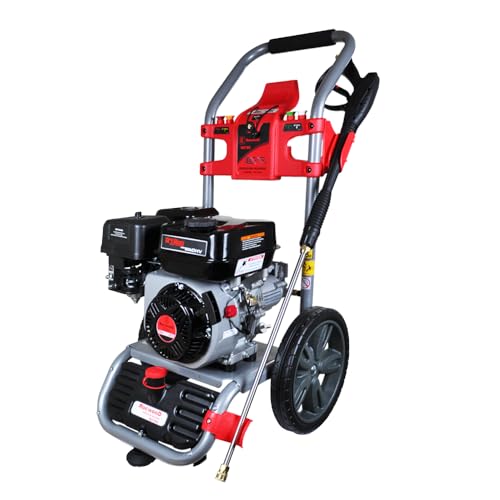
High-pressure cleaners operate on a straightforward principle: they convert normal water flow into a concentrated jet by utilising a motor or engine. This process begins with drawing in water, which is then pressurised by a pump. The efficiency of this equipment is dictated by both PSI (pounds per square inch) and GPM (gallons per minute). The combination of these two metrics determines the machine’s cleaning power.
Regarding design, the power unit is critical. Electric motors typically generate less pressure but offer quieter operation suitable for light cleaning tasks. Conversely, gasoline engines provide higher pressure levels, ideal for heavy-duty applications. Understanding which option aligns with your needs can dramatically impact the cleaning experience.
Components and Functionality
Key components include the pump, hose, and nozzle. The pump is responsible for generating pressure, while the hose transports water from the unit to the surface being treated. The nozzle’s design affects the spray pattern; adjusting the nozzle can switch from a wide fan to a narrow jet, altering the impact and efficacy on varying surfaces.
For best results, selecting the correct nozzle is paramount. A wider spray is effective for gentle cleaning, whereas intense jets target tougher stains. Maintenance of these machines is also crucial; regularly checking for clogs and wear can prolong lifespan and enhance performance.
Practical Applications
Beyond traditional cleaning uses, various attachments and chemicals can be integrated to enhance functionality. This adaptability allows for applications ranging from surface washing to delicate tasks, such as cleaning vehicles or outdoor furniture. Knowing the capabilities and limitations of your equipment leads to safer and more effective cleaning outcomes.
Suitability of Pressure Washers for Paint Application
Specialised sprayers are preferred for applying liquid coatings, given their design for optimal control and precision. Although high-pressure devices can deliver liquid at high velocities, they often result in uneven application and overspray issues, leading to wasted material and subpar finishes.
The rapid ejection of liquid can cause atomisation that exceeds desired specifications, making it challenging to achieve a smooth layer. Furthermore, the motor’s force may not break down the medium to the correct viscosity for even coverage. Various paint types require specific spraying conditions, which these devices may struggle to meet.
Maintaining a consistent distance from the surface is critical to prevent runs and drips, and achieving this with a powerful cleaner can be difficult due to its inherent high-pressure nature. Adjustments, such as nozzle size and angle, may not yield the desired results and can complicate the application process.
For optimal outcomes, I always recommend utilising the right tool for each task. In this case, a dedicated sprayer tailored for coatings will ensure professional results while reducing the risk of damage to the surface being treated. Understanding equipment capabilities and limitations is key to achieving superior painting. Leveraging the appropriate tools simplifies tasks and enhances the end product.
Choosing the Right Paint for Pressure Washing

The selection of appropriate coating is critical for successful application using high-pressure equipment. Opt for water-based formulations that are designed for easy atomisation and quick drying. These types typically adhere well to various substrates and resist peeling and bubbling. Acrylic paints are a recommended choice, as they offer flexibility and durability, making them suitable for exterior surfaces. Ensure that the chosen product specifies compatibility with spraying devices.
Viscosity and Preparation

I have found that lower viscosity is preferable. It allows for smoother flow through the nozzle and reduces the likelihood of clogging. Thinning the paint according to manufacturer guidelines is essential, as it enhances atomisation and improves finishing. Testing the mixture helps in achieving desired results before full-scale application.
Environmental Factors
Temperature and humidity levels can significantly influence the drying time and adherence of your selected finish. Paints generally perform best in moderate conditions, so completing the task during optimal weather helps achieve a flawless appearance. Be mindful about choosing colours, as darker ones may require additional coats for full coverage.
Steps to Prepare Your Surface Before Painting

Effective preparation of your workspace is crucial for achieving a flawless finish when applying a new coat. Here’s how I approach the process:
-
Clear the Area:
Remove furniture, plants, and other items from the vicinity. Cover anything that cannot be moved with drop cloths or plastic sheeting to protect it from overspray.
-
Inspect the Surface:
Identify any unwelcome elements such as old flaking paint, peeling wallpaper, or rust. Address these issues promptly to create a smooth foundation.
-
Clean the Surface:
Thoroughly scrub surfaces to remove dirt, grime, and mildew. Consider using a cleaning solution where necessary, followed by rinsing with clean water.
-
Dry the Surface:
Allow adequate time for surfaces to dry completely. This reduces the risk of moisture interfering with the adherence of the new coating.
-
Repair Damages:
Fill in cracks, holes, or dents using a suitable filler. Sand any repaired areas until smooth to ensure a seamless finish.
-
Sand the Surface:
Lightly sand the entire area to enhance adhesion. Remove any dust produced by sanding with a damp cloth.
-
Prime if Necessary:
Apply a primer suited for the specific surface material. This step is vital for surfaces like metal or bare wood to improve adhesion and coverage.
-
Mask Off Areas:
Use painter’s tape to mask off edges, trim, and other areas that need protection from coating. This provides clean lines and a professional appearance.
By following these systematic steps, I ensure the surface is primed for optimal results. Each detail contributes to the overall quality of the finish, minimizing the need for touch-ups later.
Techniques for Using a Pressure Washer to Apply Paint

Achieving a smooth and uniform finish can be accomplished through strategic techniques. Ensure the correct nozzle size is chosen; typically, a 0.25 to 0.40 nozzle works best for coating surfaces. This allows for controlled dispersion of the liquid while maintaining optimal pressure.
Maintaining consistent movement is crucial. Glide the device at a steady pace, keeping a distance of 12 to 18 inches from the surface. This prevents uneven application and potential drips, which can mar the final look.
Another vital aspect involves overlapping strokes. Each pass should overlap the previous by about 50% to ensure even coverage. This method reduces the risk of bare spots and ensures a uniform appearance.
For larger areas, consider dividing the surface into manageable sections. This technique aids in maintaining focus and efficiency, allowing for thorough application in each area before moving on.
| Technique | Description |
|---|---|
| Correct Nozzle Selection | Use a 0.25 to 0.40 nozzle for optimal coverage. |
| Consistent Movement | Keep a steady pace 12 to 18 inches away from the surface. |
| Overlapping Strokes | Overlap each pass by 50% to prevent bare spots. |
| Sectioning the Area | Divide larger surfaces into manageable sections for control. |
Experiment with the material and machinery ahead of time on a test piece to fine-tune settings. This practice will provide insight into how the liquid interacts with the chosen substrate.
Common Mistakes to Avoid When Pressure Washing Paint

Skipping surface preparation is a significant error. Ensure the area is thoroughly cleaned and any debris removed. This prevents the new finish from adhering properly.
Utilising the wrong nozzle can lead to uneven application. A wider fan tip is ideal for larger surfaces, while a narrower tip works for detailed areas. Adjust as needed to achieve consistency.
Failing to test the chosen paint before full application can result in complications. Apply a small section first to examine adhesion and finish quality.
- Ignore environmental conditions. Avoid windy or damp days, which can affect drying and adherence.
- Overloading the sprayer with too thick a mixture can cause clogging. Always adhere to the manufacturer’s guidelines for paint consistency.
- Using excessive pressure may strip the previous coat or create splatter. Keep the pressure level appropriate for the selected material and surface.
Neglecting to maintain a consistent distance from the surface can yield unsatisfactory results. Keep an even distance to ensure uniform coverage and prevent damage.
Rushing through drying times can lead to issues with the final finish. Allow sufficient time between coats to avoid imperfections.
Ignoring protective measures for surrounding areas may result in unwanted overspray. Use drop cloths or masking tape to shield adjacent surfaces.
Finally, overlooking the maintenance of equipment can lead to suboptimal performance. Regularly check for blockages and wear to ensure proper functioning over time.