


Yes, achieving successful removal of layers can be done efficiently with a powerful cleaning tool. High-pressure water jets effectively dislodge and clear coatings from various surfaces, making it a practical option for those looking to refresh their exterior or interior spaces.
When targeting surfaces, it is imperative to adjust the pressure settings to match the material’s durability. For instance, wooden surfaces require lower pressures to avoid damage, while concrete can withstand higher settings. For optimal results, maintain a distance of at least 30 cm from the surface to prevent etching or harm.
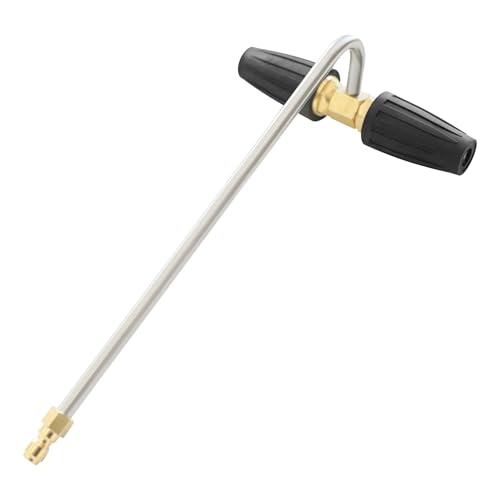
Employ an appropriate nozzle type for the task at hand. A wide-angle spray is beneficial for larger areas, while a narrow jet can better penetrate tougher layers. Experimenting with different nozzles can lead to discovering the most effective one for each specific job.
Always consider safety precautions, including wearing protective gear and using suitable cleaning agents when necessary, to enhance the process. Combining this method with additional peeling techniques, such as hand scraping for stubborn spots, can yield impressive results.
Using a High-Pressure Cleaning Device for Removing Coatings

Yes, a high-pressure cleaning device can effectively assist in removing old coatings. First, select the appropriate nozzle; a narrow tip concentrates the jet, enhancing performance. Adjust the pressure to a suitable level; excessive force might damage the surface beneath. Start from a distance, gradually moving closer as needed for optimal results.
Prepare the area by covering surrounding surfaces to prevent unintended damage and ensure safety. Consider the type of coating being removed; some materials respond better to water pressure than others. For stubborn layers, a combination of heat or chemical solvents might be beneficial prior to using the cleaning device.
It’s crucial to work in sections, allowing better control and visibility. Maintain a consistent motion to avoid uneven removal, which can result in more work later. After the initial pass, assess the progress; repeat the process on areas that require further attention.
Finally, always adhere to the manufacturer’s recommendations for both the cleaning machine and the surfaces you are working on. This approach guarantees efficient results without compromising the underlying material. Following these guidelines ensures a successful removal process while minimising the risk of damage.
Understanding the Basics of Pressure Washing for Paint Removal
Begin with selecting the correct nozzle type. A narrow spray pattern, like a 0-degree or 15-degree nozzle, delivers higher pressure, which is crucial for removing layers effectively. Adjusting the distance between the nozzle and the surface ensures optimal results without damage.
Water temperature plays a significant role. Heating the water enhances cleaning efficiency. Many units allow for hot water usage, increasing eradication of stubborn coatings.
Proper technique is paramount. Use a sweeping motion rather than a stationary blast to avoid etching the underlying substrate. Work in sections, maintaining consistency to achieve an even finish.
Machine Specifications
High pressure settings, typically above 2000 PSI, are necessary for effective removal. Pairing this with a good flow rate (minimum of 2 GPM) ensures the task is completed swiftly. If the unit lacks sufficient power, consider renting or purchasing a commercial-grade model.
Post-Application Care
After the process, thoroughly rinse the surface to eradicate any remaining debris or chemical solutions. Allow adequate time for drying before applying any new finishes or treatments. This guarantees better adhesion and long-lasting results.
Choosing the Right Specifications for Optimal Performance
For effective results in removing coatings from surfaces, it’s critical to select equipment with the right specifications. Focus on these key parameters:
1. Pressure Rating
A machine operating between 1500 to 3000 PSI is ideal for most coating applications. Higher ratings can be useful for tougher jobs but may require additional safety precautions to avoid damaging underlying surfaces.
2. Flow Rate
Look for a water flow rate between 1.5 to 4.0 GPM. Higher flow rates facilitate faster cleaning, ensuring the removal process is efficient. A balance between PSI and GPM is vital for optimal performance.
| Specification | Recommended Range |
|---|---|
| Pressure (PSI) | 1500 – 3000 |
| Flow Rate (GPM) | 1.5 – 4.0 |
| Tip Size | 0.015 to 0.025 |
| Motor Type | Electric or Gas |
| Weight | Lightweight for mobility |
The choice between electric and gas equipment depends on mobility needs and the scale of projects. Electric models are quieter and easier to maintain, while gas variants usually offer more power and are better suited for extensive tasks.
Remember to consider the nozzle size as well. Nozzles ranging from 0.015 to 0.025 inches are ideal for removing coatings without damaging surfaces. Evaluate your specific needs to determine what fits best.
Materials and Surfaces Suitable for High-Pressure Cleaning

Wooden decks and fences can benefit greatly from high-pressure techniques, especially when they exhibit layers of old stain or weathered finishes. A low-pressure setting, around 1500 to 2000 PSI, is advisable to prevent damage to the wood grain.
Concrete and brick surfaces yield excellent outcomes as they can withstand higher pressure levels, typically between 2500 and 3000 PSI. This is effective for removing stubborn stains such as oil and mildew.
Vinyl siding is a prime candidate for this method. Cleaning at a moderate pressure of 2000 PSI can refresh the appearance without causing harm, making it an ideal choice for maintaining kerb appeal.
Metal surfaces, such as aluminium or steel, usually accept higher pressures. Be cautious with delicate finishes; using a fan tip nozzle can help distribute the force evenly and reduce the risk of surface damage.
Lastly, glass surfaces can also be treated effectively with this technique. Employing a light touch, particularly with a wide spray pattern, helps prevent shattering while ensuring a streak-free finish. Always test a small, inconspicuous area first.
Step-by-Step Guide to Stripping Paint with a Pressure Washer
Before initiating the process of removing old coatings, it’s essential to gather the necessary tools and take safety precautions. Follow these steps for optimal results.
Preparation
- Ensure the area is well-ventilated and free from obstructions.
- Wear protective gear, including goggles, gloves, and a mask to avoid inhaling debris.
- Clear surrounding surfaces and cover any plants or items that may be damaged.
Setting Up the Equipment
- Select an appropriate machine with a minimum rating of 2000 PSI.
- Attach a suitable nozzle; a 25-degree nozzle is recommended for most surfaces.
- Fill the detergent tank with a specialised paint remover compatible with your device.
Executing the Process
- Begin at an inconspicuous area to test your approach and determine the effectiveness of your settings.
- Hold the nozzle at a distance of approximately 12-18 inches from the surface.
- Maintain a consistent motion, moving the nozzle horizontally across the area.
- For stubborn layers, you may need to apply the cleaning solution directly and let it sit briefly.
- Re-apply pressure washing as necessary and monitor your progress.
After completing the task, rinse off any remaining detergent and debris. Allow surfaces to dry thoroughly before applying a new coating, ensuring optimal adhesion.
Safety Precautions When Using a Pressure Washer for Paint Removal
Wearing protective gear is non-negotiable. Equip yourself with safety goggles, gloves, and sturdy footwear to guard against flying debris and potential injuries. A face shield can provide additional protection for the face. Avoid loose clothing that can get caught in machinery.
Check the equipment for any damage before commencing work. Ensure hoses are secure and free of leaks, and inspect nozzles for clogs or wear. Always follow the manufacturer’s instructions regarding the operation and maintenance of the device.
Position the apparatus at a safe distance from the surface, adjusting the distance as needed. Starting too close can cause significant harm to the material beneath, creating dents or gouges. A good rule of thumb is to begin at least a few feet away, then gradually move in while observing results.
Environmental Awareness
Consider the surroundings. Make sure there are no fragile items nearby that might be damaged by the force of the water. Protect nearby plants, glass, or other delicate surfaces by covering them with tarps. Always check the weather, as working during rain can increase the risk of slips and accidents.
Post-Operation Procedures
After finishing the task, safely disconnect the hoses, and store the equipment appropriately. Clean any accumulated debris from the nozzles and filters to maintain optimal performance for future use. Dispose of any paint remnants according to local regulations, ensuring that hazardous materials do not enter the environment.
Common Mistakes to Avoid During the Paint Stripping Process

Prioritise surface assessment before starting. Different materials react variably to high-pressure techniques. Failing to evaluate the surface can lead to damage or ineffective removal.
Incorrect Nozzle Choice
Selecting the wrong nozzle can severely affect results. Always opt for a fan spray nozzle rather than a direct jet. This ensures even coverage without causing gouges.
Neglecting Distance and Angle
- Main error: Holding the nozzle too close, which risks damaging the substrate.
- Maintain a distance of approximately 12 to 18 inches from the surface for better control.
- Adjust the angle to around 30 degrees for optimal results; this helps to lift off layers effectively.
Skipping the pre-treatment stage can hinder efficiency. Soaking the area in advance or using a chemical-based solution can significantly ease the removal process.
Inadequate Protective Gear
- Ignoring proper safety equipment is a widespread and dangerous mistake. Safety goggles, gloves, and masks are necessary.
- When working with potentially harmful materials, ensure respiratory protection.
Lastly, rushing through the job may lead to unsatisfactory outcomes. Take your time for steady, thorough application. Ensuring that no sections are missed will save time on repeat efforts.


