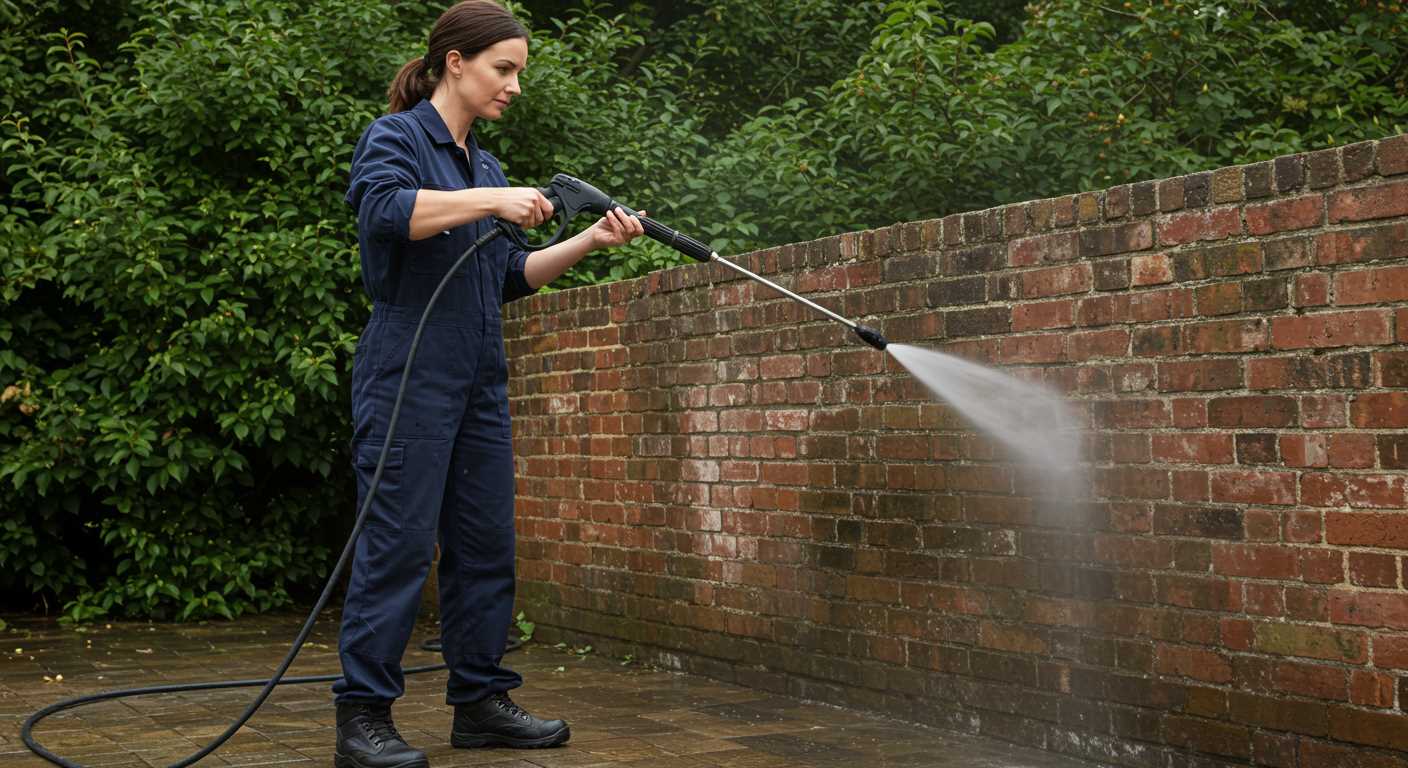

Using a mixture of warm water and dish soap offers a straightforward way to remove grime and stains. Fill a bucket with water and add a few squirts of soap, stirring until it’s well blended. Apply this solution with a stiff-bristled broom or scrub brush, ensuring you cover the entire surface in sections. Pay extra attention to particularly dirty areas, using a bit of elbow grease to tackle tough spots.
For a more intense approach, creating a paste from baking soda and water can help combat stubborn marks. This combination works like a mild abrasive; simply mix until it reaches a paste-like consistency, apply it to problematic sections, and let it sit for about 15 minutes before scrubbing. Rinse thoroughly to avoid any residue that could attract dirt over time.
When dealing with oil stains, cat litter or cornstarch can serve as excellent absorbents. Spread the chosen substance over the stain and allow it to sit for several hours or overnight to soak up excess oil. Afterward, sweep it away and follow up with soap and water to eliminate any remaining traces.
Vinegar is another natural alternative for disinfecting and breaking down dirt. Mix equal parts of vinegar and water in a spray bottle, apply directly to the surface, and let sit for a few minutes before wiping off with a cloth or rinsing. This method not only cleans but may also help restore the surface’s natural appearance.
Lastly, a thorough rinse with a garden hose at the end of the process will remove any leftover soap or cleaning agents, ensuring a pristine finish. Regular maintenance can significantly reduce the need for intensive cleaning, keeping your entrance looking fresh and inviting.
Techniques for Refreshing Your Surface
Utilising a mixture of vinegar and baking soda creates a powerful duo for tackling stubborn stains. I recommend applying this paste directly onto the affected areas. Let it rest for about 15-20 minutes before scrubbing with a stiff-bristled brush.
Dish soap combined with warm water offers a simple yet effective solution for general grime. Mix a few drops into a bucket of warm water, then scrub the surface with a mop or a broom to ensure all dirt is removed.
For tougher stains like oil, sprinkle some cat litter or baking soda over the area, allowing it to absorb the substance for several hours. Sweep away the residue and follow up with the vinegar-baking soda mixture if necessary.
Consider using a manual scrub brush with a long handle for those hard-to-reach spots or for specific, concentrated areas. This helps maintain a consistent motion without straining your back.
| Method | Materials Needed | Time Required |
|---|---|---|
| Vinegar & Baking Soda | White vinegar, baking soda, brush | 30-40 minutes |
| Dish Soap Solution | Dish soap, warm water, mop/broom | 20 minutes |
| Oil Stain Absorption | Cat litter/baking soda | Several hours |
Rinsing the surface with a bucket of water after applying any cleaning solution ensures all residues are washed away, leaving the area looking refreshed. Investing a bit of time into these methods offers a satisfying, clean result without specialised equipment.
Choosing the Right Cleaning Solution for Driveway Stains
For effective removal of stains, selecting the appropriate cleaning agent is paramount. For oil and grease spots, consider using a degreaser designed for outdoor surfaces. Look for biodegradable options to minimise environmental impact.
For organic stains like leaves and food, a mixture of water and vinegar works wonders. The acetic acid in vinegar breaks down organic material without harsh chemicals. Mix one part vinegar with one part water for optimum results.
Rust stains demand a specialised rust remover, typically containing oxalic acid. Apply it in accordance with the instructions provided by the manufacturer, taking care to protect surrounding areas.
For general dirt and grime, a simple solution of dish soap and water can be surprisingly powerful. Use a dilution of one cup of dish soap per gallon of water, and apply with a scrub brush to agitate the surface.
Always test any cleaning solution on a small, inconspicuous area first. This ensures compatibility with the surface and prevents potential damage. For persistent stains, thorough scrubbing may be necessary, and for large areas, consider using a broom or a scrubber with a long handle to save strain on your back.
Finally, always rinse the area with clean water after applying any cleaning solution to remove residues and avoid slippery surfaces. A good rinse promotes a safe and tidy environment.
Preparing the Surface for Cleaning Tasks
Begin by removing any large debris, such as leaves or branches, to expose the area completely. A broom or rake works effectively for this purpose.
Next, inspect for any materials that may need special attention, such as oil or grease spots. Mark these areas for targeted treatment later. If present, pick up and dispose of any trash, ensuring a clean working environment.
Following the initial clearing, it’s advisable to sweep or use a blower for finer dirt and dust. This step ensures that the surface is as clear as possible before proceeding.
Addressing any plant growth is essential. Pull out weeds or grass that may have intruded, as these can hinder any cleaning process. A hoe or a weeding tool is useful for this task.
For optimal results, consider hosing down the area with plain water. This light rinse helps to saturate the surface, making it more receptive to any cleaning solutions applied later. Be cautious not to create puddles, as standing water can dilute any cleaning agents.
Once the surface is adequately prepared, double-check the weather conditions. Select a day with no rain forecasted to allow any applied solutions to work effectively. Overcast conditions may prolong drying times, affecting the overall outcome.
Additionally, ensure personal protective equipment, such as gloves and eye protection, is on hand. This is important for combating any harsh chemicals that might be used later.
Finally, gather all necessary cleaning agents and tools. Having everything at hand streamlines the process and makes it more manageable. This preparation lays a solid foundation for restoring the appearance of the area effectively.
Using a broom and scrub brush for effective dirt removal

For tackling grime and debris on your surface, adopting a stiff-bristled broom and a robust scrub brush proves invaluable. These tools allow for thorough agitation and dislodging of dirt from the textured surface.
First, I suggest clearing loose debris with the broom. Sweep away leaves, dirt, and larger particles to expose the underlying stains that require attention. This initial step is crucial as it prevents hindrance during scrubbing.
Next, select an appropriate scrub brush. Look for one with stiff bristles that can reach into crevices and lift stubborn marks. Use a circular motion to focus on heavily stained areas, ensuring you apply enough pressure to dislodge embedded grime.
To enhance effectiveness, consider moistening the area before scrubbing. This technique helps loosen dirt and makes it easier to lift. Just ensure that the surface isn’t overly saturated, as excess water can lead to pooling and hinder your efforts.
For added cleaning power, pair your brush work with a suitable detergent. Select a product designed for specific stains, such as oil or moss. Mix according to the manufacturer’s instructions and apply it to the surface. Following this, the scrubbing action will yield better results as the cleaning solution penetrates and breaks down tough spots.
After scrubbing, rinse away any remaining residue with clean water. A flat nozzle on your hose can provide just the right amount of force to wash away loosened dirt, making the area look revitalised.
Regular maintenance using a broom and scrub brush not only keeps things looking neat but also extends the lifespan of the material beneath. Engaging in this manual cleaning strategy offers control over the process and ensures that every inch is addressed, resulting in a well-kept appearance.
Employing natural methods like vinegar and baking soda
For a simple yet powerful approach, I recommend mixing equal parts of white vinegar and water in a spray bottle. This solution not only cuts through grime but also neutralises odours. Spray generously on the affected areas, allowing it to sit for about 30 minutes before scrubbing with a brush.
Utilising baking soda for stubborn stains

Baking soda works wonders on tougher spots. Sprinkle a generous layer directly onto the stain, then add a splash of vinegar. You’ll see a bubbling reaction that lifts debris. Let it sit for another 15-20 minutes, then scrub with a stiff brush to enhance the removal process. Rinse with water to finish.
Alternative natural methods
If you’re dealing with oil or grease, I suggest combining dish soap with warm water. Apply it liberally, scrub with a brush, and rinse thoroughly. For a deeper clean, consider using a homemade paste of baking soda and water, applying it on stains, scrubbing, and rinsing off after a while. These natural ingredients effectively eliminate unwanted marks and freshen your surfaces.
Tackling Oil Stains with Household Products
For removing oil spots, use a mix of dish soap and warm water. Create a solution by combining one part dish soap with two parts water. Apply this directly onto the stain, allowing it to sit for about 30 minutes. The soap helps to break down the grease.
Absorbent Materials
.jpg)
Another effective method involves using absorbent materials like cat litter, sawdust, or baking soda. Sprinkle a generous layer over the stain, let it absorb the oil for several hours or overnight, then sweep it away. This step can significantly reduce the visibility of the stain before applying fluid cleaners.
White Vinegar Solution
Mix equal parts of white vinegar and water in a spray bottle. Spray the solution directly on the oil stain and scrub with a stiff-bristle brush. Allow it to sit for at least 10 minutes before rinsing with water. This method utilises the natural degreasing properties of vinegar.
Utilising a hose and nozzle for rinsing

A hose equipped with a suitable nozzle provides an effective means for rinsing surfaces after scrubbing. Here’s how to maximise its potential:
- Select a nozzle: Choose a nozzle with adjustable pressure settings. A fan spray pattern is ideal for broad coverage, while a concentrated jet can target stubborn dirt.
- Optimal water flow: Ensure the water flow is strong enough to remove loose debris and detergent residues. If the flow is inadequate, check for any blockages in the hose or nozzle.
- Technique: Position the nozzle about 3–4 feet away from the surface. Start at one end and progressively work your way to the other, overlapping slightly with each pass to ensure uniform rinsing.
- Focus on edges and corners: These areas often accumulate dirt. Direct the nozzle at a slight angle to dislodge debris effectively.
- Rinse thoroughly: Pay special attention to areas where cleaning solutions were applied. Residues can cause staining if left behind.
By using a hose and nozzle wisely, one can achieve satisfactory results, maintaining the appearance of the exterior surfaces with minimal effort.
Maintaining a clean driveway through regular upkeep
Establish a routine to keep surfaces tidy. Sweep weekly to prevent debris build-up that can lead to stains and deterioration over time.
Consider sealing surfaces every two to three years to protect against weather damage and stains. Choose a high-quality sealant suitable for your material type, whether concrete, asphalt, or pavers.
Monitor for cracks or wear. Address minor issues promptly with appropriate fillers to prevent larger repairs later.
Regularly inspect for moss or algae growth, especially in shady areas. Remove these promptly using a vinegar solution or a diluted bleach mixture to maintain a neat appearance while preventing potential slippery surfaces.
Always keep flower beds or shrubs trimmed back from the edges to avoid debris accumulation and help with drainage.
Organise vehicle parking to reduce oil and tyre marks; consider using mats if necessary. Regularly inspect vehicles for leaks, as early detection can prevent ground stains.
Consistency is key; making these tasks part of regular maintenance can keep your entrance looking great year-round.


