

Checking the water inlet filter is a crucial step to start with. Often, debris can accumulate and restrict flow, resulting in diminished operations. Detach the hose and inspect the filter for clogs. If dirt is present, clean it using warm water and a brush before reassembling.
Next, evaluate the nozzle. A blocked or inappropriate nozzle can significantly hinder performance. Detach it and examine for obstructions; a simple pin or wire can effectively clear any blockages. Additionally, ensure you are using a nozzle suited for the intended cleaning task, as this can enhance efficiency.
Inspecting the high-pressure hose for leaks or kinks is essential. Any damage can lead to loss of force. If a leak is discovered, replacing the hose may be necessary to restore functionality. While reviewing the hose, check all connections to ensure a secure fit, as loose joints can also result in decreased effectiveness.
Lastly, inspect the detergent injector. A malfunctioning injector can lead to inefficient operation. Confirm that it’s clean and functional, as improper operation can impact overall output. If issues persist, consulting the manufacturer’s guide for troubleshooting specifics tailored to the model will be beneficial.
Check the Water Supply and Hose Connections
Verify that the water source is fully turned on. Low flow can originate from a partially closed tap, which restricts the flow rate and impacts performance. Ensure that the water supply is adequate for optimal function.
Examine the inlet screen for debris. This screen can easily become clogged, leading to inadequate water intake. Cleaning it will often resolve issues related to water flow.
Inspect the garden hose for kinks, cracks or blockages. Any damage or bending can significantly reduce the volume of water reaching the machine. Replace a damaged hose to restore proper water flow.
Ensure all connections are secure. Loose fittings between the water source and the machine can result in air leaks, which may disrupt water flow. Tightening any loose connections can help establish a tight seal.
Verify Filter and Nozzle Condition
Check for any filters or screens in the hose that may be obstructed. A clean filter is necessary for smooth operation. Replace or clean filters as required.
Inspect the nozzle for clogs. A blocked nozzle can greatly diminish the force of the stream. Regular maintenance checks on the nozzle will help maintain optimal cleaning performance.
Inspect the Pressure Washer Filter for Blockages
Remove the filter and examine it closely for debris or dirt build-up. A clean filter allows for optimal water flow. If there are any signs of clogging, rinse it thoroughly with clean water. For stubborn residues, soak it in a mild detergent solution and scrub gently with a soft brush.
Replace the Filter if Necessary
If cleaning does not resolve the issue, consider replacing the filter. Original equipment manufacturer (OEM) filters are recommended to ensure compatibility and effectiveness. Check the user manual for specific replacement guidelines and part numbers.
Reassemble and Test

After cleaning or replacing the filter, reassemble all components securely. Turn on the unit and conduct a test run. Observe the water flow; consistent output indicates proper functioning. If issues persist, further investigation may be required into other components.
Examine the Nozzle and Spray Wand for Clogs
Begin with a thorough inspection of the nozzle and spray wand. Remove the nozzle from the spray wand and examine it for debris, mineral build-up, or any signs of blockage. A clogged nozzle can significantly hinder water flow, so be meticulous.
Utilise a small cleaning tool, such as a straightened paperclip or a specialized nozzle cleaning tool, to gently dislodge any obstructions within the nozzle holes. Ensure that each opening is clear, as even minor clogs can result in diminished performance.
Next, move on to the spray wand. Unscrew and detach it from the machine, checking for any visible dirt or blockages inside the wand. If any accumulation is detected, flush it with clean water. A blocked wand may restrict water flow and, ultimately, pressure.
| Part | Inspection Steps |
|---|---|
| Nozzle |
|
| Spray Wand |
|
After conducting these checks and cleans, reassemble all components properly. Run a test to assess improvements in operation. Regular maintenance of these parts ensures optimal functionality and longevity.
Assess the Pump Operation and Oil Level

First, check the pump functioning. Anomalous sounds or excessive vibrations usually indicate an issue. Ensure the pump is not airlocked; bleeding any trapped air can often resolve this. Listen for changes in sound that might signal a malfunction.
Next, assess the oil level within the pump. A low oil level can lead to insufficient lubrication, causing wear and decreased efficiency. Consult the pressure cleaner’s manual for the proper oil type. Verify the level using the dipstick, and add oil if necessary. Change the oil at recommended intervals to ensure optimal performance.
Inspect the Seals and Gaskets
Check for signs of leaks or wear on the seals and gaskets around the pump. Damaged seals can result in loss of fluid, leading to subpar operation. Replace any worn-out parts to maintain a tight seal and ensure maximum efficiency during use.
Monitor Temperature During Operation
Keep an eye on the operating temperature of the pump. Overheating can stem from various issues, including low oil or insufficient water flow. If the pump gets excessively hot, shut it down immediately to avoid further damage. Allow it to cool, then recheck the water supply and oil levels.
Evaluate the Treatment of Pressure Washer Detergents
Utilise detergents specifically designed for cleaning equipment, as they enhance efficacy without causing harm to components. Choose biodegradable options that effectively remove dirt and grime, ensuring environmental safety. Read the label carefully to confirm compatibility with your model.
Application Techniques
Adjust dilution ratios based on the manufacturer’s guidelines to achieve optimal results. Apply the solution using a foam cannon or through the detergent tank, ensuring a uniform coating on surfaces. Let the detergent dwell for a few minutes, allowing it to penetrate and lift stubborn stains.
Post-application Rinsing
Thoroughly rinse surfaces after application to prevent residue from drying and creating a film. Use clean water to flush out the detergent system, ensuring no chemical remains in the hoses or pump. Regularly inspect and clean all components exposed to cleaning agents to maintain longevity and performance.
Review the Property of the Water Source Pressure
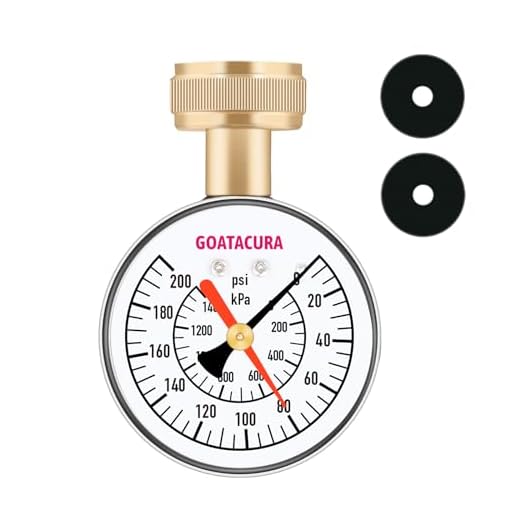
Check the water supply system prior to starting any cleaning task. The initial step is to examine the static water pressure available at the source. It’s advisable to measure this using a pressure gauge; aim for at least 20 psi for optimal performance of cleaning equipment.
Factors Influencing Water Supply Quality

- Pipe Diameter: Smaller pipes reduce water flow and pressure. Ensure that the supply pipes are adequately sized for the usage demands.
- Distance from Source: Greater distances from the water source result in pressure loss. Consider relocating the equipment closer if you observe significant reductions.
- Water Filters: Clogged or dirty water filters can obstruct flow. Inspect and clean any screens or filters to maintain an unobstructed passage.
- Community Usage: During peak times, shared resources might experience decreased pressure. Testing at different times can help identify periods of optimal availability.
Optimising the Water Supply for Cleaning Equipment
Utilise a water storage tank if the main supply shows inconsistent performance. Gravity-fed systems may provide adequate pressure to combat flow restrictions.
Regularly inspect the main water line for leaks or damages that could lead to diminished flow. Immediate repairs can boost the water supply’s efficiency and reliability.
Additionally, the temperature of the water affects cleaning capacity. Cold water is typical, but hotter water enhances cleaning efficacy against certain stains. Ensure your source can accommodate the desired temperatures safely.
FAQ:
What are the common causes of low pressure in a pressure washer?
Low pressure in a pressure washer can be attributed to several factors. Firstly, a clogged nozzle or spray tip can restrict water flow, leading to lower pressure. Additionally, using a longer hose than necessary or one with too small a diameter can cause pressure drop. Another common issue is a malfunctioning pump, which might be due to air leaks, worn-out seals, or low oil levels. Lastly, inadequate water supply, such as not having enough water in the tank or using a source with low flow rate, can also be responsible for reduced pressure.
How can I troubleshoot low pressure issues on my pressure washer?
Troubleshooting low pressure issues involves a systematic approach. Start by checking the nozzle for any obstructions and clean it if necessary. Inspect the hose for kinks or leaks and ensure that it is the correct diameter. Examine the water supply connection to ensure it is providing adequate flow; this may involve checking the hose connections, ensuring there are no blockages or restrictions upstream. If the issue persists, inspect the pressure washer pump for any signs of damage or wear. Check the oil level in the pump and add oil if it’s low. If you find significant wear or damage, it may be necessary to replace the pump or consult a professional for assistance.
Can the type of detergent used affect the pressure of my pressure washer?
Yes, the type of detergent can impact the performance of your pressure washer. Some detergents are formulated specifically for use with pressure washers and are designed to create optimal foam and cleaning action without clogging the nozzle. Using the wrong type of detergent, particularly those that are too thick or not suitable for pressure washing, can lead to blockages in the nozzle and reduce pressure. It’s advisable to use detergents that are recommended by the pressure washer manufacturer to ensure proper function and to avoid damaging the machine.
What steps should I take after identifying the source of low pressure?
Once you have pinpointed the source of low pressure, there are several steps to take. If the issue is a clogged nozzle, clean it thoroughly using a needle or a soft brush. For hoses with kinks or cracks, replace them with new ones of appropriate diameter. If the pump is malfunctioning, check the oil levels and replace any worn-out parts as needed. In case of persistent low pressure related to water supply, try using a different faucet or water source. After addressing the problem, test the pressure washer to see if the pressure has improved. Regular maintenance, such as periodic checks and cleanings, can help prevent future low pressure issues.


