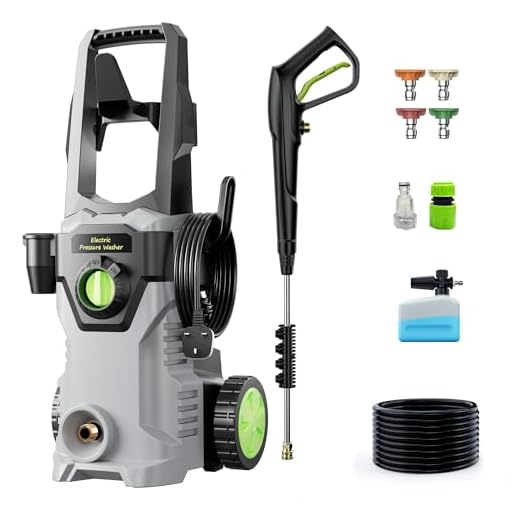


Ensure that all components are present before beginning the assembly of the unit. Check the user manual for a list of parts, including the motor, pump, wand, hoses, and any nozzles. Lay out each piece in an orderly fashion to simplify the assembly process.
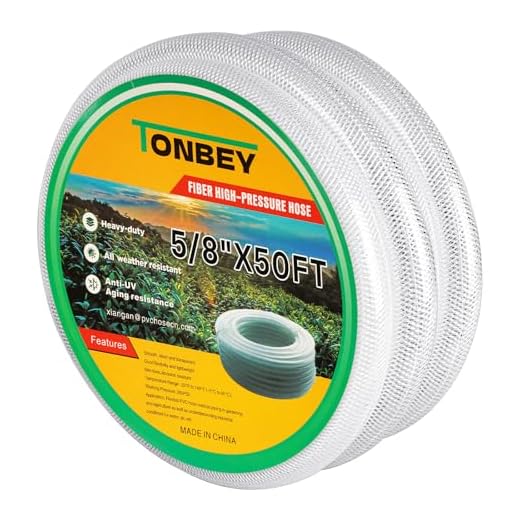
Begin connecting the hoses by attaching the high-pressure hose to the outlet on the pump. Tighten securely but avoid over-tightening as this may cause damage. The garden hose should be linked to the water inlet, ensuring that all connections are watertight.
When focusing on the wand, attach it firmly to the trigger gun, ensuring that the locking mechanism is engaged. This step is crucial to prevent any disconnection during operation. Lastly, before the initial use, prime the system by running water through the hoses to eliminate air pockets.
Identifying the components of your cleaning machine
Familiarity with the key parts enhances efficiency and ensures correct assembly. The essential components include a motor, pump, high-pressure hose, spray wand, nozzle, and base unit.
The motor serves as the power source, either electric or petrol-operated, influencing the performance level. For electric variants, ensure compatibility with outlet voltage. Petrol models provide higher mobility but require a fuel supply.
The pump, often a triplex or axial type, generates the pressure. Check the specification to ensure it meets the desired cleaning requirements.
The high-pressure hose connects the pump and the spray wand. Inspect it for signs of wear or damage to ensure a reliable water flow. Length and diameter can affect operation; a longer hose may limit pressure but offers more reach.
The spray wand is crucial for directing the water stream. This component typically includes adjustable settings to modify the spray pattern, allowing versatility for various tasks.
Nozzles come in different shapes and sizes, tailored to specific tasks from heavy-duty cleaning to delicate surface rinsing. Selecting the right nozzle optimises results and prevents damage to surfaces.
The base unit houses the motor and pump, often equipped with wheels for mobility. Stability and construction quality contribute to the overall durability of the machine.
Understanding these components provides a solid foundation for effective assembly and operation, enhancing performance and longevity.
Understanding the assembly instructions provided

Referencing the assembly manual is crucial for seamless construction. Pay attention to the visual diagrams as they simplify the understanding of each component’s placement and orientation. Follow instructions sequentially, ensuring that no steps are skipped.
Key elements to focus on:
- Ensure identification of all required tools, typically found at the beginning of the guide. This prevents the need for interruptions during assembly.
- Observe any warnings and safety notes, which are included to prevent mishaps or damage.
- Take note of torque specifications for bolts and screws, as improper tightening can lead to future operational issues.
Assemble the frame first, as it provides a sturdy base. Ensure all brackets and fasteners are aligned precisely before securing them. This step establishes a strong foundation for attaching various components.
Final checks:
- Verify each connection before proceeding to the next step. Loose components may not perform optimally.
- Check for any visible damage or missing parts, which should be reported immediately to ensure a complete unit.
- After everything is in place, review the connections and ensure that wiring is tidy and secure to prevent any operational hazards.
Make sure to refer back to the manual if any uncertainties arise during the process. Following outlined instructions meticulously leads to successful assembly and enhances the longevity of the equipment.
Assembling the Frame and Wheels of the Cleaning Equipment
Begin with the metal frame, ensuring all parts are free from damage. Identify the main frame pieces, typically two side panels and a base. Securely attach these panels using bolts, inserting them through pre-drilled holes. Check for alignment before tightening with a wrench to ensure a sturdy structure.
Next, locate the wheel assembly components. This usually involves two wheels and accompanying axles. Insert the axle through the designated slots on one side of the frame. Before securing, slide on a wheel, followed by a retaining clip to prevent dislodgement. Repeat the process for the opposite side, ensuring both wheels rotate freely.
For added stability, some models include leg supports. Attach these near the base; they assist in maintaining balance during operation. Use the provided screws to fix them firmly to the frame.
| Component | Description | Assembly Tips |
|---|---|---|
| Main Frame | The skeleton of the equipment. | Ensure proper alignment of panels before tightening. |
| Wheels | Allows for mobility. | Ensure wheels rotate smoothly post assembly. |
| Axles | Enables wheel attachment. | Use clips to secure wheels to prevent removal. |
| Support Legs | Provides stability. | Fix securely with screws for optimal support. |
After securing all components, perform a final inspection. Ensure all bolts are tight, and the frame stands firm. This ensures a reliable foundation for optimum functionality during operation.
Connecting the Motor and Pump Correctly

The connection between the motor and pump must be precise for optimal performance. First, position the motor and pump adjacent to one another, ensuring alignment with the mounting brackets. Securely tighten the bolts for the motor to prevent any vibration. Next, attach the pump using the specific couplings provided; they should click into place firmly without excessive force.
Check the shaft alignment. Both components need to be perfectly aligned to prevent premature wear. A misalignment can lead to inefficient operation and possible damage. If adjustments are needed, use shims to ensure both parts rest optimally along their axes.
Use high-quality seals between the motor and pump to prevent leaks. Apply an appropriate thread sealant to the fittings if necessary, tightening them by hand followed by a wrench for a snug yet cautious fit–avoid over-tightening, as this can compromise the seals.
Complete the assembly by connecting the power leads from the motor to the power source, observing polarity if applicable. Ensure all connections are secure and insulated to prevent electrical issues. A thorough check before powering the equipment helps avoid malfunctions during operation.
Attaching the Hose and Gun Securely
Ensure that the hose connections are tightened firmly. Begin by aligning the hose connector with the inlet on the motor or pump. Rotate the connector clockwise until it feels snug. This prevents leaks and ensures a consistent water flow during operation.
Securing the Spray Gun
Next, attach the spray gun to the other end of the hose. Insert the spray gun fitting into the hose connector and tighten using a wrench or hand pressure, depending on the model. Confirm the connection is secure, as a loose fitting can lead to dangerous water spray.
Checking for Leaks
After completing the attachments, turn on the water supply without powering the motor. Inspect all connections for leaks, watching for any drips or moisture around the fittings. If any leaks are present, immediately disconnect, tighten again, and retest.
This cautious approach will keep the equipment safe and enhance performance during use.
Installing the Nozzles and Accessories Properly
.jpg)
Securely attaching nozzles and accessories greatly impacts functionality and overall satisfaction. Adhere to these guidelines for optimal performance.
Fitting the Nozzles
- Choose the appropriate nozzle based on the task; different colours indicate specific spray patterns.
- Align the nozzle with the lance or trigger gun opening before pushing it in firmly.
- Twist the nozzle clockwise until it locks into place to prevent accidental dislodging during use.
Attaching Accessories
- Examine each accessory for compatibility with the model.
- For brushes or extension wands, ensure that connectors are aligned and securely fastened.
- Test each connection by pulling gently to confirm stability before operations begin.
Regularly inspect nozzles and accessories for wear and damage. Replace them as necessary to maintain effectiveness and safety.
Conducting a Safety Check Before Operation
Inspect all connections and components for any signs of damage or wear prior to usage. Check hoses for cracks or leaks, ensuring that fittings are secure. A thorough examination of the power source is necessary; verify that the electrical cord is intact without frays or exposed wires.
Pressure Specifications and Safety Gear
Confirm that the unit’s pressure rating aligns with the task at hand. Familiarise with the operational range to prevent equipment strain. Always wear protective eyewear and suitable clothing to guard against spray or debris. Closed-toe footwear is recommended to safeguard the feet.
Environment Assessment
Ensure the workspace is clear of obstacles and that surrounding areas are suitable for operation. Remove any items that could be damaged by water or pressurised debris. Be mindful of the surface underneath; standing on a stable, non-slip area reduces the risk of accidents significantly.
Troubleshooting Common Assembly Issues
If components do not align properly during assembly, examining mating parts for any obstructions is crucial. Dirt or leftover packaging can prevent correct fitment. Clean the areas thoroughly before attempting to reconnect.
Wobbling Frame
A wobbly structure often results from improper tightening or mismatched parts. Verify that all screws and bolts are secured according to the assembly instructions. A level surface during assembly assists in ensuring stability. If one wheel is shorter, substituting parts may be necessary.
Leaks in Hose Connections
Leaks at hose connections typically arise from insufficient tightening or damaged seals. Inspect O-rings for wear; replacing them can eliminate leakage. Additionally, ensure all connections are aligned before securing; misalignment may lead to persistent dripping even after tightening.


