


To achieve a seamless attachment between the tubing and the Hozelock spray wand, position the end of the tube at a right angle to the inlet of the wand. This guarantees a snug fit and minimises the risk of leaks during operation.
Before proceeding, ensure that both components are clean and free from debris. Any remnants can obstruct the connection and potentially damage the seals. Gently push the tube into the wand’s opening until you hear a reassuring click, indicating that the latch has engaged properly.
If you encounter resistance while connecting, verify that the fitting is compatible. Incompatible parts can lead to performance issues, so always consult the specifications. Additionally, a rubber washer inside the connector can enhance the seal, providing added security against water loss.

Once attached, test the assembly by running a short cycle. Monitor for any signs of leakage around the fitted area. Should any issues arise, remove and reattach the components, ensuring an appropriate alignment and tightness.
Using the right technique and components assures not only operational efficiency but also extends the lifespan of your cleaning equipment. This straightforward approach will keep your cleaning tasks effective and enjoyable.
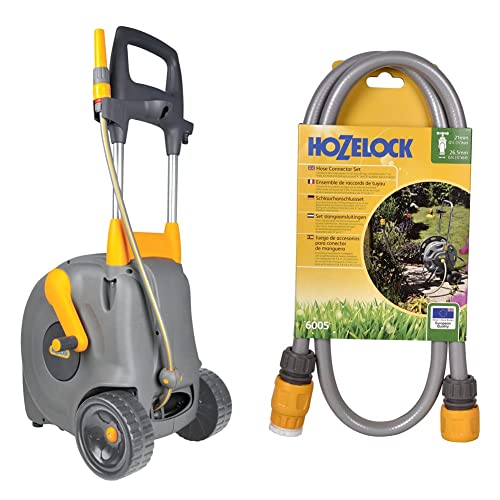
Understanding the Hose Fitting Type for Hozelock Lances
For optimal performance, ensure compatibility between your cleaning equipment’s fittings and those of your Hozelock attachments. The most common type of connection for Hozelock products is the quick-release system, allowing for swift attachment and detachment. This design not only facilitates ease of use but also ensures a secure link, minimising the risk of leaks during use.
Types of Fittings
Predominantly, you will encounter two styles of fittings in Hozelock systems: 1/2 inch and 3/4 inch. The 1/2 inch fitting is commonly used for domestic applications, whereas the 3/4 inch is better suited for more demanding tasks and larger systems. Verify the size in your manual or on the product itself before making any connections.
Installation Tips
When attaching the fitting, I recommend checking the rubber O-ring for wear. A worn O-ring can lead to pressure loss. Clean the fitting interface regularly to avoid build-up of debris that could compromise the seal. Tighten the connection firmly, but be careful not to over-tighten, as this can damage the threads.
Step-by-Step Guide to Connecting the Hose

First, ensure that both the connector on your cleaning device and the end of the flexible tubing are clean and free of debris. This prevents leaks and guarantees a secure fit.
1. Align the Fittings
.jpg "How does hose connect to hozelock pressure washer lance")
Position the end of the adjustable tubing so that it aligns with the fitting on your cleaning equipment. Make sure the threading matches; this step is crucial for a proper seal.
2. Secure the Connection
Begin rotating the tubing clockwise onto the fitting. Apply moderate pressure until you feel resistance. Continue turning until you achieve a snug fit, but avoid overtightening to prevent damage.
Finally, test the connection by turning on the water supply and checking for leaks. If any drip is observed, reassess the fitting and tighten as needed.
Common Issues When Connecting Hoses to Hozelock Lances
Ensure all fittings are clean before attempting attachment. Dirt or debris can lead to leaks or a poor seal. A thorough inspection of both the end of the tube and the connector on the gun is recommended.
Check for compatibility between the connector and the fitted item. Sometimes, the fittings may not match even if they appear similar. Always confirm that your connector type aligns with the lance specifications to avoid any conflicts.
Watch for wear and damage on the connectors. Frayed edges or cracks can prevent a secure fit and lead to pressure loss. Replace any worn parts immediately to maintain optimal performance during use.
Pay attention to the alignment of the parts while attaching. Cross-threading can occur if you’re not careful, resulting in an unusable connection. Gentle twists can help find the right position before securing it tightly.
Monitor the pressure during operation. If you notice fluctuations in power, it might indicate an improper connection. Disconnect and reconnect to ensure everything is secure and functioning as intended.
Incorporate lubricant on the O-rings to promote a better seal. This not only aids initial attachment but also makes future disassembly easier. Just be cautious with the amount, as excess can attract grime.
Store the components properly after use to prevent future issues. Keeping everything dry and protected from harsh conditions extends the lifespan of both the tubing and the lance.
If problems persist despite following these guidelines, consider consulting the manufacturer or a professional. They might provide insights specific to your model or additional troubleshooting tips.
Tools Needed for Proper Hose Installation

A quality pair of pliers is non-negotiable for tightening fittings. I recommend using adjustable pliers to allow for a firm grip on various sizes of connectors without damaging them.
Next, a flathead screwdriver comes in handy to ensure hose clamps are securely fastened, preventing any leaks during operation. It’s also wise to have a Phillips screwdriver for any additional screws that may need adjusting.
For a clean and efficient setup, a utility knife is vital for trimming any excess hose material. It ensures a precise cut for a snug fit, reducing the risk of disconnection or leaks.
A bucket can serve as a useful tool for testing connections by catching any water during the initial setup. This helps identify leaks before starting operational tasks.
Finally, gloves provide protection against cuts and abrasions, ensuring your hands remain safe while handling equipment. Keep a pair on hand to maintain comfort throughout the assembly process.
Maintenance Tips for a Secure Hose Connection

Regularly inspect the rubber O-ring inside the connector. This small component ensures a watertight seal. If it’s damaged or worn, replace it immediately to prevent leaks.
After each use, drain the assembly of residual water to prevent freezing in colder temperatures, which can cause rubber to crack over time.
Use a silicone-based lubricant on the threads and O-rings periodically. This helps maintain flexibility and prevents sticking, ensuring easy disassembly for maintenance or storage.
Store your equipment in a dry, cool place, avoiding direct sunlight. Prolonged exposure to UV light can deteriorate materials, making them less effective.
Check for any debris in the connection points. A clean interface between components reduces wear and tear, leading to a more reliable assembly.
Refer to your manufacturer’s guidelines for any specific maintenance protocols. Adhering to these recommendations will prolong the lifespan of your cleaning equipment.
| Maintenance Task | Frequency | Description |
|---|---|---|
| Inspect O-ring | Monthly | Check for wear and replace if necessary. |
| Drain residual water | After each use | Prevent freezing and water damage. |
| Lubricate connections | Every 3 months | Use silicone-based lubricant on threads and O-rings. |
| Clean connection points | Monthly | Remove debris to ensure a secure fit. |
Identifying Compatible Hozelock Accessories


Always prioritise the selection of compatible attachments to maximise performance. Verify that each accessory, whether it’s a nozzle or extension piece, features the same connection size as the primary unit. Measure the diameter to ensure a secure fit, typically available in 1/2-inch or 3/4-inch options.
Examine product specifications and user manuals, as manufacturers often list tested and approved accessories. Compatibility not only ensures proper function but also prevents potential damage during operation.
Look for the Quick Connect feature, which allows swift changes between accessories. This is particularly advantageous when moving between tasks. The Hozelock compatibility badge on products can also guide you in making informed decisions.
Check for local retailers or online shops that specialise in cleaning equipment; they often carry a wide range of accessories. Customer reviews can provide insight into the effectiveness and reliability of specific attachments.
Lastly, if unsure, consultation with experts in stores or online forums dedicated to cleaning equipment can clarify compatibility questions and lead to proper choices for your set-up.
Troubleshooting Water Flow Problems During Use
.jpg "How does hose connect to hozelock pressure washer lance")
First, check for any blockages at the nozzle or end fitting. A clogged tip can significantly restrict flow. If blocked, clean or replace as necessary.
Inspect Connections
- Ensure all connections are tight and secure; leaks can occur if joints are misaligned.
- Look for any signs of wear or damage on fittings that could impede water flow.
Assess Water Source
- Verify the water supply is adequate; low pressure or limited flow from the tap can affect performance.
- Inspect hoses leading to the device for kinks or damage that can restrict water movement.
If flow issues persist even after checking these components, consider the following:
- Test with a different water source. Sometimes the issue lies with the initial supply.
- Examine the internal components of the device; buildup within the pump could hinder performance.
Finally, if all else fails, consulting the manufacturer’s manual for specific troubleshooting tips related to your model could provide further insights.


