


The first step involves gathering quality components. A robust engine paired with a pump designed for high pressure is non-negotiable. Choose a powerful motor, preferably petrol, with adequate horsepower to ensure efficiency. Look for a pump ideally rated for the intended tasks, ensuring it delivers the necessary PSI and GPM for optimal performance.
Next, consider the configuration of belts and pulleys. Precision in alignment is key to maintaining consistent power transfer. Adjustable mounts can play a significant role in fine-tuning the tension, preventing slippage and enhancing longevity. Selecting the right materials for the belts is crucial; opt for reinforced options that resist wear and heat for improved durability.
Assembly demands attention to detail. Begin with a sturdy frame to support components securely. Ensure tight connections between the engine and pump, utilising quality fittings to prevent leaks. Always incorporate safety features, such as a pressure relief valve and emergency shut-off switch, to protect both the user and equipment.
Finally, regular maintenance will enhance longevity. Lubricate moving parts frequently, check for wear in belts, and inspect for leaks regularly. Following these guidelines will not only establish a dependable cleaning tool but will also provide consistent results for various cleaning tasks.
Constructing a High-Performance Cleaning Unit
Start by selecting a robust motor; a minimum of 10-15 HP is recommended for optimal performance. Make sure to choose an electric or gas engine with adequate torque to drive the pump without strain.
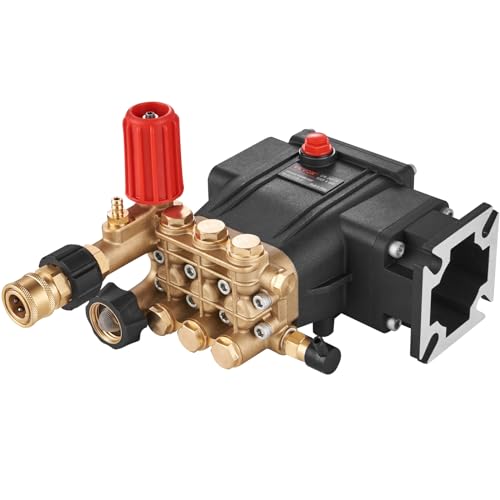
The pump is equally critical. Opt for a triplex plunger pump, as it offers better longevity and more consistent performance than other types. Look for models that can handle pressures of 3000 PSI and above for professional-grade output.
Integrate appropriate pulleys for efficient power transmission. Typically, a fixed pulley ratio of 2:1 will ensure the pump operates at the ideal RPM based on your motor specifications. Use heavy-duty belts that can endure high tension and reduce slippage.
Prioritise solid frame construction. Use steel tubing for the base, ensuring stability during operation. A well-constructed frame can absorb vibrations and prevent wear on components over time.
Incorporate an effective cooling system, especially for gas motors. Install a cooling fan to dissipate heat generated during operation. A cooling mechanism will extend the lifespan of both motor and pump significantly.
For mobility, attach durable wheels to the frame. Choose pneumatic tyres that can handle rough terrain. This feature enhances portability and usability, especially on job sites.
Include a quality high-pressure hose. A minimum diameter of 3/8 inch is ideal to minimise flow restrictions. Reinforced materials will prevent kinking and ensure safety during use.
Don’t overlook the importance of filtration. A reliable inlet filter protects the pump from debris, ensuring longevity and consistent performance. Regular maintenance of filters will prevent clogging.
Finally, implement a clear control system for ease of operation. A well-placed throttle and pressure gauge enhance the user experience, allowing for quick adjustments while working.
Choosing the Right Components for Your Pressure Cleaning Machine
Start with a powerful motor, preferably in the range of 5 to 7 horsepower. Look for an electric or petrol engine that can efficiently handle high workloads. For electric options, consider models with continuous duty ratings to avoid overheating.
The pump is the heart of the setup. Opt for a triplex plunger pump for durability and performance. Brands like AR or CAT are well-regarded for their reliability. Ensure the pump’s output matches your cleaning requirements, typically between 2.5 to 4 GPM (gallons per minute) at pressures of 2500 to 4000 PSI.
Correct belt selection is pivotal. Use high-quality, cogged V-belts designed for heavy loads. These belts provide better grip and reduce slip, ensuring even power transfer. Measure the distance between your motor and pump to choose the appropriate length.
Include a sturdy frame fabricated from steel or aluminium. This should be designed to withstand vibrations and potential impacts during use. A good frame will enhance portability while ensuring stability during operation.
Don’t overlook hose quality; choose a durable, reinforced hose rated for the machine’s pressure. A 50-foot hose typically offers adequate reach for most tasks, while a swivel connector can prevent tangles.
Lastly, select nozzles based on the specific tasks. A set that includes adjustable and interchangeable tips will give versatility for different cleaning surfaces, from delicate paint to tough concrete. Consult a pressure nozzle chart to ensure you choose the correct spray angle and flow rate.
| Component | Recommendation | Example Brands |
|---|---|---|
| Motor | 5-7 horsepower | Honda, Baldor |
| Pump | Triplex plunger pump | AR, CAT |
| Belt | High-quality cogged V-belt | Goodyear, Gates |
| Frame | Steel or Aluminium | Custom-built, Norther Tool |
| Hose | Durable, reinforced | Annovi Reverberi, Flexzilla |
| Nozzles | Adjustable and interchangeable | SIMPSON, PowerWash |
Step-by-Step Assembly of the Frame
Choose robust materials such as steel or aluminium for the frame to ensure durability and stability under pressure. Start by gathering the following components:
- Steel or aluminium tubing (1-2 inches in diameter)
- Angle brackets for reinforcement
- Welding equipment or sturdy fasteners
- Rubber or plastic feet to prevent slipping
First, cut the tubing to the required lengths: two horizontal pieces for the top and bottom and two vertical pieces for the sides. Ensure the dimensions accommodate all internal components, leaving extra room for maintenance.
Construct a rectangular base by securing the horizontal pieces to the vertical parts using angle brackets. This forms a strong foundation. If welding, ensure clean joints to prevent weak points. If using fasteners, pre-drill holes for accuracy.
For stability, consider adding diagonal supports by cutting shorter pieces of tubing and attaching them from the corners to the centre of the sides. This prevents flexing while using the equipment.
After securing the base, attach the upper section of the frame, which should support the motor and pump assembly. Ensure it is aligned correctly to maintain balance.
Incorporate adjustable feet at the base, allowing for level adjustments on uneven surfaces. This enhances stability during operation.
Before finishing, inspect all joints for strength and correct any misalignments. The frame should be sturdy enough to support additional weight without wobbling.
Finally, paint or coat the frame with a weather-resistant finish to prolong its life and prevent corrosion. Allow it to cure fully before proceeding with mounting other components.
Installing the Belt Drive Mechanism
Begin by securing the main motor to the frame using bolts and washers. Ensure the motor is positioned to align with the axle where the pulley will mount.
Next, attach the pulley to the motor shaft. Apply a retaining compound or use a key and set screw for a strong grip. Ensure the pulley is level with the other components to prevent slippage during operation.
Position the large pulley onto the axle connected to the pump. Use a similar attachment method as with the motor pulley, ensuring tightness. Verify both pulleys are aligned; an offset can lead to premature wear.
Install the belt by threading it around both pulleys. Make sure there is minimal slack but not so tight that it strains the motor or pump bearings. Adjust as necessary to maintain proper tension.
Check all connections for stability. Use a torque wrench to tighten bolts to the manufacturer’s specifications. Revisit pulleys to confirm alignment; a slight shift can cause snapping.
Conduct a manual rotation of the pulley assembly to identify any potential friction points or irregularities. This ensures a smooth operation once the power is engaged.
Finally, add a belt guard to protect the mechanism from debris and accidental contact during use. Regularly inspect the system for wear, particularly on the belt and pulleys, as these wear components may require replacement over time.
Connecting the Pressure Pump to the Engine
Ensure proper alignment of the pump and engine shafts before proceeding with the connection. Misalignment can lead to accelerated wear or failure. Utilize a flexible coupling to accommodate any minor discrepancies in alignment and allow for easier installation.
Utilize a high-quality belt suitable for the desired RPM of the pump and engine. A belt too tight can strain both components, while one too loose can lead to slippage. Adjust the tension by repositioning the engine using its mounting plate or by employing tensioning mechanisms available for the specific setup.
Securing the Connection

Once the belt is in place, secure the pump and the engine firmly using appropriate bolts and washers. The use of locking nuts is advisable to prevent loosening during operation. Ensure that all connectors are tightly fastened to maintain performance under pressure.
Testing the Installation

Before first use, rotate the engine manually to ensure that the pump engages smoothly without any obstruction. Power the unit briefly to confirm proper functionality. Watch for any unusual noises or vibrations that may indicate misalignment or inadequate tension. Any adjustments should be made prior to full operation to ensure longevity and reliability.
Setting Up Water Inlet and Outlet Systems
For effective operation, the water intake and discharge systems must be meticulously configured. Begin with a high-quality inlet filter to catch debris, ensuring a steady flow into the pump. This component should be easily accessible for routine maintenance.
Connect the water inlet hose, using reinforced materials to resist kinks and leaks. A diameter of 3/4 inch often strikes a balance between flow rate and pressure. Consider incorporating quick-connect fittings for simplicity in hose attachment and detachment.
Next, focus on the outlet configuration. Select a nozzle suitable for the intended cleaning tasks, adjusting the angle and pressure settings to match the project requirements. For versatility, use interchangeable nozzles that allow for easy swapping during different applications.
Ensure the outlet hose is rated for high pressure, with a minimum diameter of 1/4 inch. This helps maintain optimal water delivery without back pressure that could damage the system. Reinforced hoses withstand the rigours of operation, especially at elevated pressure levels.
Install a pressure relief valve on the discharge line. This safety feature protects the components from overpressure situations and contributes to the longevity of your apparatus. Position this valve as close to the pump’s outlet as possible for maximum efficiency.
Finally, verify all connections for leaks before running the unit. Tighten fittings and inspect the hoses for any signs of wear or damage. Regular checking of these elements prevents disruptions and ensures consistent performance throughout the cleaning activities.
Testing and Adjusting Pressure Settings
The first step in optimising your cleaning unit’s functionality involves measuring the outlet pressure. Attach a pressure gauge to the wand or nozzle fitting. Run the machine and note the reading. For ideal performance, a range of 2,500 to 3,000 PSI is typically recommended, depending on the specific application.
If the pressure is too low, inspect the inlet filter for clogs and ensure the water supply is adequate. A common issue is an undersized hose or fittings that restrict flow. Upgrading to larger diameter components can significantly improve performance.
Adjusting Pressure Levels
Many pumps feature an adjustable unloader valve. Locate this component and make incremental adjustments to the setting. Typically, turning the knob clockwise increases the pressure, while counterclockwise reduces it. Always make small adjustments and test between each change to avoid exceeding the pump’s limits.
For those using a variable pressure nozzle, experiment with different settings. These nozzles can offer varied pressure outputs and enable effective cleaning on numerous surfaces. For instance, switch between high-pressure for tough stains and low-pressure for rinsing delicate areas.
Final Testing and Verification
After adjustments, run the unit for several minutes. Monitor for unusual noises or vibrations that might indicate an issue. Check that there are no leaks in the connections, which could affect the overall pressure output. Assess the cleaning effectiveness on a predetermined test area to verify that the adjustments yield the desired results.
Once satisfied with the pressure settings, document the final configuration for future reference. This record can save time during subsequent uses and aid in any necessary troubleshooting.
Safety Measures During Operation
Always wear appropriate personal protective equipment (PPE) such as goggles, gloves, and non-slip footwear before starting your cleaning task. This significantly reduces the risk of injuries from debris or high-pressure water.
Maintenance of Equipment
Regularly inspect all components for wear and tear. Look for leaks in hoses and connections, and ensure that all fastenings are secure. A loose component can lead to accidents during operation. Replace any damaged parts immediately to maintain efficiency and safety.
Proper Handling Techniques
Keep a firm grip on the nozzle and maintain a safe distance from the surface being cleaned. The force of the water can easily cause injuries if directed towards the body. Additionally, never point the nozzle at yourself or others, and always ensure that the area around you is clear before activating the machine.
Before transport, disconnect all hoses and accessories and ensure the equipment is in a stable position. Ensuring a safe environment not only protects you but also those around you. Adhering to these guidelines will help avoid potential hazards and enhance your cleaning experience.
Finally, stay alert and aware of your surroundings. Be particularly cautious if working on ladders or slippery surfaces, as sudden movements can result in falls or accidents. Prioritising safety makes the task more efficient and enjoyable.
Maintenance Tips for Longevity
Regularly inspect all connections to ensure they are tight and free from leaks. Any signs of wear on hoses or seals should prompt immediate replacement to prevent further damage.
Cleaning and Storage
After each use, rinse the nozzle and filter to eliminate debris and prevent clogging. Store the unit in a dry, sheltered location, avoiding exposure to extreme temperatures or moisture which can cause corrosion and plastic degradation.
Lubrication
.jpg "How to build a belt drive pressure washer")
Periodically apply suitable grease to moving parts, particularly on the motor and pump. This practice reduces friction and extends the lifespan of critical components. Always consult the manufacturer’s guidelines for specific lubricants.
Monitor the performance regularly, adjusting the pressure settings and ensuring the components operate smoothly. Any unusual noises or vibrations should be investigated promptly to avert more extensive damage.


