


Choose a robust motor capable of delivering exceptional power, ideally rated between 3 to 7 horsepower. A high amp electric motor or a reliable gasoline engine can provide the necessary strength for rigorous commercial use. Ensure the selected motor fits within your design specifications for optimal performance.
Integrate a heavy-duty pump designed for high water flow rates, typically ranging from 2 to 5 gallons per minute. Look for models that utilise triplex plunger technology, known for longevity and superior pressure capabilities. This will significantly enhance cleaning efficiency and reduce wear over time.
Incorporate quality components, including durable hoses–preferably reinforced and rated for high pressure–to withstand demanding tasks. Consider brass fittings and connectors to avoid leaks and ensure a secure attachment to various nozzles and equipment.
For mobility, construct a solid frame using rust-resistant materials like stainless steel. Include large wheels for easy manoeuvrability across various terrains. This feature not only aids transport but also contributes to stability during operation.
Lastly, equip the unit with a range of adjustable spray nozzles. This versatility allows users to tackle different cleaning challenges, from gentle rinsing to intense scrubbing. Providing options ensures that the machine can adapt to a diverse clientele and an array of tasks.
Constructing an Industrial Cleaner
Focus on selecting a high-performance motor, ideally at least 6.5 HP petrol or a comparable electric motor. This ensures you achieve sufficient pressure and water flow for tackling tough grime. Pair it with a pump designed for heavy-duty use, such as a triplex plunger pump, which can handle the rigours of extended operation.
For the framework, utilise durable materials like steel or high-grade aluminium. A sturdy chassis not only supports the components but enhances mobility if wheels are included. Ensure all connections are tight and leak-proof; using premium O-rings and seals will save you from unexpected repairs.
Optimising Accessories
Integrate a variety of nozzles to accommodate different cleaning tasks. Adjustable spray tips offer versatility, while a turbo nozzle can deliver a concentrated jet for stubborn marks. Additionally, consider including a detergent injection system for enhanced cleaning capabilities.
Final Assembly Tips
When assembling, pay attention to the alignment of all components. Perform a thorough test run before putting it into regular use; check for any vibrations, unusual noises, or leaks. Fine-tuning the pressure settings can significantly improve the performance and lifespan of your equipment.
Selecting the Right Pump for Your Pressure Cleaning Equipment

Choose a pump with appropriate PSI and GPM ratings for your specific tasks. A machine with 3000 PSI and 2.5 GPM is suitable for commercial cleaning applications, while 1500-2000 PSI with 1.5-2.0 GPM caters to residential needs.
Types of Pumps
- Triplex Pumps: Ideal for high-end units, offering superior durability and performance. Their three-piston design ensures consistent pressure and longevity.
- Axial Pumps: Commonly found in lower-cost models, they are simpler and more compact but may wear out faster under heavy use.
Material Quality
Look for brass or stainless steel components in the pump construction. These materials resist corrosion and extend lifespan, making them preferable over plastic options, especially for frequent usage.
Additionally, ensure that seals and O-rings are durable. Viton and rubber combinations provide better resistance against heat and chemicals compared to standard alternatives.
Maintenance Considerations
- Regularly check and replace oil; this prolongs pump life.
- Inspect hoses and connections for leaks or wear.
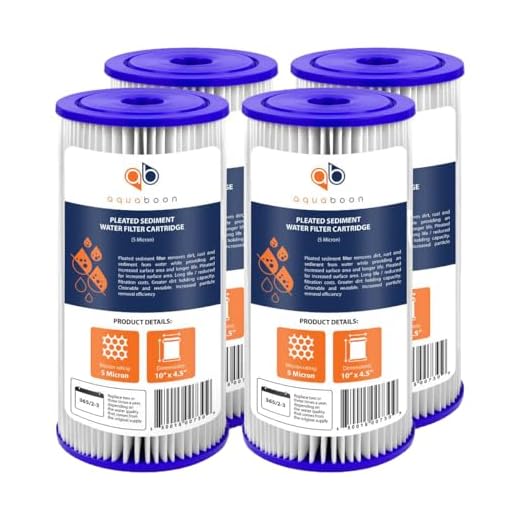
- Use a water filter to prevent debris from entering the pump, which can cause damage.
By focusing on the right specifications, type, and high-quality materials, I can guarantee enhanced performance and durability in your cleaning unit. Prioritising these factors ensures optimal efficiency and satisfaction during use.
Choosing a Suitable Engine Type and Size
Select a gas engine for maximum mobility and power, particularly if you require high pressure and flow rates. These engines generally range from 5 to 15 horsepower, depending on the intended usage.
When opting for electric motors, consider their quieter operation and ease of use. They usually have power ratings between 1.5 and 5 horsepower, suitable for residential or light commercial tasks with moderate strength requirements.
Evaluate the required pressure for your tasks. Pressure ratings from 2000 to 4000 psi (pounds per square inch) will cover most applications. Here’s a quick reference:
| Engine Type | Power Rating (HP) | Typical Pressure (psi) | Best Use Cases |
|---|---|---|---|
| Gas | 5 – 15 | 2500 – 4000 | Heavy-duty cleaning, industrial use |
| Electric | 1.5 – 5 | 2000 – 3000 | Residential cleaning, light tasks |
Consider fuel availability and convenience. Gasoline engines need refuelling, while electric options require a reliable power source. If your work involves frequent transport, prioritise portability and weight.
Finally, ensure to match your engine selection with the right pump and nozzle attachments to optimise performance. Correct alignment between these elements enhances overall efficiency and task completion time.
Designing the Frame for Stability and Portability
Prioritise a low centre of gravity to enhance stability. A base with a wider stance reduces tipping risks, especially during operation. Steel or heavy-duty aluminium is recommended for both durability and support.
Incorporate strategically placed reinforcements at load-bearing points. This prevents flexing, ensuring that equipment operates smoothly without rattling or vibrations.
- Use triangulated bracing between horizontal and vertical sections.
- Include rubber isolators at key joins to minimize noise transmission.
For portability, design with integrative wheels. Choose large, pneumatic tyres suitable for rough terrain. A retractable handle is beneficial for ease of movement.
- Ensure wheels can pivot for better manoeuvrability.
- Opt for a folding mechanism to save space during storage.
Finally, consider the overall weight. For ease of transport without compromising sturdiness, the ideal frame should balance material choice and structural integrity. Testing prototypes under various conditions before finalising ensures the design meets practical requirements.
Integrating a Water Supply System
Choose a reliable water source to ensure consistent performance. Residential hoses work well, but for extended use, consider a larger tank or direct plumbing connection. Ensure the inlet is capable of delivering a minimum of 5 litres per minute to maintain optimal pressure levels.
Pipe and Hose Selection
Opt for high-quality hoses to prevent leaks and pressure loss. Reinforced PVC or rubber hoses withstand pressure better and resist kinks. For connections, use quick couplers to facilitate easy detachment and maintenance.
Filtration and Water Quality
Incorporate a sediment filter to eliminate contaminants that can damage internal components. Depending on your location, a water softener may be necessary to prevent scaling in the system. Regularly check and clean filters to maintain flow rates and efficiency.
Assembling Nozzles and Hose Connections
Begin by selecting high-quality quick-connect fittings for nozzles and hoses to ensure a secure and leak-free connection. I prefer brass fittings over plastic options for enhanced durability and resistance to wear.
Next, choose your nozzle types. A selection of interchangeable nozzles provides versatility. I recommend using 0°, 15°, 25°, and 40° spray angles to accommodate different cleaning tasks. Match the nozzle to the flow rate of your pump for optimal performance.
For hose connections, use a reinforced high-pressure hose between the pump and the nozzle. A 3/8-inch diameter is standard for most setups, but make sure the length doesn’t exceed 100 feet to maintain pressure. Invest in spiral-wound hoses; they resist kinking and twisting during operation.
When assembling, ensure each connection is tightened properly to prevent leaks. I’ve encountered issues where vibrations can loosen fittings over time, so consider adding thread seal tape to threaded connections for added security.
Test each nozzle’s spray pattern thoroughly before final assembly. Adjustments may be necessary to achieve the desired pressure and coverage. Pay attention to the alignment of hoses to avoid unnecessary bends that could restrict water flow.
Incorporate a filter at the water intake to prevent debris from entering the system. This will prolong the life of your unit and maintain effective cleaning power.
Finally, label your nozzles and hoses if you’re using multiple attachments for easier identification during usage. This small step can save time and simplify operation.
Understanding Electrical Requirements for Power
First and foremost, be aware of the voltage and amperage specifications required by your chosen motor. Most units operate on either 120V or 240V systems. Ensure your electrical supply matches those ratings to avoid performance issues or equipment damage.
Choosing the Right Motor
Select a motor that meets your needs based on required pressure and flow rate. For example, an electric motor typically demands less maintenance compared to gas engines, making it a suitable option for indoor use or smaller jobs. A common rating for motors in the cleaning sector is between 1.5 to 5 horsepower.
Circuit Requirements
Check the dedicated circuit requirements for the motor. If your device draws higher amperage, a dedicated circuit will prevent tripping breakers, especially during peak usage. For 120V motors, a 15A circuit is often sufficient, whereas larger units may require a 20A circuit. Utilise appropriate gauge wiring to accommodate the amperage–12 or 14 gauge is usually adequate.
Utilise Ground Fault Circuit Interrupter (GFCI) protection when the unit is used outdoors or in damp conditions. This safeguard reduces the risk of electric shock.
Integrating proper components such as a contactor or relay can enhance safety and control, providing an extra layer if the equipment is subject to high load situations.
Finally, if you’re adapting existing electrical systems, consult with a licensed electrician to ensure all connections meet regional electrical codes and standards. The safety and reliability of your equipment depend on it.
Implementing Safety Features in Your Design
Incorporate a reliable pressure relief valve to prevent excess pressure buildup that can lead to equipment failure. This valve will automatically release pressure when it exceeds a predefined set point, ensuring safe operation at all times.
Integrate a thermal relief system within the pump to guard against overheating. This feature will allow water to bypass the pump when it reaches a certain temperature, preventing damage and extending the unit’s lifespan.
Design the frame with rounded edges and non-slip surfaces to minimise the risk of injury during handling. Additionally, use high-quality materials that withstand impacts, diminishing the chances of structural failure.
Install protective shields around rotating parts and high-pressure hoses to avoid accidental contact. This barrier will significantly reduce the risk of injury during operation and transport.
Include a prominent on/off switch that is easily accessible, allowing for immediate shut-off in emergencies. Clearly label the switch and ensure it can be operated without moving from a safe position.
Equip the unit with proper electrical insulation and grounding to protect against electrical shock. This should be a standard feature to enhance user safety during operation, especially in wet conditions.
Utilise clear warnings and instructions on the equipment itself, highlighting any potential hazards associated with misuse. Use visual symbols in addition to text for clarity, reaching a broader audience.
Incorporate an automatic shut-off feature that engages when the unit is not in use for an extended period. This not only saves energy but also reduces the risk of accidental activation.
Finally, validate your safety features through rigorous testing. Seek feedback from end-users and make adjustments as necessary. Continuous improvement will enhance both performance and safety.
Testing and Optimising Performance Before Use

Conduct several pressure tests using different nozzles to assess the flow rate and pressure output. A calibrated gauge will provide precise measurements. Aim for a pressure range that suits your tasks, whether it’s light cleaning or heavy-duty work.
Evaluate the engine’s performance under load conditions. Run the unit at full capacity for 15-30 minutes while monitoring for overheating or abnormal noises. This helps identify any mechanical issues that could affect long-term reliability.
Check the water supply system thoroughly. Ensure there are no leaks and that the hoses can deliver the necessary flow rate. A blocked or undersized hose can drastically reduce performance.
Test the cleaning efficiency by applying the washer to sample surfaces, such as concrete or wood. Adjust nozzle types and angles as needed, recording the results to develop a clear understanding of what combinations yield the best outcomes.
Inspect the integrated safety features. Operate the unit to confirm that pressure relief valves and emergency shut-off systems function correctly. This step is not just about compliance but also about safeguarding the user and the equipment.
Ensure that vibration dampening measures are effective. Extended use can lead to mechanical wear; therefore, check connections and mounts function properly during operation without excessive movement.
Lastly, review maintenance routines. Document any wear or required parts replacement observed during initial tests. Creating a maintenance schedule based on this data can enhance longevity and performance.


