To create a robust reservoir for your cleaning apparatus, begin by selecting materials like high-density polyethylene or stainless steel for durability and longevity. Ensure that the chosen material can withstand the pressures involved, as well as resist corrosion from cleaning agents. A quality check on the thickness of the walls is essential; aim for a minimum of 5 millimeters to prevent any risk of rupture.
Next, consider the design. A cylindrical shape is often preferred for maintaining even pressure distribution. If designing from scratch, use CAD software to draft your plans. Make sure to incorporate inlet and outlet ports; the inlet should feature a filter to prevent debris from entering the system. Pay attention to the valve types and sizes, ensuring compatibility with your existing components.
Welding or employing high-strength adhesives are both practical methods for joining sections. Always pre-test joints for leaks before final assembly. After securing, sand down any rough edges to avoid injury during operation. Regular maintenance checks after construction will prolong the lifespan of your cleaning apparatus and ensure optimal performance.

Finally, always adhere to safety regulations when operating your newly constructed cleaning device. Properly labelled safety warnings and maintenance schedules will aid in preventing accidents and enhance user experience in the long term.
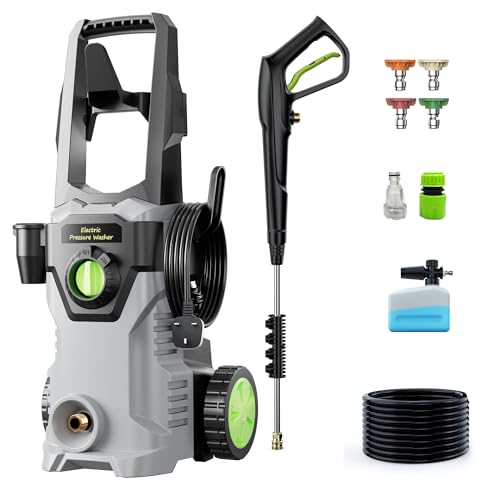
Selecting the Right Materials for the Tank

Steel and high-density polyethylene (HDPE) are the top choices for constructing an effective storage unit. Each material offers unique benefits depending on the intended use.
- Steel: Known for its durability and resistance to impact. It withstands high pressure and provides excellent longevity. Opt for stainless steel for superior corrosion resistance.
- HDPE: A lightweight option that is resistant to both chemicals and UV exposure. It’s an excellent choice for mobile units due to its portability.
Consider the following factors while selecting materials:
- Pressure Capacity: Ensure the material can withstand the pressure ratings of the pump you’ll be using. Steel typically handles higher pressures than plastics.
- Weight: For transport-friendly designs, lightweight options like HDPE simplify mobility, while steel offers robustness but adds weight.
- Cost: Evaluate your budget. HDPE is generally less expensive than steel but may not offer the same durability over time.
- Corrosion Resistance: Choose materials like stainless steel or treated HDPE to prevent degradation, especially if exposed to harsh elements.
- Manufacturing Process: Consider how the material can be shaped. Steel allows for welding, while HDPE typically requires specialised welding techniques.
In the selection process, keep in mind the specific requirements of your applications. Balance the need for strength, weight, cost, and corrosion resistance based on the conditions the unit will face. By doing so, you will ensure a reliable and effective system for your cleaning tasks.
Designing the Tank for Optimal Water Flow
The shape of the vessel significantly impacts the flow dynamics. Opt for a cylindrical design, as it promotes smooth water movement and reduces turbulence. This form minimises unnecessary pressure drops during operation.
Inlet and Outlet Positioning: Position the water inlet at the bottom of the container. This ensures that the water drawn is clear of debris that may settle at the base. Place the outlet near the top to facilitate efficient drainage, preventing stagnation.
Internal Baffles: Incorporating internal baffles or ribs enhances stability and helps direct water flow. They reduce swirling motion, maintaining a steady flow rate and improving performance.
Volume Capacity: Ensure the size is proportionate to the power unit. A larger reservoir can help maintain a consistent flow, but oversized containers may cause unnecessary weight. Striking a balance is key.
Ventilation: Include vents to allow air pressure equalisation. Without appropriate ventilation, water may not flow as intended, causing bottlenecks or cavitation. Vent placement should consider accessibility for maintenance.
Surface Treatment: Smooth internal surfaces reduce friction, allowing for efficient flow. Consider applying a non-corrosive coating to protect against wear, especially if the water contains cleaning agents.
Final adjustments should focus on the overall layout. A well-designed structure will optimise performance, ensuring the system functions effectively while enhancing the user experience.
Building the Frame and Support Structure
Use robust materials such as steel or heavy-duty aluminium for the frame. These options provide excellent strength-to-weight ratios and corrosion resistance, which is critical for longevity. Ensure that the framework can support the weight of the storage unit, pump assembly, and any additional components without flexing or bending over time.
Frame Design

Design a rectangular frame with cross-bracing for stability. The cross-bracing will help distribute the load evenly, preventing any structural failure during operation. Make sure to create a base that is slightly larger than the unit’s footprint for stability. Keep in mind that a height of around 1 metre is often ideal for ergonomic access to controls and maintenance points.
Mounting and Support
Securely mount the water containment unit within the frame using rubber grommets or vibration dampeners to minimise noise and absorb vibrations from the electric motor. Create a separate support structure for the pump to allow for easy access and maintenance. Use bolts designated for outdoor use, ensuring they can withstand weather conditions to avoid rusting.
Incorporate adjustable feet on the base of the frame to compensate for uneven surfaces. This feature will allow for a level assembly, ensuring optimal performance during use. Always consider accessibility for routine checks and repairs; maintain sufficient space around each component to facilitate serviceability.
Installing Inlet and Outlet Valves Properly
Position both the inlet and outlet valves at the lowest possible points to facilitate proper drainage. This ensures that any water left in the system can drain out, reducing the risk of corrosion and contamination.
Valve Selection

Opt for valves with a rating suitable for the water pressure you expect. Use brass or stainless steel for their durability. Plastic valves may be tempting due to lower costs but could fail under extreme conditions.
Sealing Techniques
Apply Teflon tape on the threads of the valves before installation. This prevents leaks and secures a tight fit. Be sure to wrap the tape in the direction of the threads to avoid unravelling during tightening.
| Valve Type | Material | Pressure Rating |
|---|---|---|
| Ball Valve | Brass | Up to 600 psi |
| Gate Valve | Stainless Steel | Up to 1500 psi |
| Check Valve | Plastic | Up to 250 psi |
Tighten valves carefully using a wrench, but avoid overtightening, which can cause damage. After installation, run a pressure test by filling the system with water while monitoring any leaks that may form.
Integrating a Pump System for Pressure Generation

Choose a reliable pump that matches your application. A diaphragm or gear pump can provide efficient flow and suitable pressure levels. Adjusting the pump’s speed offers flexibility in pressure output, allowing you to optimise performance based on specific tasks.
Understanding Pump Types
For this type of system, consider a belt-driven pump for higher durability and maintenance ease. Rotary vane pumps are also an excellent alternative due to their compact size and ability to handle varying fluid viscosities. Ensure that the selected pump can manage the expected flow rate without excessive wear.
Installation Tips
Secure the pump using robust mounts to minimise vibration. Use high-quality hoses with clamps to connect the pump to the inlet and outlet ports. Regularly check for leaks and maintain proper alignment to prevent premature pump failure. Systems designed with accessibility in mind facilitate easier maintenance and troubleshooting.
Testing the Tank for Leaks and Safety

Begin the evaluation by filling the reservoir with water to its maximum capacity. Allow it to sit for a minimum of 24 hours, observing for any signs of leakage. If you spot any damp patches or water accumulation outside, that indicates an imperfection in the construction.
Utilise a pressure gauge to assess the integrity under operational conditions. Connect the gauge to the outlet and gradually increase the pressure. Monitor for sudden drops, which suggest a potential fail point.
The air pressure test is another effective method. Seal the inlet and outlet openings, then introduce air into the unit to a moderately high pressure, ensuring it remains stable during the observation period. Any loss of pressure denotes a breach in the material.
It’s wise to include a safety valve in the design. This component helps prevent excessive pressure build-up, which could pose risks during operation. Regularly inspect the valve for functionality to ensure it releases pressure as required.
For additional security, conduct a visual inspection for stress points or deformities upon completion of each test. Pay close attention to joints and seams where structural weaknesses may arise.
After confirming the absence of leaks, it’s necessary to repeatedly assess the overall assembly. This includes checking the frame and attachments for stability during various usage scenarios to guarantee reliable performance.
Lastly, consider running a few dry tests without loading the system to check for vibrations or unusual movements that may indicate improper alignments or fixings. This methodical approach ensures optimal performance and boosts overall safety.
Maintaining Your Pressure Washer Tank Over Time

Regular inspections are key to prolonging the life of your water storage unit. I recommend checking for any signs of rust or corrosion, as these can compromise integrity. If you notice any, sand down the affected areas and apply a suitable anti-corrosive coating.
Cleaning the interior is equally important. I suggest draining the unit periodically and using a hose to flush out sediments and debris. A thorough rinse and drying prevent algae growth and odours that can build up over time.
Monitor the seals and joints carefully. Any wear could lead to leaks. Replace gaskets and seals at the first sign of deterioration. This small effort can save you from larger issues down the line.
Ensure all connections remain tight and secure. Loose fittings can lead to pressure loss and reduce performance. I recommend checking these connections each time you prepare the unit for use to ensure optimal functionality.
If your system includes a filtration mechanism, inspect and clean filters regularly. Clogged filters can impede water flow and decrease pressure efficiency, leading to ineffective operation.
Don’t overlook the exterior. Clean the outer surfaces to prevent buildup and potential rusting. Using mild soap and water is usually enough to maintain an appealing appearance and protect the material from environmental factors.
Lastly, consider seasonal maintenance if your equipment is stored for extended periods. Empty your unit, store it in a dry space, and consider using a cover to protect it from dust and debris.