

For anyone looking to construct an effective high-pressure cleaning appliance, selecting a reliable motor is paramount. A minimum of 1.5 horsepower ensures sufficient power for most household tasks. Pair this with a minimum flow rate of 1.5 gallons per minute (GPM), and you’re set for success in tackling grime.
Choosing the right pump type is equally critical. An axial cam pump is excellent for light to medium-duty tasks, while a triplex pump delivers impressive durability for more demanding jobs. Ensure to mount the pump securely on a sturdy frame to prevent vibrations during operation.
Next, invest in a high-quality spray gun and nozzle set. Adjustable nozzles allow for versatility in cleaning different surfaces, from delicate car exteriors to stubborn driveways. Including a durable hose that can handle high-pressure conditions will ensure flexibility and ease of movement during use.
Consider integrating a detergent injection system to enhance your cleaning capabilities. A low-pressure soap nozzle will facilitate effective application of cleaning agents, promoting deeper penetration and better results.
Finally, don’t overlook safety features. Including a pressure relief valve and ensuring electrical components are well-protected will significantly enhance operational safety. With these elements in place, you can enjoy a personalised cleaning solution tailored to meet your specific needs.
Choosing the Right Pump for Your Cleaner
I recommend focusing on two primary pump types: axial and triplex. Axial pumps are more straightforward, less expensive, and suitable for occasional use. They often come with entry-level equipment, delivering pressures up to 2000 PSI. Conversely, triplex pumps are built for durability and can sustain higher pressures, making them ideal for commercial applications.
Check the pump’s PSI (pounds per square inch) and GPM (gallons per minute) ratings. A balance between these figures influences the cleaning performance. For heavy-duty tasks like stripping paint or removing tough stains, look for a minimum of 3000 PSI with at least 2.5 GPM.
Durability is essential. Materials such as brass or stainless steel extend pump life compared to plastic components. Consider the warranty period offered by the manufacturer, as this can provide insight into the expected longevity of the unit.
Noise levels also matter. Some pumps operate quietly, which is beneficial for residential use. If noise is a concern, opt for electric units as they typically produce less sound than gas-powered models.
Pay special attention to maintenance requirements. Regular oil changes and checking for leaks can prolong the pump’s lifespan. Triplex models generally require more upkeep, while axial pumps might be more forgiving.
Finally, ensure compatibility with your motor. Whether you’re using an electric motor or a gas engine, the pump must match the specifications to avoid performance issues and ensure optimal operation.
Selecting an Appropriate Motor for Optimal Performance
.jpg)
Opt for an electric motor with a minimum power rating of 1.5 kW (2 HP) for residential tasks and consider 3 kW (4 HP) for more demanding applications. Ensure that the motor operates at 2800 RPM, which strikes an excellent balance between pressure and flow efficiency.
Type of Motor

Brushless motors are preferable due to their longevity and reduced maintenance needs. Compare this with brushed versions that can wear out faster. If opting for a gas engine, look for a reliable brand offering a four-stroke engine to minimise emissions and maximise torque.
Voltage Considerations
Select a motor that matches your local voltage conditions. A 230V motor is commonly used in residential settings, while commercial environments may require 400V. Make sure your power source can handle the current draw to avoid tripping circuits.
Combining the right motor with an efficient pump is vital for achieving desired cleaning results. Always test your setup with water flow and pressure settings to ensure optimal performance before extensive use.
Understanding Hose Specifications and Length Requirements
For optimal performance, select a high-quality hose rated for high-pressure use. A minimum of 3000 PSI (pounds per square inch) is recommended to withstand the forces exerted during operation. Opt for hoses made from materials like PVC or rubber, as these provide durability and flexibility while remaining resistant to kinks and bends.
Consider the diameter of the hose as well; a 1/4 inch diameter is standard for most consumer-level models, but 3/8 inch can enhance water flow and reduce pressure loss over long distances. This is particularly beneficial in larger cleaning tasks or where significant reach is needed.
Length is another critical factor. Standard hose lengths can vary from 25 to 100 feet. Longer hoses may lead to diminished pressure, so aim for a length that meets your needs without exceeding what is necessary. For example, a 50-foot hose typically maintains adequate force for most residential applications.
Utilising quick-connect fittings can enhance convenience, allowing for easy attachment and detachment. Ensure that all fittings match the hose specifications to prevent leaks or pressure drops. Adhering to these guidelines ensures not only effective cleaning results but also prolongs the lifespan of the equipment.
Designing a Custom Frame for Stability and Portability

Create a robust frame using sturdy materials such as metal or high-density plastic to ensure longevity and support under pressure. Opt for square tubing rather than round for better rigidity and ease of assembly. 1-inch tubing typically provides sufficient strength while remaining lightweight.
Portability hinges on components. Incorporate wheels with rubber tyres, ideally around 8-10 inches in diameter, for smooth transport across uneven surfaces. Furthermore, locking mechanisms on wheels keep the unit stationary during usage, preventing accidental movement.
Weight Distribution
Balance is key; place the motor and pump low within the frame to lower the centre of gravity. This setup mitigates tipping hazards. Employ adjustable mounting brackets for the motor, allowing for optimisation based on weight variations from fluid levels.
Storage Solutions
Create storage solutions within the frame for accessories like hoses, nozzles, and detergent containers to reduce clutter. Incorporate hooks or dedicated compartments for easy access. This design not only enhances usability but also promotes organisation during operation.
Integrating Safety Features in Your Pressure Cleaner Design
Incorporate a thermal relief valve into the design. This component prevents overheating by releasing water when temperatures exceed safe limits, ensuring longevity and safe operation.
Implement an automatic shut-off feature that activates when the trigger is released. This prevents unnecessary operation, conserving energy and reducing wear on components.
Include a pressure regulator to manage and limit the maximum pressure output. This helps prevent damage to surfaces and ensures user control over cleaning power.
Utilise non-slip handles and ergonomic grips to enhance user comfort and reduce the risk of accidental drops during operation.
Integrate a safety lock mechanism on the trigger. This feature prevents unintentional activation, reducing the potential for accidents, especially in environments with children or pets.
Consider using reinforced hoses with burst protection technology. These hoses withstand high pressure and are less likely to rupture, ensuring a safer cleaning experience.
Equip your unit with an electrical safety circuit breaker. This device automatically cuts off power in the event of a short circuit, enhancing safety during use.
Incorporate visible warning labels on the machine, highlighting safe operating practices and risks associated with misuse. These reminders can help prevent accidents.
- Ensure all components are rated for the expected pressure levels.
- Test the safety features regularly to guarantee function and reliability.
- Ensure easy access to the manual for safety instructions and troubleshooting.
By prioritising these elements, the risk of accidents and injuries diminishes significantly, making the cleaning task safer and more enjoyable.
Assembling Components: A Step-by-Step Guide

Begin with the pump’s installation. Secure the pump to the custom frame using bolts and spring washers to prevent vibrations from loosening the attachments. Ensure that the inlet and outlet ports are correctly aligned, with the inlet connected to the water source and the outlet directed towards the hose assembly.
Motor Installation
Next, position the motor adjacent to the pump. Ensure the shaft of the motor aligns perfectly with the pump’s drive shaft. Use a pulley or a coupling to connect them securely. Double-check that the motor is fixed on a flat surface to avoid movement during operation.
Hose Attachments
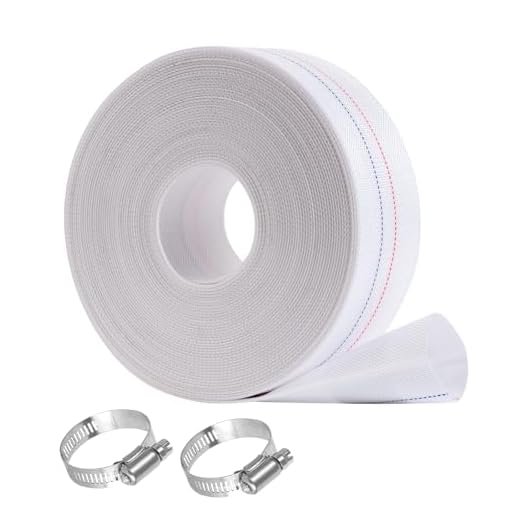
Once the motor is secured, attach the high-pressure hose to the pump’s outlet. Use hose clamps to ensure a tight fit, preventing leaks. When connecting the hose, it’s advisable to measure the length required carefully, avoiding any unnecessary slack while ensuring it reaches your working area comfortably.
| Component | Attachment Method | Notes |
|---|---|---|
| Pump | Bolts and spring washers | Ensure proper alignment of ports |
| Motor | Pulley or coupling | Align shaft with pump drive shaft |
| Hose | Hose clamps | Prevent leaks, measure length accurately |
After these steps, check all connections for security. Power up the system to test functionality, ensuring there are no leaks in the hose or from the pump. Adjust any components as necessary to enhance performance. Completing this part methodically sets the foundation for a reliable cleaning machine.
Testing Your Cleaner for Performance and Leakage
To ensure optimal functionality, conduct a thorough performance evaluation and check for leaks after assembly. Begin this process by connecting the water supply and motor to the components.
Follow these steps to validate performance:
- Activate the motor and observe the water flow. It should be consistent and strong.
- Check the pressure gauge–if equipped. The pressure should meet the specifications of the pump used.
- Evaluate the nozzle settings by switching between different types to assess the spray patterns. A well-designed unit should deliver various spray options effectively.
The next step is to inspect for leaks:
- Examine all attachment points, including hoses, nozzles, and the pump casing. Look out for any signs of water seeping out.
- Tighten all connections and fittings with proper tools, ensuring a secure assembly. Use Teflon tape on threaded connections to enhance sealing.
- If leaks persist, consider replacing seals or gaskets that may have been damaged during assembly. This is crucial as wear and tear can lead to significant performance issues.
- Monitor the cleaner during operation for unusual noise or excess vibration, as these symptoms often indicate misalignment or loose components.
If the performance falls short or leaks remain unresolved, revisit each component’s installation for potential errors. Ensuring each part is properly fitted and secured will lead to better results in usage. Regular testing after modifications or repairs will keep everything functioning smoothly.
FAQ:
What materials do I need to build a pressure washer?
To construct your own pressure washer, you will require a few key materials. Firstly, you need a high-pressure water pump, which can often be sourced from old equipment or purchased online. Additionally, you’ll need a suitable motor, typically an electric or petrol engine, to power the pump. Further, you will require a frame or housing to hold everything together; this can be made from metal or sturdy plastic. Hoses capable of withstanding high pressure are also crucial, along with nozzles that control the spray pattern. Lastly, don’t forget safety equipment such as goggles and gloves, as working with high-pressure water can be hazardous.
Can I use an old car washer pump for my pressure washer project?
Yes, an old car washer pump can be repurposed for a DIY pressure washer, but there are a few factors to consider. Most car washer pumps are designed for low-pressure applications, so you should check the pump’s specifications to ensure it can handle the pressures used in a typical pressure washer setup. If the pump is rated for higher pressures, you can integrate it into your design. Moreover, you may need to modify the connections to accommodate the high-pressure hoses and nozzles. Testing the pump before final assembly is advisable to ensure it meets your needs for performance.
How difficult is it to build my own pressure washer compared to buying one?
Building your own pressure washer can vary in difficulty based on your technical skills and experience with mechanical projects. If you have a solid understanding of plumbing and electrical components, constructing a pressure washer can be a rewarding DIY task. However, it requires careful planning, precise assembly, and attention to safety. On the other hand, purchasing a pressure washer is straightforward, and you can immediately use it without the risk of malfunctions. Weighing the costs, time involved, and your comfort with building will help you decide whether to embark on this project or to opt for a pre-made solution.


