
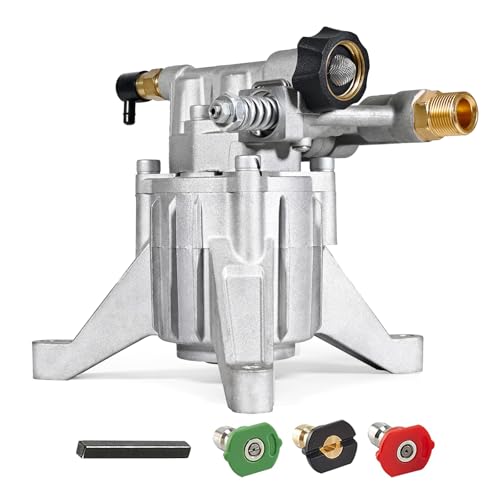


Ensure your machine operates smoothly by refreshing the lubricating liquid at regular intervals. The ideal approach involves a few straightforward steps: gather necessary tools, including a drain pan, funnel, and the recommended type of lubricant for your specific machine.
Begin by positioning the unit on a stable surface to guarantee safety while working. It’s essential to turn off the engine and disconnect it from the power source before proceeding. Once prepared, locate the drain plug. This typically requires a socket wrench for removal. Allow the used liquid to flow completely into the drain pan, disposing of it responsibly.
Next, install the drain plug securely before moving on to refill with new lubricant. Using a funnel simplifies this process, minimizing spills and ensuring precision. Check the owner’s manual for the correct quantity and type of lubricant, which significantly contributes to both longevity and functionality of the machine.

After refilling, run the engine briefly to circulate the new lubricant throughout the system. This final step helps in achieving even distribution and optimal performance. Finally, always remember to perform this maintenance task as part of your routine care to extend the life of your equipment.
Steps for Maintenance of Your Equipment

Start by locating the drain plug, usually situated at the bottom of the engine casing. Ensure that your machine is placed on a flat surface to prevent spillage.
Using a wrench, carefully loosen and remove the drain plug, allowing the used liquid to flow into a suitable container. It’s advisable to let it sit for a minute or two to ensure complete drainage.
Once emptied, clean the drain plug and gasket with a clean cloth to eliminate any residue. It’s essential to inspect the components for wear and replace them if necessary.
Position the plug back into place and ensure it is secured adequately. Avoid over-tightening, as it may lead to damage.
Next, select the appropriate lubricant as specified in the user manual, ensuring compatibility with your model. Using a funnel, pour the new liquid into the designated fill port. Fill it to the level indicated on the dipstick or sight gauge.
After refilling, check for leaks around the drain plug and fill area by running the unit briefly. This step ensures that the seals are intact and functioning correctly.
Dispose of the used liquid according to your local regulations, as it may contain harmful materials.
Gather Necessary Tools and Supplies for Oil Change
Ensure you’re fully equipped before starting the maintenance task. Here’s a list of items I always prepare:
- Wrench Set: A suitable wrench will help you remove the drain plug effectively.
- Oil Container: Utilize a container that can easily hold the old lubricant for disposal.
- New Lubricant: Refer to the user manual for the exact type and amount needed.
- Funnel: A funnel will simplify pouring the new liquid without spills.
- Rags or Towels: Keep a few on hand for cleaning up any spills or drips.
- Gloves: Protect your hands from any residues or contaminants.
Additional Tools
If you have them, consider including:
- Drain Pan: For more extensive cleaning, a drain pan can help manage the old fluid disposal.
- Torque Wrench: Use this for accurately securing the drain plug after the process.
Being prepared with these tools ensures a smoother experience and helps maintain the efficiency of your machine.
Identify the Correct Lubricant Type for Your Equipment
Selecting the suitable lubricant is key for maintaining your device’s performance. Consult the owner’s manual for specifications, which typically provides the recommended viscosity grade and type. Most models require a detergent oil classified as SAE 30 or 10W-30. The choice between these options often hinges on your local temperature conditions; lighter grades like 10W-30 are preferable for colder climates, while SAE 30 performs well in warmer regions.
Consider using high-quality synthetic alternatives if available, as they can offer improved lubrication and efficiency, especially under varied operational conditions. Always ensure the lubricant meets API standards and has the necessary additives to prolong engine life and reduce wear.
For optimal performance, avoid using automotive oils that are not formulated for small engines, as they may lack essential additives, potentially leading to increased wear and tear. Choose a reputable brand that guarantees compatibility with your equipment. When in doubt, inquire at local hardware stores or consult manufacturer support to confirm compatibility.
Prepare Equipment for Fluid Replacement

Before proceeding with the fluid replacement, ensure the power source is disconnected. This step eliminates any risk of accidental starting. Position the machine on a stable, flat surface to prevent spills and ensure safety during the process.
Remove any accessories attached to the unit, such as nozzles or hoses. This will provide better access and reduce the chance of contamination. Let the engine cool completely if it has been recently operated; dealing with hot components can lead to burns or other injuries.
Gather a suitable container to catch the used fluid. Position it correctly under the drain plug to avoid mess. Also, have rags or paper towels ready to clean any spills swiftly. Wear gloves to keep your hands clean and protect against any residues.
Check for any leakage around the casing or connections. Addressing any issues before starting will save time and ensure smooth operation while working. Finally, ensure that you have the owner’s manual at hand for any specific instructions related to your equipment model.
Drain the Old Fluid Safely and Efficiently

Before initiating the drainage process, ensure that the unit is turned off and has cooled down completely. This prevents any risk of burns or injuries. Position the apparatus on a flat surface, preferably above a container to catch the used liquid. Here’s a step-by-step guide to follow:
Steps to Safely Remove the Used Liquid
- Locate the drain plug at the bottom of the engine. It is typically a bolt or a designated opening.
- Using the appropriate wrench, carefully loosen the plug. Be ready to catch the liquid as it flows out.
- Allow sufficient time for all the fluid to completely exit the reservoir. This ensures that any contaminants or debris are thoroughly removed.
- While draining, check for any unusual particles in the liquid, which may indicate potential engine issues.
- Once fully drained, securely replace the drain plug and tighten it, ensuring no leaks will occur later.
Cleaning Up After Draining

After completing the drainage procedure, dispose of the used fluid responsibly. Many service centres or auto shops accept used liquids for recycling. Clean any spills immediately to prevent slipping hazards or environmental damage.
Regularly maintaining your machine by properly draining and replacing fluids contributes to longevity and optimal performance. Stay diligent in your upkeep for a smooth operation every time you utilise your equipment.
Refill with New Fluids and Check Levels
Begin by locating the fill port on the engine. Use a funnel for precise pouring to avoid spills. Carefully add the fresh lubricant until it reaches the recommended level indicated on the dipstick or the fill line inside the reservoir. It’s crucial not to overfill, as excess liquid can cause foaming and adversely affect performance.

Verifying Fluid Levels

After refilling, check the dipstick to ensure that the fluid is at the correct mark. If it’s too low, add a little more until the level is just right. If you accidentally overfill, use a siphon or drain excess back into a suitable container. Run the equipment for a short duration to circulate the new fluid, then re-check the levels and adjust as necessary to maintain optimal functionality.
Dispose of Old Oil in an Environmentally Responsible Manner
It’s essential to handle used lubricant properly to protect the environment. Never pour it down drains, on the ground, or in regular trash. Instead, follow these steps for responsible disposal.
Local Recycling Options
Check for nearby recycling centres that accept used lubricant. Many automotive shops and service stations also recycle this waste. Some municipalities have designated collection periods for hazardous materials. Contact your local waste management facility to find out more.

Preparation for Disposal
Before disposal, seal the collected lubricant in a clean, leak-proof container, labelled clearly to avoid confusion. Ensure the container is made of materials compatible with the used liquid.
| Container Type | Recommended For |
|---|---|
| Plastic Jug | Most lubricants (check local rules) |
| Metal Can | Some motor and gear lubricants |
| Specialised Hazardous Waste Container | For professional disposal |
By disposing of used lubricant responsibly, you contribute to environmental conservation and ensure compliance with local regulations. Always stay informed about the best disposal practices in your area.
Regular Maintenance Tips to Extend Equipment Life
Clean the air filter frequently to prevent debris buildup, which impacts performance significantly. A clean filter ensures optimal airflow and engine efficiency. Replace it annually or if it appears dirty.
Inspect hoses and fittings routinely for signs of wear or leaks. Any cracks or holes can diminish pressure output or lead to operational failures. Tighten connections and replace damaged components without delay.
Use fresh fuel and stabiliser. Stale petrol can lead to engine issues and starting difficulties. Empty the fuel tank if the equipment will not be used for an extended period and refill with fresh fuel before use.
After every use, flush the system with clean water to prevent clogs from detergent residues or contaminants. This practice maintains the internal components in good condition and ensures consistent operation.
Check all electrical connections and components for any corrosion or damage. Keeping these parts clean and functional is vital to reliable starting and operation. Replace any corroded terminals immediately.
Store in a clean, dry environment away from extreme temperatures. Proper storage not only protects against weather damage but also extends the life of electrical and mechanical systems.
Regularly consult the manufacturer’s guidelines for specific maintenance schedules and detailed recommendations tailored to your model for optimal performance and longevity.
FAQ:
What tools do I need to change the oil in my Craftsman pressure washer?
To change the oil in your Craftsman pressure washer, you will typically need a few basic tools and materials. These include an adjustable wrench or socket set for loosening the oil drain plug, a funnel for pouring the new oil, and an oil container for catching the old oil. You may also want to have a rag on hand for any spills and to clean the area afterwards. It’s advisable to use oil that is specifically recommended for your pressure washer model, so check the owner’s manual for the correct specifications.
How often should I change the oil in my Craftsman pressure washer?
The frequency of oil changes for your Craftsman pressure washer largely depends on usage. Generally, it is recommended to change the oil after the first 20 to 50 hours of use to remove any contaminants that may have built up during initial operation. After this initial change, make it a habit to check the oil level regularly and change the oil every 50 to 100 hours of operation, or at least once per season if the washer is used infrequently. Regular maintenance will help keep your pressure washer performing well and extend its lifespan.


