


Regular maintenance of your cleaning unit ensures optimal performance and longevity. My recommendation is to focus on the lubricant used within the engine, as it plays a key role in keeping everything running smoothly.
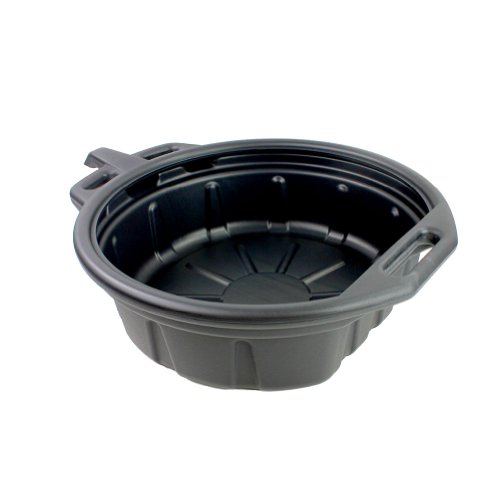
The initial step involves locating the engine’s drain plug. It is typically positioned at the base of the machine, often requiring a standard wrench to remove. Prepare a suitable container underneath to catch the used liquid. This process prevents any mess and ensures a clean workspace.
After draining, replace the drain plug securely to avoid any leaks. Next, select a high-quality lubricant designed for small engines. Pour the new liquid into the designated fill location, which is usually marked clearly on the engine. Using a funnel can help prevent spills during this process.

Make sure to check the levels regularly, as maintaining appropriate amounts reduces friction and prolongs the engine’s life. This simple upkeep can significantly enhance the efficiency of your equipment while saving you from costly repairs in the future.
Steps for Updating Lubricant in Your Pressure Cleaning Unit

Prepare the equipment by ensuring it is switched off and detached from any power source. Allow the engine to cool slightly to avoid burns and make handling easier. Position a drain pan beneath the unit to catch the expelled fluid.
Draining the Current Fluid

Locate the drain plug, typically situated at the base of the engine. Use a suitable wrench to loosen the plug and allow the used lubricant to flow completely into the drain pan. Take care to dispose of the old substance according to local regulations, as it can be harmful to the environment.
Filling with Fresh Lubricant

Once the old liquid has been fully eliminated, replace and securely tighten the drain plug. Next, use a funnel to introduce the recommended new lubricant into the designated fill port. Check your user manual for the specific type and quantity required; this information is crucial for optimal performance.
After filling, inspect the fluid level using the dipstick. Ensure it sits within the marked range. Run the engine for a brief moment to circulate the new lubricant, then check the level again and add more if necessary.
Dispose of any used materials responsibly and keep your equipment in peak condition for future tasks.
Gather Necessary Tools and Materials
Identify the following items before starting: a quality wrench set, suitable for the drain plug, and an oil pan or basin to collect the used fluid. A funnel ensures a clean refill, while a clean rag aids in wiping any spills.
Select the appropriate type of engine lubricant as per the manufacturer’s recommendations; usually, a specific viscosity rating should be followed. Having fresh gloves on hand keeps everything tidy, and a small container can be useful for storing any old lubricant for proper disposal.
Lastly, ensure that your workspace is well-lit and clear of obstacles to facilitate the task. Being organised from the start saves time and effort, making the procedure smoother.
Identify the Correct Oil Type for Your Model

Refer to the manufacturer’s specifications in the user manual to find the right lubricant for your unit. Each variant may require specific formulations, depending on engine design and operating conditions. If the manual is unavailable, check the manufacturer’s website or contact their customer service for guidance.
Common Oil Specifications
Most models use either SAE 30 or 10W-30 viscosity grades. Ensure to confirm compatibility with your particular engine, as using the incorrect type can cause performance issues or damage. Additionally, synthetic blends often offer enhanced protection and performance benefits, especially in varying temperatures.
| Model | Recommended Oil Type | Viscosity Grade |
|---|---|---|
| Model A | Conventional | SAE 30 |
| Model B | Synthetic Blend | 10W-30 |
| Model C | Conventional | SAE 30 |
Verification Tips
Before purchasing, cross-check the specifications on the bottle. Look for certification marks such as API (American Petroleum Institute) or ISO (International Organization for Standardization) which indicate compliance with quality standards. Always opt for reputable brands to guarantee reliability and performance.
Prepare Pressure Cleaner for Liquid Swap

Ensure the appliance is completely powered down and disconnected from any electrical source. Remove the water supply line to avoid accidental activation during maintenance. Place the unit on a flat, stable surface to prevent tipping over while working.
Use an appropriate drip pan or container to collect any residual fluid that may escape during the procedure. Wearing protective gloves is highly recommended to safeguard against contact with used lubricant.
Check the manufacturer’s guidelines for specific instructions related to your model. Familiarising myself with the design and features can facilitate a smoother operation. It might also be beneficial to label or organise tools and materials at hand for quicker access.
Allow sufficient time for the machinery to cool down if it has been operational recently. Hot components can lead to burns or injuries. An adequate waiting period prevents any accidents while managing liquid during replacement.
Drain the Old Liquid Safely
Ensure you have a clean container that is appropriate for collecting used lubrication. A funnel can help to direct the flow efficiently and reduce spills.
Warm up the machinery slightly before draining. This reduces viscosity and allows for quicker removal of the spent lubricant. Running the unit for about 5 to 10 minutes should suffice.
Position the receptacle under the drain plug. With a wrench, carefully loosen and remove the plug. Allow the liquid to pour out completely. Take your time to ensure all contents empty, which may take several minutes.
Disposal of Old Liquid
Once drained, seal the used material in a proper container. Follow local regulations for disposal. Many recycling centres accept spent lubricants, so check for nearby options.
Clean any spills immediately with absorbent materials. This promotes a safe environment and prevents slippery surfaces.
Add New Lubricant to Engine
Ensure the engine is on a level surface to enable proper filling. Remove the filler cap, typically located on the side or top of the engine. Using a funnel will help avoid spills while pouring. Carefully add the lubricant until it reaches the recommended fill line indicated on the dipstick or engine casing.
Monitor the level frequently as you pour to prevent overfilling. Allow a brief moment for the new substance to settle before checking. After achieving the correct level, securely replace the filler cap to prevent any leakage. It’s advisable to run the unit for a few minutes post-refilling, checking for leaks, and reassess the fluid level once the engine has cooled.
Dispose of any used materials properly by following local regulations for hazardous waste. Keeping accurate records of lubricant changes aids in future maintenance schedules and helps prolong the life of your machine.
Check Oil Level and Proper Functionality
After adding fresh lubricant, it’s critical to verify the quantity within the reservoir. Use the dipstick for this task, ensuring it meets the manufacturer’s specifications. Here’s how I approach this assessment:
- Remove the dipstick and wipe it clean with a lint-free cloth.
- Reinsert the dipstick completely, then remove it again to check the level.
- If the level is low, add more fluid gradually, checking frequently. Avoid overfilling.
Next, I turn my attention to the unit’s operation. Start the machinery and allow it to run for a few minutes. This process gives me a chance to observe several factors:
- Listen for any unusual noises that might indicate mechanical issues.
- Check for any leaks around the seal where the oil resides.
- Monitor the performance to confirm it operates smoothly without stalling or erratic behaviour.
A proper level and seamless operation signify readiness for upcoming cleaning tasks. Regularly inspecting and maintaining fluids ensures longevity and efficiency, ultimately enhancing performance during use.
Dispose of Old Oil Responsibly
Follow local regulations for the disposal of used lubrication. Never pour it down drains or rivers; this can harm the environment. Here are the steps for safe elimination:
- Transfer the spent fluid into a secure, leak-proof container. Use a funnel for accuracy to prevent spills.
- Label the container clearly as “Used Lubrication” to avoid confusion.
- Locate nearby recycling facilities or oil disposal sites. Many auto repair shops and service stations accept used fluids.
- Check local authorities for community collection events or information on specific drop-off locations.
- Never mix different types of fluids; this can complicate recycling and disposal processes.
Storing used lubrication for an extended period can pose safety risks. Ensure containers are sealed tightly and kept out of direct sunlight and extreme temperatures. By following these guidelines, you protect both your local ecosystem and the community.


