


To ensure optimal functioning of your cleaning machine, regularly assess the fluid content in the mechanism. This not only enhances performance but also prolongs the lifespan of the device. Begin by locating the fill port on the side of the mechanism, usually marked clearly for convenience.
With a cloth, gently wipe any residue around the fill area to maintain cleanliness. Use a dipstick or a recommended tool to determine the fluid amount. Insert the tool into the filling port, then remove it to observe the reading. If the fluid is below the marked threshold, consider replenishing it with the specified lubricant. Always refer to the manufacturer’s guidelines regarding the suitable type and viscosity of the fluid.
After refilling, securely seal the fill port to avoid any leakage. Regular inspections will not only enhance performance but also mitigate potential damage, ensuring your cleaning equipment remains reliable for years to come.
Identifying the correct fluid type for your cleaning device’s mechanism

Consult the manufacturer’s manual for precise specifications regarding the suitable liquid for the mechanism. Often, you will find recommendations for synthetic or non-synthetic lubricants, which vary based on the model and brand.
If the manual is unavailable, many manufacturers suggest standard 30-weight non-detergent liquid, commonly used in various equipment. Opting for a non-detergent type can help prevent the formation of harmful sludge.
Compatibility with the weather conditions in your area is also significant. For instance, in colder climates, a lighter grade fluid may be beneficial to ensure ease of operation during low temperatures.
Being cautious of additives is essential, as some may cause harm to the internal components. Selecting a reputable brand can help mitigate this risk, ensuring better performance and longevity of your apparatus.
Finally, note the price range for quality liquids. Investing a bit more in a high-quality formula can often lead to significant savings on maintenance and repairs over time.
Locating the oil dipstick or fill cap on your pressure washer
To find the dipstick or fill cap on your cleaning machine, first refer to the user manual for your specific model, as placement can vary significantly. Most manufacturers provide detailed illustrations for ease of identification.
Generally, the cap is positioned on the top or side of the motor casing. Look for a small, round cap that may have a symbol indicating it is for fluid. In some cases, it may be labelled “Oil” or “Fill.” If it is not clearly marked, search for a rubber or plastic cap that can be easily unscrewed or pulled off.
In many devices, the dipstick is integrated into the fill cap. After removing it, wipe it with a clean cloth and reinsert it, then remove it again to read the fluid status. Ensure that the dipstick is properly seated to avoid any spillage.
For certain models, the dipstick may be located lower on the pump body for easier access. Ensure that the machine is on a level surface to obtain an accurate reading.
If you’re still having trouble locating the fill cap or dipstick, consider watching online tutorials specific to your model, as they provide visual guidance that can help ease the process.
Removing the dipstick and cleaning it before checking
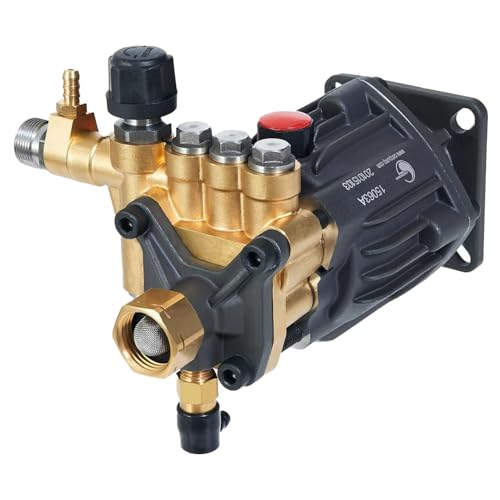
.jpg "How to check pressure washer pump oil level")
Begin by gently twisting and pulling the dipstick out from its housing. Take care not to force it, as this could damage the threads. Once removed, inspect the dipstick for any residue or debris. If there is any visible grime, clean it using a lint-free cloth or paper towel, ensuring that no particles remain that could contaminate the fluid during measurement.
After cleaning, allow the dipstick to dry completely before reinserting it into the housing. This ensures an accurate reading when you go to assess the contents. Finally, carefully place it back, making sure it seats properly to prevent leaks or misreadings. Proper removal and maintenance of the dipstick significantly contribute to the longevity and performance of your equipment.
Interpreting the oil level markings on the dipstick

Understanding the markings on the dipstick is key for ensuring optimal performance. Typically, you’ll encounter two indicators: ‘Full’ and ‘Add’ or ‘Low’. These are straightforward guidelines to follow.
- Full: This marking indicates sufficient lubricant. If your reading falls within this range, the system is adequately lubricated.
- Add: This is a clear sign that additional fluid is needed. If the level dips to this mark, consider topping up before further usage.
It’s essential to avoid exceeding the ‘Full’ marking. Overfilling can lead to operational issues, such as increased pressure and potential leaks. If the dipstick features a graduated scale, take note of finer increments for precise measurements.
For accurate readings, ensure the unit is on a level surface and check the dipstick without cleaning solutions or debris affecting the measurement. Regular inspection of these markings helps maintain long-term functionality and efficiency.
Adding oil if the level is low and avoiding overfilling

To replenish insufficient fluid in your machine, choose an appropriate type based on the manufacturer’s specifications. Use a funnel for precise pouring. It helps prevent overflowing the reservoir, which can cause serious issues.
Pour the lubricant slowly and observe the amount entering the system. Regularly pause and verify the indications on the dipstick to ensure you do not exceed the maximum mark. Overfilling can lead to emulsification, where air bubbles form in the liquid, reducing lubrication efficiency.
If you accidentally add too much, use a siphon tool or a turkey baster to remove the excess. It’s preferable to check less oil frequently than to encounter problems from incorrect levels.
Be consistent with scheduling inspections and refills, which helps maintain the functionality and longevity of your equipment.
Regular maintenance tips for your washer’s circulatory fluids
Performing routine checks on the circulatory fluids significantly enhances operational efficiency and longevity. Regularly change the fluids at the intervals specified in the user manual, typically after every 50 hours of use. This ensures optimal lubrication and performance.
Monitor for leaks

After using the machine, inspect the area where you stored it for any signs of leakage. Oil stains indicate potential issues with seals or gaskets. Address these concerns promptly to prevent further damage.
Use a funnel during fluid changes
Employ a funnel when transferring new lubricant. This prevents spills and keeps the workspace clean. A clean environment reduces contamination risks that could affect the lubricating processes within the machinery.
In case of contamination, consider a complete fluid replacement rather than just topping up. Contaminated fluids can lead to increased wear and tear on components.
Keep a log of fluid maintenance and changes. Documenting these actions helps track service history and can highlight patterns that may require further attention.
A voiding excessive wear can be achieved by operating the equipment within its designated limits. Refer to the manual for recommended usage guidelines to maintain optimal functionality.


