

Start with a gentle solution using warm water and mild dish soap. Mix a bucket of this concoction, and with a sturdy brush, scrub the surfaces in small sections. The soap will help lift grime while the warm water accelerates the process.
For tougher stains, consider a paste made from baking soda and water. Apply it directly to the stain and let it sit for about 15-20 minutes before scrubbing. The abrasiveness of the baking soda can tackle stubborn marks effectively.
If you encounter mould or mildew, a vinegar solution works wonders. Combine equal parts of white vinegar and water in a spray bottle, apply it generously, and let it sit for a while. The acidity will help break down the growth, making it easier to remove.
Following these steps, rinse the area thoroughly with clean water. You might need to repeat certain sections, but patience here will yield remarkable results, refreshing your outdoor area without heavy equipment.
Steps for Restoring Your Outdoor Surface
Begin with a thorough sweeping to remove loose debris like leaves, dirt, and dust. This sets the stage for more effective cleaning. Next, prepare a solution of warm water mixed with a mild detergent. Use a bucket for easy access, and ensure that the water isn’t scalding hot, as it can damage certain surfaces.
Employ a stiff-bristled brush to apply the soapy mixture onto the area. Use circular motions, working section by section. Ensure to allocate extra attention to stubborn spots or stains–this combination of scrubbing and soaking helps to break down embedded grime. For grout lines or textured areas, a smaller brush or toothbrush may offer better manoeuvrability.
Rinse and Refresh
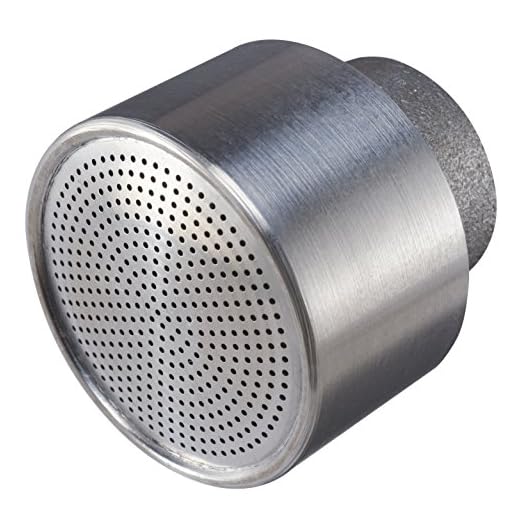
After scrubbing, rinse the area with clean water. A garden hose with a nozzle set to a gentle spray is ideal for this step. Ensure all soap residue is washed away, as it can leave a slippery surface if not fully removed.
If some stains persist, mixing baking soda with water to form a paste can be useful. Apply it directly to the stain, allowing it to sit for 15 minutes before brushing it off. This natural approach helps lift stubborn discolourations without harsh chemicals.
Final Touches
Once the surface is dry, consider applying a sealant appropriate for the specific material of your surface to prolong its cleanliness and protect against future build-up. Regular maintenance with a broom or leaf blower will help keep your space looking its best.
Assessing the Type of Surface
Begin by identifying the specific material of your outdoor area. Common surfaces include concrete, brick, stone, tile, and wood, each requiring tailored products and techniques for restoration.
- Concrete: Typically durable, but may be stained or discoloured. Use a mixture of warm water and mild detergent, scrubbing with a stiff-bristle brush to lift grime.
- Brick: Porous and often retains dirt. Employ a solution of vinegar and water for effective results, ensuring to avoid excessive moisture to protect the mortar.
- Stone: Natural surfaces can vary significantly. For soft stones, like sandstone, prefer a gentle soap solution; more robust types like granite are more forgiving and can withstand stronger cleaners.
- Tile: Glazed tiles can shine with a solution of baking soda and water. For unglazed tiles, ensure to use products that won’t stain or damage the surface.
- Wood: Whether treated or untreated, wood requires careful handling. Opt for a mild soap with a soft brush to prevent splintering and maintain the finish.
Taking the time to recognise the surface type will inform your approach, ensuring optimal results and prolonging the life of your outdoor area. Each material has its nuances in terms of stains and maintenance, so a discerning eye will save both time and effort.
Gathering Necessary Cleaning Supplies
Start by collecting a stiff-bristle broom. This will be crucial for removing loose debris such as leaves and dirt. Following that, acquire a selection of scrubbing brushes in varying sizes, as these are ideal for targeting different areas and types of grime.
A quality bucket is next on the list. Opt for a large one to hold sufficient water and cleaning solution. As for the solution itself, consider a commercial exterior cleaner or a DIY mix of vinegar and baking soda, which effectively tackles stubborn stains and mildew.
Additional Tools
Don’t overlook the value of a garden hose; this will help rinse off the surface and any cleaning agents. For intricate corners and tight spaces, a toothbrush or a similar small brush can be extremely useful. A pair of rubber gloves is recommended for protecting your hands while working with cleaning agents.
Lastly, have microfiber cloths or towels handy for drying any areas that may need a quick wipe-down. With these supplies organised, the task ahead becomes far more manageable and effective.
Preparing the Patio for Cleaning
Remove all furniture, pots, and accessories from the area to create a clutter-free zone. This ensures that you have adequate space to work and prevents damage to your belongings.
Next, clear away any debris, such as leaves, dirt, or small branches. A broom or a brush works well for this task. Pay attention to corners and crevices, as dirt tends to accumulate in these spots.
Once the surface is cleared, inspect for any loose or broken tiles. Repair these before proceeding to avoid exacerbating any existing damage during the scrubbing process.
If your surface has significant grime or stains, consider pre-treating those areas with a suitable cleaning solution. This will aid absorption and make subsequent efforts more effective.
Test any cleaning solution on a small, inconspicuous section. This helps to ensure compatibility with the material and avoids any unwanted reactions.
Lastly, dampen the entire surface lightly with water. This substantiates a more manageable scrubbing experience. Ensure that you have ample ventilation and sunlight for optimal dry time once the cleaning is concluded.
Choosing the Right Cleaning Solution
The selection of a suitable cleaning agent significantly impacts the results of your endeavour. I recommend starting with eco-friendly, biodegradable options, which are gentler on surfaces and the environment. Look for solutions specifically formulated for outdoor surfaces, as they often target specific types of grime effectively.
Common Options
Baking soda mixed with water creates a paste; it works excellently for lifting stains without harsh chemicals. Vinegar is another versatile choice, providing natural disinfectant properties while breaking down dirt. For tougher spots, consider a mixture of bleach and water, but use it sparingly and test in a small area first, as it can be harsh on delicate surfaces.
Commercial Cleaners

If preferred, I suggest exploring commercial cleaning products designed for your specific surface type. Brands that specialise in outdoor maintenance often contain proprietary formulas that yield excellent results. Always follow the manufacturer’s instructions regarding dilution and application methods to ensure optimal efficacy.
Prioritising safety is key. Wear gloves and a mask when applying potent chemicals, and ensure good ventilation if you’re working in a confined space. Testing any solution on a small, inconspicuous area can prevent potential damage to the entire surface.
Applying the Cleaning Solution Correctly

Even the best formula will underperform if not applied properly. I recommend using a spray bottle or a garden sprayer for even distribution. Ensure the surface is dry to allow the solution to work effectively. Start at one corner and work your way systematically to avoid missing any spots.
Techniques for Application
For larger areas, a garden sprayer can cover extensive spaces quickly. Adjust the nozzle for a fine mist to avoid concentrated spots that can lead to streaks. For stubborn areas, applying a thicker layer might be necessary; allow it to sit for the time specified by the manufacturer to penetrate grime.
Rinsing and Follow-Up
After your solution has had time to act, rinse the area thoroughly with clean water. I advise using a stiff brush to tackle any remaining residues. Rinse in the same pattern as your application to ensure every part is treated. Lastly, assess if additional applications are needed for persistent stains or marks.
Scrubbing Techniques for Different Stains
For oil stains, a combination of baking soda and warm water works wonders. Sprinkle baking soda directly onto the stain, then scrub using a stiff-bristled brush. The abrasive nature of baking soda lifts the oil while absorbing it. Rinse thoroughly afterwards.
Moss and algae require a more robust approach. Mix water with white vinegar at a 1:1 ratio and apply it to affected areas. Allow it to sit for 10-15 minutes to penetrate, then scrub with a brush. This method attacks the roots and helps to prevent regrowth.
For rust marks, apply a mixture of lemon juice and salt. The acidity of the lemon combined with the abrasiveness of salt creates an effective rust remover. Scrub gently and rinse adequately afterwards to see a noticeable difference.
To tackle grime, detergent and hot water are effective. Create a solution of dish soap and warm water, then use a scrub brush to work it into the surface. The heat will help to break down stubborn residue.
For stains caused by leaves or tree sap, choose a mixture of warm water and a few drops of dish soap. Apply it generously over the area and allow it to soak for several minutes before scrubbing. This solution should loosen any remaining debris.
In cases of paint spots, a paint thinner or acetone on a cloth can be effective. Dab the stain carefully; do not scrub, as it may spread. Once the paint softens, remove it gently with a plastic scraper before wiping the area with a damp cloth.
Finally, for general maintenance, using a broom or a leaf blower can help prevent buildup, making future scrubbing easier. Regular maintenance reduces the frequency and intensity of scrubbing needed, allowing surfaces to remain cleaner for longer.
Final Rinsing and Maintenance Tips
To ensure all residues and cleaning agents are fully removed from the surface, consider using a garden hose with a spray nozzle. A gentle spray is often sufficient, and you can adjust the water flow depending on the surface texture. Rinse sections thoroughly, moving from one area to another to prevent residues from drying.
Maintenance Strategies
After rinsing, apply a sealer specifically formulated for your surface type. This not only protects from future staining but also eases subsequent cleaning. The application of sealer enhances longevity and appearance, making upkeep simpler over time.
Routine Upkeep

Establish a regular cleaning schedule. Frequent light maintenance prevents accumulated grime. Use a broom or leaf blower to remove debris weekly, and perform a deeper clean every few months. This will prolong the lifespan and aesthetics of the area, reducing the need for intensive scrubbing.
| Frequency | Task |
|---|---|
| Weekly | Remove debris with broom or blower |
| Monthly | Inspect for stains and address immediately |
| Seasonally | Deep cleaning and apply sealer |
Implementing these rinsing and maintenance practices will help maintain the cleanliness and appearance of your outdoor area effectively. A consistent routine not only preserves the surface but also enhances your outdoor enjoyment.


