If you’re aiming to refresh the outer aesthetic of your structure, using high-pressure machinery is a surefire approach. Begin by assembling the right gear: a quality unit, suitable nozzles, and protective gear for personal safety. I recommend a machine with at least 2500 PSI for optimal results on surfaces that have gathered dirt and grime over time.
Prior to commencing the task, prep the environment by clearing away any furniture, plants, or items that could be damaged. It’s imperative to protect windows and doors with plastic sheeting to prevent water intrusion. Using a detergent specifically formulated for exterior surfaces ensures that stubborn stains emulsify and wash away more easily.
Maintain a consistent distance of around two feet from the surface to avoid damage from excessive pressure. Start from the top and work your way downwards, employing sweeping motions rather than focusing on a single spot for extended periods. This technique not only promotes a thorough cleanse but also helps prevent streaks and lines.

Finally, allow the treated surfaces to dry completely before replacing any items or furnishings. This ensures that the newly enhanced look lasts longer and underscores the effectiveness of your labour. Regular maintenance will keep your environment not only visually appealing but also resilient against the elements.
Effective Techniques for Cleaning Masonry Surfaces
Begin by assessing the exterior for any loose debris. Use a broom or blower to remove dirt and grime before commencing the washing process.
Maintain a distance of 24 to 30 inches between the nozzle and the masonry. This prevents damage while allowing adequate force to lift stubborn stains. Adjust the nozzle tip to include a wider spray pattern for broad areas, utilising a tighter stream for focused spots.
Follow these steps for optimal results:
- Select an appropriate detergent formulated for stone or masonry. It should target mould and mildew effectively without causing harm.
- Dilute the cleaning solution according to the manufacturer’s instructions, as concentration affects effectiveness and safety.
- Apply the solution from the bottom upwards to avoid dripping or streaking on already cleaned sections. Allow it to dwell for 5 to 15 minutes to break down grime.
- Rinse thoroughly from the top down, ensuring that all detergent residues are washed away. Failing to rinse can lead to discolouration.
Check the performance of the equipment regularly. Inspect for any signs of wear or blockage in the nozzles, adjusting as necessary. Maintain a steady pace while working to ensure consistent coverage.
After completing the task, examine the surface for any stubborn areas that may require additional attention. Spot treat these sections now for a more polished finish.
Scheduling this maintenance regularly will keep the facade looking fresh and help in prolonging the longevity of masonry materials.
Selecting the Right Pressure Washer for Brick Cleaning
Opt for a unit delivering a minimum of 3000 PSI and a flow rate around 2.5 GPM. This combination ensures effective removal of stubborn stains and built-up grime. For softer materials or delicate areas, models adjustable down to 1500 PSI will suffice.
Consider electric models for small tasks, yet gas-powered machines excel for extensive projects, providing more power and duration. Ensure the selected machine has a wide nozzle range; a 25-degree or 40-degree nozzle typically performs best on vertical surfaces, allowing for versatile cleaning angles.
Check the weight of the unit; portable options are preferable for manoeuvrability. Additionally, assess the cord length or hose capacity for uninterrupted work. Some models come equipped with onboard detergent tanks, which can simplify applications.
Familiarise yourself with the features: adjustable pressures and rotary nozzles enhance productivity, while built-in timers assist in efficient work hours. Sound levels matter as well; quieter models will keep the environment peaceful while operating.
Review customer feedback on reliability and performance. A brand with positive reviews often indicates a solid track record. Guard against low-quality machines; those might lead to inefficiency or breakdowns during usage. Investing in a dependable brand can save time and money in the long run.
Preparing the Area Around Your Brick Home
Clear the vicinity of any furniture, potted plants, or decorative items that could be damaged during the cleaning process. This prevents unintentional harm and ensures easier access to all surfaces.
Cover windows and doorways with plastic sheeting and painter’s tape. This protects seals and surfaces from water pressure and any cleaning solutions used.
Check for loose mortar or damaged areas on the exterior. Repair any issues before starting to avoid further damage while washing.
Utilise tarps or drop cloths to shield the ground and surrounding plants. This minimises the impact of water runoff and cleaning solutions on your landscaping.
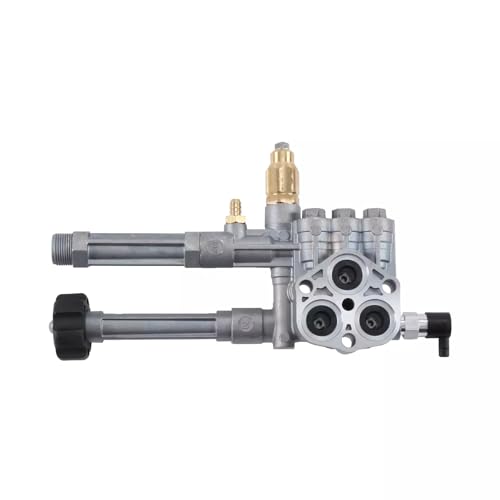
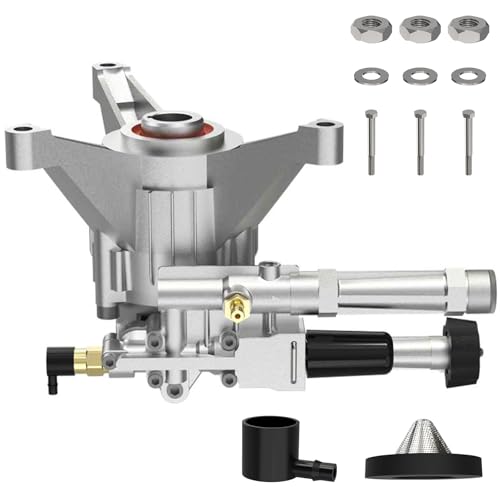
Organising Your Equipment

Gather all necessary tools and cleaning solutions before commencing. Having everything on hand simplifies the process and saves time. Make sure the washer is in good working condition, with an appropriate nozzle for the job.
Inspect hoses for leaks and ensure all connections are secure. Prepare a safe power source and ensure extension cords are rated for outdoor use to avoid hazards.
Safety First
Wear appropriate protective gear, such as goggles, gloves, and non-slip footwear. This reduces the risk of injury from debris and high-pressure water.
Be aware of nearby electrical outlets and overhead power lines. Maintaining a safe distance from these hazards is essential for a safe operation.
Choosing the Appropriate Cleaning Solution for Brick
Opt for a pH-neutral detergent specifically designed for masonry surfaces. This type of solution effectively removes dirt, algae, and mildew without compromising the integrity of the structure. Ensure the formula is biodegradable to protect your garden and surrounding environment.
Popular Options

Some trusted brands include Krud Kutter and Simple Green, both of which feature formulas made for stone and masonry. For more stubborn stains, consider using a diluted solution of bleach mixed with water, but be cautious with its application, as undiluted bleach can damage your surroundings.
Method of Application
Apply the solution using a low-pressure setting. Let it dwell for around 5-10 minutes, allowing the cleaner to penetrate the grime, but avoid letting it dry out. Rinsing promptly ensures effective removal of residues and prevents potential streaking.
Understanding Pressure Settings for Brick Surfaces
The optimal pressure range for treating porous masonry typically falls between 1,200 to 2,500 PSI. Selecting the right setting is crucial to avoid damaging the surface while ensuring effective dirt removal.
Recommended Pressure Settings

- For standard cleaning tasks: Aim for 1,200 to 1,500 PSI. This range is usually sufficient for light to moderate debris and grime.
- For tougher stains or heavily soiled areas: Increase the pressure to between 1,800 and 2,500 PSI, ensuring that the nozzle is held further from the surface to mitigate potential harm.
- Avoid exceeding 2,800 PSI, as higher settings can cause chipping, pitting, or splintering of the material.
Choosing Nozzle Types
- Use a 25-degree nozzle for wider coverage and general cleaning tasks.
- Opt for a 15-degree nozzle for focused, heavy-duty cleaning on stubborn grime.
- A 40-degree nozzle is ideal for rinsing and delicate areas to prevent damage.
Always test a small section before proceeding with extensive cleaning. Adjusting the angle and distance of the nozzle helps regulate pressure, ensuring that the surface remains intact while achieving cleanliness. Keep in mind that maintaining a steady movement will also prevent streaks and uneven cleaning results.
Techniques for Pressure Washing Brick Without Damage
Utilising a high-powered cleaning device effectively requires careful technique to avoid harm to porous surfaces. A fan spray nozzle, typically rated at 25 degrees or wider, is recommended to disperse water over a larger area, significantly reducing the risk of chipping or erosion.
Angle and Distance
Maintain an angle of approximately 30 to 45 degrees while aiming the nozzle at the surface. This technique lessens the impact of the water stream. Furthermore, keep the wand at least 2 feet away from the surface being treated to ensure the force does not embed grime within the pores.

Consistent Motion
Apply a sweeping motion to ensure that water does not remain concentrated in one area for too long. This method aids in preventing any damage while ensuring comprehensive removal of contaminants.
| Technique | Description |
|---|---|
| Fan Spray Nozzle | Utilises a wider spray pattern to minimise concentrated pressure. |
| Proper Angle | Aims the spray at 30-45 degrees for less direct impact. |
| Maintain Distance | Keeps the nozzle at least 2 feet away from surfaces. |
| Sweeping Motion | Prevents prolonged pressure in one area and aids in thoroughness. |
Incorporating these techniques ensures the integrity of surfaces while achieving effective results. After completing the process, inspecting for any missed spots or residual dirt can be done with a lower pressure setting or with manual scrubbing as needed.
Rinsing and Neutralising the Surface Post-Cleaning

After using a high-powered cleaning device, it’s crucial to thoroughly rinse any remaining residue from the surface. Begin by adjusting the nozzle to a wider spray pattern, ensuring an even distribution of water across the area. This helps to avoid any concentrated pressure that could damage the surface.

A rigorous rinse should follow the cleaning session, using clean water to wash away dirt and any cleaning agents that may linger. Starting from the top and moving downwards is essential to allow the flow of water to carry contaminants away effectively. Pay special attention to crevices and joints where debris often accumulates.
Once you’ve rinsed the area, neutralising the surface is the next step. This process is vital, particularly if any harsh cleaners were used. A solution of water mixed with a neutralising agent, such as a vinegar-water mix, can help restore the balance and prevent any potential chemical reactions that could arise from residual cleaners.
Apply the neutralising solution evenly across the surface and allow it to sit for a short duration, usually about 10-15 minutes, to ensure it can work effectively. Afterward, rinse once more with clean water to remove all traces of the neutraliser. This step not only protects the surface but also prepares it for any further treatment or maintenance you plan to apply.
Be meticulous in examining the area after rinsing and neutralising. Look for spots that might require additional attention, ensuring the surface is free from any chemicals or debris that could cause damage or discolouration over time.
Maintaining Your Cleaning Equipment After Use
Thoroughly inspect the unit after the task. Remove any debris or dirt accumulated on the exterior. A clean casing prolongs the lifespan of components.
Draining and Flushing

Before storage, drain all water from the hoses and gun to prevent freezing or mineral build-up. Run fresh water through the system for several minutes to flush out cleaning solutions. This prevents internal corrosion.
Storing Properly

Keep the device in a dry environment, ideally indoors, to prevent damage from weather elements. Ensure all nozzles and accessories are stored in a designated place to avoid loss or damage. Periodically check for signs of wear on hoses and connections, replacing any parts as needed to maintain optimal performance.
Regular Maintenance Tips for Keeping Brick Clean
Establish a routine inspection, ideally every six months. Check the surface for any signs of moss, mildew, or stains. Prompt attention to these issues reduces the need for deep cleaning later.
Apply a protective sealant every few years. This creates a barrier against moisture, dirt, and UV damage, helping maintain the surface’s appearance over time.
Clear debris from gutters and downspouts regularly. Ensure water is directed away from the wall to prevent dampness, which can lead to growths that affect overall aesthetics.
Consider using a stiff-bristled brush for routine surface dusting. This helps dislodge any loose debris without needing harsher methods that may damage the texture.
Clean surrounding vegetation. Overhanging branches or climbing plants can contribute to dirt accumulation and create conditions for algae growth. Regular trimming helps keep surfaces clear.
Monitor for staining from nearby elements, such as foliage or vehicles. Implement immediate cleaning strategies for any spills to prevent set-in stains.
Keep walkways and patios clean as well. This not only improves the overall appearance but also prevents debris transfer to the vertical surfaces during rainy weather.
Document the condition over time with photos. This visual record helps assess what maintenance routines are most successful and where improvements are needed.
By following these recommendations, longevity and appearance remain intact, ensuring that the beauty and integrity of the exterior is preserved for years to come.
FAQ:
What equipment do I need to clean a brick house with a pressure washer?
To clean a brick house with a pressure washer, you’ll require a pressure washer, a suitable nozzle (preferably a 25-degree nozzle for general cleaning), and a surface cleaner attachment for larger areas. Additionally, it’s advisable to use a cleaning solution specifically designed for brick surfaces. Protective gear such as goggles and gloves is also recommended to ensure safety while operating the equipment.
How should I prepare the area before pressure washing my brick house?
Before you begin pressure washing, it’s important to prepare the area effectively. Start by removing any furniture, plants, or decorations near the house to prevent damage. Cover windows and doors with plastic sheeting to avoid water entering your home. Ensure that electrical outlets and fixtures are also protected from water exposure. Pre-soaking the brick with water can help loosen dirt and grime for more efficient cleaning. Always check the weather conditions to ensure you’re cleaning on a dry day.
What cleaning solutions should I use when pressure washing brick?
When cleaning brick, it’s advisable to use a cleaning solution that caters specifically to masonry. A mix of water and mild detergent can be effective for general cleaning. For tougher stains like mildew or algae, a solution containing bleach or a mould and mildew cleaner may be necessary. Always follow the manufacturer’s instructions on any cleaning product, and be cautious with chemical concentrations to avoid damaging the brick or mortar.
Are there any techniques to avoid damaging the brick while pressure washing?
To prevent damaging the brick during pressure washing, maintain a safe distance of approximately 2 feet between the nozzle and the brick surface. Avoid using too high a pressure setting; a pressure range of 1500 to 2000 PSI is generally safe for brick. Use a sweeping motion rather than directing a concentrated beam of water at one spot. Additionally, it’s important to avoid using a narrow nozzle tip, as this can create focused pressure that could chip or erode the brick. Always test a small, inconspicuous area first to assess how the brick reacts to the cleaning process.