


Begin this endeavour with a simple yet powerful solution: a mixture of warm water and mild detergent. Use a soft-bristled brush to gently scrub the surface, ensuring you reach all crevices where dirt can accumulate. This method is not only economical but also safe for the structure.
Once you have tackled the initial layer of grime, consider utilising a vinegar solution to deal with stubborn stains. Combine equal parts vinegar and water in a spray bottle, applying it directly to the affected areas. Let it sit for approximately 10-15 minutes before scrubbing with your brush again. This natural approach can often restore the surface’s original appearance without causing damage.
For the final touch, rinse the area thoroughly with clean water, using a bucket or hose to prevent residue from forming. It’s essential to allow the surface to dry completely, as moisture can lead to further issues. Regular maintenance will keep your surfaces looking pristine, enhancing both aesthetic appeal and longevity.
Effective Techniques for Refreshing your Surface
Utilise a mixture of warm water and mild detergent to tackle grime. Apply the solution with a soft-bristled brush, scrubbing gently to avoid causing damage. Rinse the area with clean water using a garden hose to wash away any remaining soap.
For stubborn stains, consider a paste made from baking soda and water. Spread it onto the affected areas, allowing it to sit for at least thirty minutes before scrubbing with your brush. This method helps lift tough marks effectively.
Mix equal parts vinegar and water in a spray bottle for an eco-friendly cleaning option. Spritz the solution on the surface, letting it sit for a few minutes. Follow up with a thorough rinse. Vinegar’s natural acidity breaks down deposits without harsh chemicals.
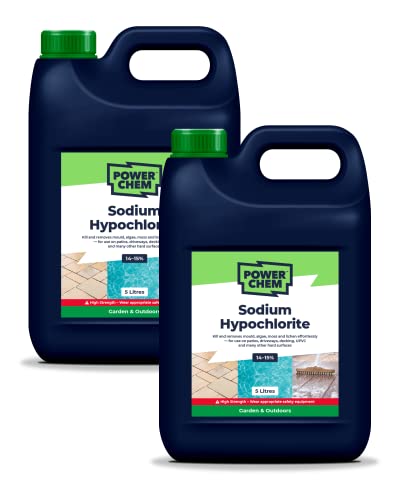
In cases of mould or mildew, a solution of bleach and water can be beneficial. Apply it cautiously, using protective gloves and eyewear. Allow the mixture to sit for a maximum of fifteen minutes before rinsing thoroughly to prevent damage to surrounding areas.
Regular maintenance is key. Wipe down the surface periodically with a damp cloth to remove dust and prevent the buildup of dirt, ensuring it remains in good condition over time.
Assessing the Condition of Your Exterior Surface
Start by closely inspecting the overall integrity of the surface. Look for cracks, crumbling mortar, or any missing sections. If you notice significant damage, consider repairs before any cleaning process. Small fractures can usually be treated with mortar repair, while larger issues may require professional attention.
Identifying Stains and Accumulations
Check for different types of stains such as mildew, algae, or soot. Each type requires a distinct approach for removal. For example, organic growth like moss may need a specific solution to tackle effectively. Take notes of any discolouration or debris build-up, as this will guide your choice of cleaning agents.
Evaluating Surrounding Environment
Observe the environment around the exterior. Overhanging trees or vegetation can contribute to moisture retention, leading to further staining and deterioration. Ensure to clear any obstructive elements and create a dry zone for better access. This assessment helps not only in devising a cleaning strategy but also in preventing future issues.
Gathering Necessary Cleaning Supplies
To achieve effective results, I recommend collecting the following items before embarking on your cleaning task. First, grab a stiff-bristle brush or a scrub brush with a long handle. This will allow you to reach various areas and ensure thorough scrubbing. Additionally, consider acquiring a bucket for mixing your cleaning solutions.
Recommended Cleaning Solutions
For an eco-friendly approach, mix warm water with white vinegar in equal parts. If you prefer something a bit stronger, a solution of water and dish soap works well for general grime. For tough stains, a mixture of baking soda and water creates a paste that can be applied to the affected areas before scrubbing.
Protective Gear

Don’t forget to equip yourself with gloves and safety goggles to protect your hands and eyes from splashes. Old clothes are also advisable, as the process may get messy. Finally, having a sponge or cloth on hand will help with rinsing and wiping down surfaces once you finish scrubbing.
Choosing the Right Cleaning Solution for Brick
Opt for a solution that balances strength and safety. A mix of warm water and mild dish soap can effectively tackle superficial grime. For deeper stains, white vinegar diluted with water works wonders, especially for organic marks like moss or mildew.
If you encounter stubborn spots, consider using baking soda combined with water to form a paste. Apply this directly to the stain and allow it to sit for a while before gently scrubbing. Avoid harsh chemicals such as bleach, as they can damage the surface and surrounding areas.
Ready-to-use solutions formulated specifically for masonry are another option. These products often contain ingredients that break down dirt while being safe for your surfaces. Always check the label to ensure compatibility with your material.
Remember, testing any cleaning agent on a small, inconspicuous area is essential before applying it to the entire surface. This ensures that you won’t inadvertently cause discolouration or damage.
Preparing Your Brick Surface for Cleaning

Remove any loose debris and dirt from the surface. Use a broom or a stiff brush to sweep away cobwebs, leaves, and dust. This step is crucial as it ensures that the cleaning solution can penetrate the surface effectively.
Inspect for damage before proceeding. Look for cracks or crumbling areas that may need special attention. Consider sealing these spots with a suitable masonry repair compound to prevent further deterioration during the cleaning process.
Safety Precautions
- Wear gloves and protective eyewear. This will protect against any cleaning solutions that could irritate the skin or eyes.
- Ensure the area is well-ventilated, especially if using powerful detergents.
Test for any historical treatments or sealants. Apply a small amount of your chosen solution in an inconspicuous area to check for adverse reactions or damage to the surface.
Handling Surrounding Areas
Cover plants, furniture, and other surfaces that could be affected by cleaning agents. Use plastic sheeting or old cloths to shield them from splashes and drips, minimising potential harm.
Prepare a plan for water runoff. If you’re using a bucket for application, think about where excess water will go to avoid any flooding or collection that could damage your property.
Applying Cleaning Solution to the Brick Surface
Begin by carefully pouring the chosen cleaning agent into a spray bottle or bucket. Use a spray bottle for better control, especially on vertical surfaces. If you’ve opted for a bucket, mix the solution with water according to the manufacturer’s instructions before proceeding.
Standing approximately 30 cm away, spray the cleaning mixture evenly across the surface. Ensure that you cover all areas, with a focus on heavily stained spots. Allow the solution to penetrate for at least 10 to 15 minutes; this enhances its ability to break down soil and grime.
For stubborn marks or embedded dirt, gently scrub the area with a soft-bristle brush. Apply moderate pressure, being cautious not to damage the texture. Work in sections, ensuring that the mixture remains moist during this phase–reapply if necessary.
After scrubbing, rinse the surface thoroughly with clean water. A garden hose works well for this task. Ensure that all residues of the cleaning solution are removed to prevent any potential discolouration over time. Double-check that the area is free from any remnants before it dries.
For larger surfaces, consider using a sponge mop for efficiency. This tool can help cover more ground quickly while allowing for precise application of the cleaning solution. Follow the same principles of spraying, scrubbing, and rinsing.
In case of particularly tarnished sections, multiple applications may be required. Be patient–this process can take time, but the end result will showcase the original beauty of your masonry.
Scrubbing Techniques for Stubborn Stains
For persistent blemishes, a strong scrubbing approach is necessary. I recommend using a stiff-bristled brush or nylon scrubber for this task. Start by applying your chosen cleaning solution directly to the affected area. Allow it to penetrate for a few minutes to soften the grime.
Technique Comparison

| Technique | Description | Best For |
|---|---|---|
| Circular Motion | Scrub in small circles to lift off dirt. | Small spots and build-up |
| Back and Forth | Move the brush horizontally and vertically to cover more area. | Large stains |
| Up and Down | Use a vertical motion to remove tall build-up. | Vertical surfaces |
Ensure you apply even pressure to avoid damaging the surface while scrubbing. For extremely tough marks, consider repeating the process or switching to a more potent solution, but always test a small section first to prevent potential damage.
After scrubbing, rinse the area thoroughly with clean water to remove any residual cleaning agent. This step is crucial to avoid any discolouration over time. Follow up with a soft cloth to absorb excess moisture and give your surface a clean finish.
Finishing Touches and Preventative Care

After completing the cleaning process, it’s vital to give the surface a thorough inspection. Look for any remaining spots or stains that may require additional attention. If needed, spot-treat those specific areas with a suitable solution and a soft brush.
Sealing the Surface
Applying a sealant can significantly enhance durability and protection. Choose a breathable, water-repellent product formulated for porous materials. This will prevent moisture penetration, further staining, and the growth of mould or mildew.
Routine Maintenance Tips

- Schedule regular inspections every few months to identify any signs of discolouration or damage early.
- Use a stiff-bristled brush and mild detergent for light cleaning as needed, especially after severe weather.
- Avoid using harsh chemicals that can compromise the surface integrity.
- Clear away debris, such as leaves or soil, to minimise organic growth on the surface.
Staying consistent with these practices will aid in prolonging the freshness and appearance of your masonry surface, ensuring it remains an appealing feature of your property for years to come.


