

Begin with gathering the right supplies: a mix of automotive soap, soft brushes, microfiber cloths, and a hose with a gentle spray nozzle. This approach effectively removes grime and dirt without the risk of damaging sensitive components.
Remove all loose debris using a soft brush or vacuum. Pay special attention to crevices where dirt accumulates. For stubborn spots, a solution of soap and warm water will be your best ally. Gently scrub affected areas with a soft brush, ensuring to reach into tight spots.
After scrubbing, rinse the surfaces with a hose on low pressure. This helps eliminate residual soap and dirt without flooding electronic parts. Use a microfiber cloth for drying, which prevents water spots and protects finishes. Consider applying a protectant for added shine and to repel dirt in the future.
Technique for a Pristine Motor Compartment
Utilise a damp microfiber cloth coupled with an all-purpose cleaner for a thorough approach. Spray the cleaner on particularly dirty areas, allowing it to penetrate for several minutes. Wipe with the cloth, rotating it frequently to avoid spreading grime.
Tools Required
Gather a soft-bristle brush, a vacuum with a nozzle attachment, and a plastic bag to cover sensitive components. The brush facilitates the removal of stubborn residue, while the vacuum aids in capturing debris from crevices.
Steps to Follow
First, disconnect the battery to prevent potential electrical issues. Proceed by vacuuming loose dirt and debris. Then, apply the cleaner and let it rest, followed by scrubbing with the brush in tight spots. For polishing, a detailing spray can be employed on plastic and metal surfaces. Finally, ensure all components are dry before reconnecting the battery.
Gathering Necessary Cleaning Supplies

Begin by collecting specific items to ensure a thorough job. Here’s a concise list of what you will need:
| Item | Purpose |
|---|---|
| Soft-bristle brush | Ideal for scrubbing without causing scratches on delicate surfaces. |
| Microfibre cloths | For wiping surfaces to avoid lint and scratches. |
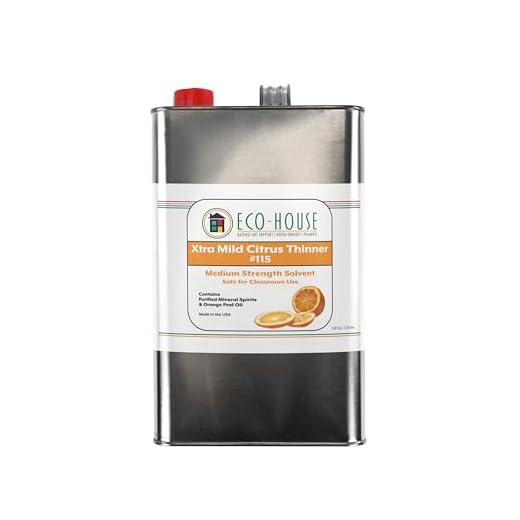
| Citrus-based degreaser | Effectively dissolves grease and grime. |
| Bucket | For mixing cleaning solution and rinsing tools. |
| Garden hose | Useful for rinsing off surfaces with moderate water flow. |
| Protective gloves | To safeguard skin from chemicals and dirt. |
| Plastic bags or covers | To protect sensitive components from moisture. |
Consider having a variety of brushes on hand, such as an old toothbrush for tight spots and an extending brush for hard-to-reach areas. Always prepare a safe workspace by ensuring all electronics are covered, and gather everything before you start for a smooth process.
Preparing the Engine Compartment for Tidying
Begin by securing the vehicle and ensuring that the ignition is turned off. This simple step prevents electrical issues and accidents. Disconnect the battery, starting with the negative terminal to minimise risks. This protection is vital for sensitive components within the engine compartment.
Next, cover critical areas with protective materials. Use plastic bags or cling film to shield the alternator, airflow sensor, and any exposed wiring. This tactic safeguards them from moisture and cleaning agents, preserving functionality.
Additionally, inspect for loose items or debris that may obstruct your efforts. Remove any obstructions like leaves or twigs, as they can muddy your cleanup routine and impact visibility. A thorough examination promises a more effective approach.
Assess the condition of hoses, belts, and connectors. Any signs of wear or damage should prompt careful consideration. Repairing or replacing faulty components before starting ensures a smoother experience during the tidying process.
Finally, wear appropriate protective gear. Gloves, goggles, and a face mask prevent exposure to dirt, chemicals, and contaminants. Proper attire enhances safety and comfort while working in confined spaces.
Choosing the Right Cleaning Solutions

Select biodegradable degreasers for their eco-friendly composition and effectiveness in breaking down grime. Look for products that specifically list compatibility with automotive components to ensure safe usage.
For stubborn stains, consider using citrus-based cleaners. These naturally derived solutions cut through oil and dirt while leaving a pleasant scent. Always test on a small area first to prevent potential damage.
A good all-purpose cleaner can be versatile for various surfaces under the hood, such as plastic, metal, and rubber. Make sure it does not contain harsh chemicals that could compromise sensitive components.
For enhanced results, choose foaming cleaners that cling to vertical surfaces, allowing more time for the solution to work on the contaminants before rinsing away.
Don’t overlook the importance of detailing brushes and soft cloths for applying and buffing the cleaning agents. These tools help to reach tight spots and prevent scratching delicate areas.
Always read labels and safety instructions. Protective gear, such as gloves and goggles, ensures personal safety while applying these products.
Applying Cleaning Products Safely
Before using any cleaning solution, adhere to these safety guidelines to protect yourself and your vehicle components.
- Protective Gear: Don gloves, safety goggles, and a mask to prevent irritation from chemicals.
- Read Labels: Carefully check instructions on product labels to ensure correct application.
- Ventilation: Work in a well-ventilated area to avoid inhaling fumes, particularly with harsh products.
- Test Surfaces: Conduct a patch test on a small area to check for adverse reactions before full application.
- Keep Away from Sensitive Components: Avoid direct contact with electrical parts and sensitive materials, which may deteriorate with improper substances.
- Mix Carefully: If diluting, always add the cleaner to water, not the other way around, to prevent splashing.
- Storage: Store all cleaning solutions in a cool, secure location away from sunlight and out of reach of children or pets.
By following these practices, one can ensure a safer and more effective cleaning process. Prioritising safety not only safeguards your health but also helps maintain the integrity of the vehicle components.
Manual Techniques for Thorough Dirt Removal

For optimal results, utilise a few tried-and-true methods that focus on elbow grease and proper tools. Here are essential techniques to ensure a deep cleanse:
- Soft Brushes: Equip yourself with various sizes of soft-bristled brushes. The smaller brushes can reach tight spaces while larger ones are perfect for broad areas. Gently scrub surfaces to dislodge accumulated grime.
- Microfibre Cloths: Use microfibre cloths for wiping down surfaces. These cloths are absorbent and will trap dirt effectively, preventing scratching of sensitive parts.
- Detailing Brushes: Invest in detailing brushes to clean intricate areas, like around wires and hard-to-reach components. Their narrow design allows for precision cleaning.
- Sponges: A durable sponge can tackle tougher residues. Make sure to choose non-abrasive options to avoid damaging sensitive components.
- Suction Tools: A shop vac or similar device can assist in removing loose debris and dirt. Focus on surfaces where dust and soil accumulate.
- Scrapers: For stubborn grime, use plastic or wooden scrapers to avoid scratching any parts. These tools can efficiently lift hardened dirt without causing damage.
- Bucket and Water: Prepare a bucket with warm water mixed with a suitable cleaning solution. Regularly rinse your brushes and cloths in this solution to maintain effectiveness and avoid spreading grime.
Implement these hands-on techniques to achieve a thorough cleaning, keeping various components in mind and treating them delicately.
Finishing Touches and Maintenance Tips
After achieving a clean and tidy space, it’s crucial to take steps that enhance the longevity and appearance of components. Begin by inspecting all visible parts for any dirt or debris that may have been missed. A soft, dry cloth is ideal for wiping down surfaces, ensuring no residue remains that could attract further grime.
Applying Protectants

Consider using a silicone spray or a plastic conditioner to protect plastic components. This creates a barrier against moisture and dirt accumulation, keeping surfaces looking fresh and new for longer. Apply a small amount to a microfiber cloth, then gently wipe over the plastic areas for an even finish.
Regular Maintenance Schedule

Establish a routine for routine upkeep. Setting reminders every few months helps maintain cleanliness and identify potential issues before they escalate. A quick visual check and wipe-down can prevent build-up over time. Regular inspections also allow for early detection of leaks or wear, maintaining overall functionality and appearance.


