


Gather the necessary tools: a wrench set, a screwdriver, and carburettor cleaner. Start by disconnecting the spark plug wire for safety. This prevents any accidental starts while you’re working. Remove the fuel tank and drain any remnants of fuel to avoid spills. Detach the mechanism from the engine by unfastening the mounting screws.
Inspect the assembly for any visible signs of wear or clogging. Especially check the jets and passages, as these are often the culprits for performance issues. Use compressed air and the cleaning fluid to clear any obstructions effectively. Make sure all components, including gaskets and seals, are in good condition. If they show deterioration, it’s wise to replace them to ensure a perfect fit and prevent leaks later.
Once thoroughly refreshed, reassemble all parts in reverse order. Ensure every connection is tight to inhibit any air leaks during operation. After reinstallation, refill the tank with a high-quality fuel mix and reconnect the spark plug wire. Conduct a test run to ensure everything functions smoothly. Regular maintenance of this type will extend the lifespan and efficiency of your cleaning device significantly.
Procedure for Maintaining the Fuel System Component
Utilise a proper wrench to detach the assembly from the engine while ensuring the fuel supply is turned off. Carefully detach any attached linkages, taking meticulous care to observe their arrangement for easy reassembly.
With the assembly removed, prepare a clean workspace to prevent contamination. Use a suitable cleaning solvent specifically designed for fuel components. Apply the solvent generously to the exterior and internal parts, allowing it to work on any residues accumulated over time.
Disassembly and Examination
Proceed with disassembling the unit by removing screws and clips with precision. Inspect each part for wear or damage; make note of any components that may require replacement. Pay special attention to the jets and needle valves, as blockages here can hinder performance significantly.
Utilise a small brush or compressed air to clear any debris from the jets and channels thoroughly. Reassess the throttle and choke mechanisms to ensure they operate smoothly, providing proper airflow when the machine is in use.
Reassembly and Testing
Once all components have been cleaned and examined, reassemble the unit in reverse order. Ensure all screws and clips are tightened securely to prevent future leaks. It’s advisable to replace any gaskets or O-rings to maintain optimal sealing.
Reconnect the assembly to the engine and refill the fuel tank if necessary. Start the equipment to check for smooth operation. Monitor for any unusual sounds or leaks, making adjustments as needed to achieve an efficient running state.
Understanding the Role of the Carburettor in Your Cleaner
The carburettor mixes fuel and air, creating a combustible mixture that powers the engine. Its design allows for precise control over this mixture, which directly impacts performance and efficiency. If this component doesn’t function well, the engine may struggle to start or operate smoothly.
A characteristic feature of carburettors is their float chamber. It maintains a consistent fuel level, ensuring that the engine receives an adequate supply. A malfunction here can lead to flooding or starvation of fuel, both of which can hinder operations.
Fine-tuning the air-fuel ratio is another critical role of the carburettor. An optimal mix allows for cleaner combustion, reducing emissions and enhancing output. Understanding how to adjust this can greatly improve your equipment’s effectiveness and longevity.
Many carburettors come equipped with adjustment screws for this purpose. Timing the adjustments with engine operation can reveal how sensitive the machine is to changes, enabling you to find the perfect balance for your specific requirements.
Additionally, various components like jets and diaphragms within the carburettor are susceptible to debris or wear. Regular attention to these parts can prevent performance drops and costly repairs down the line.
A well-maintained carburettor directly correlates with the reliability of the entire setup. Familiarising oneself with its operation empowers users to troubleshoot and resolve issues that may arise during use, thus extending the useful life of the cleaner.
Gathering the Necessary Tools and Supplies for Cleaning
Ensure you have the following tools and supplies ready before proceeding with the task:
- Flathead screwdriver – for loosening screws and clamps.
- Phillips screwdriver – for various fasteners commonly used in assembly.
- Socket set – essential for removing bolts and securing components.
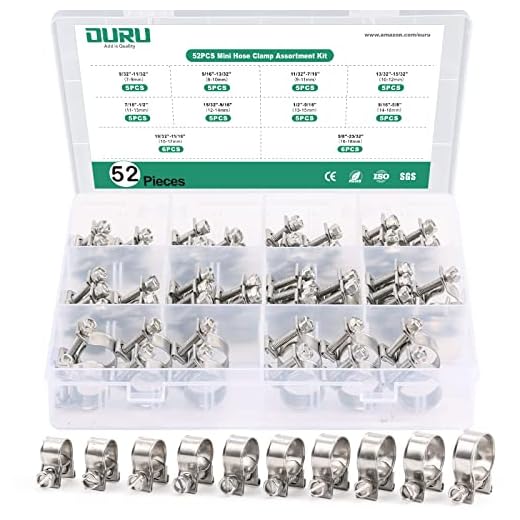
- Fuel line clamp – prevents spillage of fuel during disassembly.
- Clean cloths or rags – useful for wiping surfaces and soaking up fuel.
- Safety goggles – protects your eyes from debris and cleaning solutions.
- Gloves – keeps hands clean and safe from harmful substances.
- Carburettor cleaner spray – effective in dissolving deposits and dirt.
- Soft brush – for scrubbing difficult-to-reach areas.
- Compressed air canister – used for blowing out debris from intricate components.
Having these items on hand simplifies the process and ensures I can address any issues that may arise. I recommend testing the compatibility of all tools with your specific model to avoid any complications. Being adequately prepared saves time and effort.
Safely Disassembling the Carburetor from the Pressure Washer
Ensure the equipment is completely off and unplugged before starting. Remove the fuel tank cap to relieve any pressure. It’s crucial to let any residual fuel drain away from the system in a well-ventilated area.
Begin disassembly with a socket or screwdriver, depending on the specific fasteners used on your unit. Carefully remove the housing that encases the mechanism, while keeping track of any small components such as screws and gaskets. A magnetic tray can be very helpful to organise these parts.
Next, disconnect the throttle linkage, taking care not to damage it. This component often has a clip or a screw that must be removed. Documenting your steps or taking photos can aid in reassembly.
Detaching the fuel lines should be done with caution. Always wear gloves, and have rags on hand to quickly manage any spills. Use a wrench to carefully loosen the fittings; do not yank them off as that can cause damage. Ensure the fuel line is clear of contaminants.
Once the assembly is free, inspect the gaskets and O-rings. If they appear worn or damaged, replace them before reassembly to maintain a proper seal. It’s advisable to keep a replacement kit handy for such components.
Store the disassembled parts in a clean area to avoid contamination. This will facilitate a smoother cleaning and reassembly process. Typically, less clutter leads to fewer mistakes.
| Step | Action |
|---|---|
| 1 | Ensure equipment is off and unplugged. |
| 2 | Remove the fuel tank cap and drain excess fuel. |
| 3 | Use the appropriate tool to unscrew the housing. |
| 4 | Disconnect the throttle linkage carefully. |
| 5 | Loosen and remove the fuel lines with caution. |
| 6 | Inspect and replace gaskets and O-rings if necessary. |
| 7 | Store disassembled parts in a clean area. |
Inspecting the Carburetor Parts for Damage and Wear

Start by carefully examining the body of the assembly for cracks or signs of corrosion, which can lead to air leaks and fuel mixture issues. Look closely at the gasket seals; these components often degrade over time, resulting in improper sealing. If they appear brittle or damaged, replacing them is advisable.
Check the float for any signs of sticking or wear. A malfunctioning float can disrupt fuel delivery, causing performance problems. Ensure the needle valve operates freely and doesn’t show signs of scoring, which can prevent it from sealing correctly.
Investigate the jets and passageways for blockages. Use a fine wire or compressed air to clear any debris. Ensure that the openings are intact; any distortion can affect fuel flow. Pay attention to the diaphragm if present; tears or hardening can compromise operation and must be replaced.
Finally, inspect the linkage and throttle for smooth movement. Any stiffness can indicate wear in the pivot points or linkage, potentially leading to throttling issues. Testing this component ensures the engine operates at the desired RPM during use.
Step-by-Step Cleaning Process for the Carburetor Components
Disassembling and preparing the components is crucial. Follow these steps:
- Use a clean workspace with adequate lighting.
- Ensure all components are placed in a designated area to prevent loss.
- Utilise a parts tray or magnetic mat to keep small elements secure.
Proceed with the following detailed steps:
- Remove the float bowl. Unscrew bolts carefully and set them aside.
- Take out the float and needle valve. Inspect these parts for wear and contaminants.
- Examine the jets and passageways. Blockages can often be found here.
For cleaning:
- Use a soft brush to remove debris from surfaces.
- Soak parts in a suitable cleaning solution for optimal results.
- Employ compressed air to blow out any remaining residue from small openings.
Reassembly instructions include:
- Fit the needle valve securely back into position.
- Reattach the float ensuring it moves freely.
- Carefully reattach the float bowl and tighten bolts evenly.
After reassembly, it’s advisable to run a quick operational check. Monitor for any leaks or disturbances during the first use to ensure everything functions as intended.
Reassembling the Carburetor Correctly After Cleaning

Begin with a clean workspace to avoid contamination of components. Ensure all parts are dry and free of debris before reassembly.
Steps for Reassembly

1. Align all the elements according to the schematics. Refer to manufacturer guidelines if available. Use a light coat of clean oil on seals.
2. Install any gaskets carefully to prevent leaks. Ensure there are no wrinkles or folds that could hinder performance.
3. Reinsert the jets and ensure they are seated tightly but not overly stressed to avoid deformation.
4. Reattach the float assembly. Check that it moves freely. Adjust the float level according to specifications if necessary.
5. Secure the main body of the unit using the original screws, tightened evenly to avoid warping.
Final Checks

Confirm that all connections are secure. Check for any irregularities or loose fittings. Clear any excess residue, as it may affect operation.
When everything is in place, reconnect it to the power source, ensuring safety protocols are followed. Perform a brief test to confirm that the components are functioning smoothly.
| Component | Reassembly Tip |
|---|---|
| Gaskets | Ensure no distortion during placement. |
| Jets | Tighten without overtensioning. |
| Float Assembly | Adjust for optimal fuel level. |
| Screws | Tighten in a criss-cross pattern. |
Testing Your Pressure Cleaner After Carburettor Maintenance
After reassembling, it’s crucial to conduct a thorough assessment. Start by reconnecting the fuel lines and ensuring there are no leaks. Check that all clamps and screws are secure. Turn the fuel valve on and prime the engine if your model requires it.
Attempt to start the engine, monitoring for smooth operation. If it sputters or fails to start, double-check your assembly and troubleshoot areas where you may have missed a connection or left debris in the air pathways. Pay attention to the exhaust for unusual sounds, as this can indicate improper combustion or air-fuel mix issues.
Once running, allow the engine to warm up, watching for consistent idle. If there are fluctuations, consider further cleaning or adjustment of the mixture settings. Perform a short test run using a low-pressure setting to ensure functionality. During this phase, verify that water flows steadily and that the spray pattern is even.
Finally, test at higher pressure to confirm performance. Ensure that it operates effectively through various settings. Listen for any irregular noises, and check your surroundings for leaks. If everything checks out, you’re ready to tackle your cleaning tasks with confidence.
FAQ:
What are the signs that the carburettor of my petrol pressure washer needs cleaning?
Common signs include difficulty starting the engine, irregular idling, loss of power during operation, and excessive fuel consumption. If you notice a build-up of dirt or debris around the carburettor or difficulty in maintaining consistent pressure while washing, these may also indicate a need for cleaning.
What tools and materials do I need to clean the petrol pressure washer carburettor?
To clean the carburettor, you will need basic tools like a screwdriver set, a wrench, and a clean cloth. Additionally, have carburettor cleaner, compressed air (optional), and a small bowl for holding screws and parts during the disassembly. Safety goggles and gloves are recommended to protect yourself while working with fuel and cleaning agents.
Can I clean the carburettor without disassembling it completely?
Yes, you can clean the carburettor without fully disassembling it by using a carburettor cleaner spray. Spraying the cleaner into the air intake while the engine is running can help remove some of the grime. However, for a thorough cleaning, especially if there is significant build-up, complete disassembly is recommended to ensure all components are cleaned properly and to prevent future issues.
How do I reassemble the carburettor after cleaning it?
After cleaning, ensure all components are dry. Start by placing the gasket back in its correct position. Align the main body of the carburettor with the float assembly, making sure all pins and clips are positioned correctly. Once aligned, reattach the screws in the reverse order of disassembly, ensuring everything is snug but not overly tight to avoid damaging the parts. Finally, reconnect any fuel lines and hoses before reattaching the carburettor to the engine.


