


Utilising the right technique is crucial for achieving remarkable results. First, ensure you have the appropriate nozzle: a 25-degree or 40-degree tip is ideal for wood surfaces. Avoid narrower nozzles, as they can cause damage.
Preparation is key. Clear the area of furniture and debris, then sweep off any loose dirt. It’s beneficial to mist the surface lightly before beginning; this helps to prevent the wood from absorbing too much water too quickly.
When you start the task, maintain a consistent distance of 12 to 18 inches from the surface, moving the nozzle in long, even strokes. Overlap your passes slightly to avoid streaks. For stubborn stains, pre-treat affected areas with a suitable cleaner and allow it to sit for a few minutes before rinsing.
Finish by rinsing the area with clean water. Allowing the timber to dry properly is vital before applying any oils or sealants to protect it from the elements in the future. Following these steps will rejuvenate your outdoor wood, enhancing its appearance and longevity.
Ensuring Immaculate Timber Surfaces
Select a nozzle with a wide fan spray for even distribution, helping prevent gouges in the fibre. A 25-degree or 40-degree nozzle is ideal, balancing pressure and area coverage.
Conduct a test on a small, inconspicuous area to gauge the impact before proceeding on the entire surface. Adjust the distance between the lance and boards; maintaining 12 to 18 inches will safeguard the material.
Pre-soak the area using a cleaning solution specifically formulated for outdoor surfaces. Allow it to penetrate for at least 10-15 minutes, loosening dirt and grime effectively.
Begin at one end and work methodically across to the other, keeping a consistent motion. This eliminates streaks and uneven spots. Avoid lingering too long on one location to prevent potential damage.
After the initial pass, inspect for remaining stains or spots. Repeat the process on stubborn areas, adjusting the angle slightly for improved penetration.
After finishing, rinse thoroughly with plain water. Ensure all cleaning agent residue is removed to prevent future discolouration or degradation of the material.
For optimal upkeep, consider annual maintenance using this technique to enhance longevity and appearance.
| Parameter | Recommended Setting |
|---|---|
| Nozzle Type | 25-degree or 40-degree |
| Distance from Surface | 12 – 18 inches |
| Soaking Time | 10 – 15 minutes |
| Rinsing Technique | Thoroughly rinse, ensuring no residue |
Investing in quality equipment will yield better results and simplify maintenance over time. Regular checks and prompt attention will preserve aesthetic appeal and structural integrity.
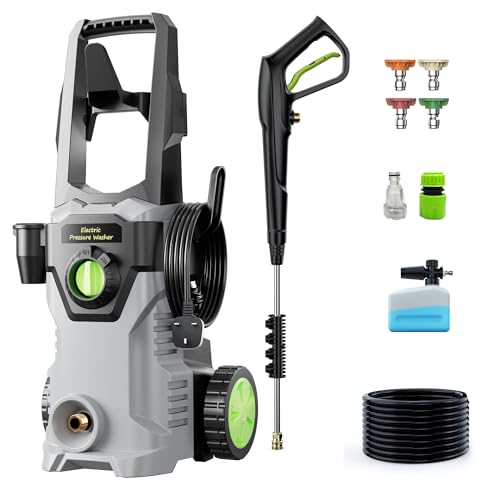
Selecting the Right Pressure Washer for Your Deck


For optimal outcomes, choose a unit with an adjustable pressure setting between 1500 and 2500 PSI. This versatility caters to various cleaning tasks while preventing damage to softer surfaces.
Evaluate the flow rate, measured in litres per minute (LPM). Aim for at least 8 LPM to ensure efficient removal of dirt and grime. The higher the flow, the quicker the job gets done.
Consider the type of motor. Electric models are quieter, easier to handle, and suitable for lighter tasks. Gas-powered variants provide higher pressure and are ideal for extensive areas or more stubborn stains.
Look for a unit equipped with various nozzles. A rotating nozzle provides a concentrated stream for tough spots, while a wider spray option is great for larger areas.
- Portability: Weigh the machine’s weight and design. Lightweight and ergonomic options ease transport and usability.
- Durability: Check materials used in construction. Robust plastic or metal frame ensures longevity.
- Battery Life: For cordless selections, assess battery capacity for sufficient runtime during use.
Lastly, read reviews and recommendations. Insights from other users provide valuable information on performance and reliability. Brands like Karcher, Ryobi, and Nilfisk stand out due to their proven track records in the market.
Preparing Your Deck for Cleaning
Prior to starting the cleaning process, it’s crucial to remove all furniture, plants, and other items from the surface. This ensures unobstructed access and prevents any damage to your belongings. Use a soft broom to sweep away debris, leaves, and dirt that may have accumulated.
Inspect for Damage
Carefully examine the area for any signs of deterioration, such as splintered wood or loose boards. Address these issues before proceeding; they can affect the results and safety during the cleaning. Replace or repair any damaged sections as needed.
Prepare the Surrounding Area
Protect nearby surfaces by covering plants, outdoor furniture, and other items that might be affected by water or cleaning solution. Lay down tarps or plastic sheets to catch runoff and ensure that your surrounding environment remains unscathed.
Choosing the Appropriate Cleaning Solution

Select a solution specifically formulated for natural materials to safeguard the integrity of your outdoor surface. Avoid harsh chemicals or bleach, which may cause discolouration or damage to the finish. Biodegradable products are a preferable choice as they are gentle yet effective against dirt and grime.
Types of Cleaning Solutions
Oxygen bleach is an excellent choice for its deep-cleaning properties without risking harm to the surface. Look for organic options or those with natural ingredients, which provide effective cleaning while being eco-friendly. Sometimes, a simple mixture of vinegar and water can suffice for light stains or mildew.
Application Recommendations
Apply the chosen solution to dry boards before rinsing. Allow it to sit for the recommended contact time to break down grime effectively. For heavily stained areas, agitation with a brush helps, ensuring even coverage. Always follow the manufacturer’s instructions for optimal results.
Test any solution in a small, inconspicuous area first to analyse its impact before full application. This way, you can ensure compatibility without risking damage to the longer stretches of your surface.
Setting Up the Pressure Washer for Optimal Use
Begin by placing your device on a flat surface, ensuring stability during operation. Check the fuel level if using a gas-powered model; refill if necessary. For electric versions, confirm a suitable power outlet is accessible, and use an extension cord rated for outdoor use if needed.
Next, attach the garden hose securely to the inlet. Ensure the connection is tight to prevent leaks. Turn on the water supply fully to avoid any interruptions during cleaning. Prime the system by squeezing the trigger on the gun until water flows steadily from the nozzle.
Select the appropriate spray nozzle; generally, a 25-degree or 40-degree tip works well for most surfaces. Attach the nozzle firmly, ensuring it snaps into place. If your machine includes adjustable pressure settings, set to a mid-range option to start.
Before starting, double-check all connections including the high-pressure hose and trigger gun to ensure security. Make sure the safety lock on the trigger is engaged until you are ready to begin operation. This step protects against accidental discharge.
Familiarise yourself with the controls; understanding how to adjust pressure on the go can prevent damage to the exterior while optimising cleaning efficiency. Practice a few test sprays on an inconspicuous area to adjust settings and get a feel for the equipment.
Executing the Cleaning Process Step-by-Step

Begin by removing any furniture, pots, or decorations from the area. This ensures a clear path for the cleaning process and protects your belongings.
Next, sweep away debris, including leaves and dirt. This helps to prevent clogs in the machinery and allows for a thorough deep cleanse.
After that, set the unit to a lower pressure setting, typically around 1200 to 1500 PSI. Start from one corner and gradually work your way across the surface. Maintain a distance of approximately 12 to 18 inches from the boards to avoid damage.
Use a steady sweeping motion, moving the nozzle side to side. Avoid staying in one spot for too long to prevent water pooling, which can lead to warping.
Should you encounter stubborn stains, pause and apply the chosen cleaning solution. Allow it to dwell for a few minutes before rinsing again.
To effectively rinse, switch to a wide-angle nozzle to ensure even distribution of water. This prevents streaking and helps remove any remaining cleaning product.
Finally, let the surface dry completely. This step is crucial before replacing any furniture or applying sealants for added protection.
Post-Cleaning Maintenance for Wooden Surfaces
After removing dirt and grime, it’s crucial to protect the surface for longevity. My top recommendation is to apply a high-quality sealant or wood preservative within a few days post-wash. This creates a barrier against moisture and UV damage, significantly extending the life of your structure.
Check the weather forecast before application; aim for a day with no rain anticipated for at least 24 hours. Ensure the surface is completely dry before sealing to prevent trapping moisture underneath.
Routine maintenance is key. Regularly inspect the surface for signs of wear, such as splintering or fading, ideally every season. Promptly address any issues. Sand rough patches to maintain a smooth finish and touch up sealant in areas that show signs of wear.
To sustain the aesthetics and integrity, consider periodic cleaning using a mild detergent and soft brush, steering clear of harsh chemicals that might damage the finish. Plan for re-sealing every one to three years, depending on exposure to elements.
Lastly, nature has its way of accumulating debris. Sweep or brush the surface to remove leaves and dirt regularly, preventing mould growth and staining. This simple habit can save time and effort in more extensive maintenance later on.


