Carefully align the attachment point of the wand with the outlet on your cleaning unit. Make sure that there are no obstructions and that all parts are clean. This step is critical for achieving a proper fit.
Once aligned, press firmly until you hear a click or feel it securely lock in place. This ensures that the connection is tight and will not loosen during operation, preventing any mishaps.
After securing the wand, check the hose connections to ensure there are no leaks before turning on the device. This will allow you to operate without interruptions and achieve optimal performance during your cleaning tasks.

Always refer to the user manual for your specific model, as variations in design may exist across different brands. Familiarity with your unit contributes to a safer and more effective cleaning experience.
Attaching the Telescopic Device to Your High-Pressure Cleaner
To achieve a secure attachment, first ensure that the unit is powered down and disconnected from the electric source or water supply. This guarantees safety during the process.
- Locate the quick-release mechanism on the end of the cleaning extension.
- Align the attachment point of the equipment with the connector on the device.
- Firmly insert the extension until you hear a click, indicating a secure fit.
After securing, double-check the connection by gently tugging on the extension; it should not come loose. Next, attach the other end of the extension to the spray handle. This typically involves a similar quick-release mechanism.
- Ensure the connection point is clean and free from debris.
- Align the handle with the designated connector and push firmly until you hear that confirming click.
Before activating the system, inspect all joints for any signs of leaking or misalignment. Once confirmed, power on your equipment. Perform a test spray at a safe distance to ensure everything is functioning correctly.
Consider using adjustable settings to tailor the water flow to suit various tasks. Remember to regularly check the integrity of connections and seals after extended use to maintain optimal performance.
Identify Compatible Karcher Telescopic Lance Model
To ensure optimal compatibility, start by looking for specific model indicators. Many units from the brand display a compatibility logo or model number on their packaging or user manual. Always refer to the product specifications to confirm that the extension accessory aligns with your machine.
Check Model Number
Locate the model number on your device, usually found on the sticker or plate. This identifier helps you find the correct extension model. The initials might indicate a series; for instance, the K Series is compatible with a particular range of lances.
Research Online Resources

Online forums and the manufacturer’s website can be invaluable. Users often share their experiences with various attachments, helping to eliminate any uncertainties regarding compatibility. Additionally, consult product guides which often list compatible accessories for various models.
By confirming the model number and utilising online resources, you can easily identify the appropriate extension accessory that meets the requirements of your cleaning equipment.
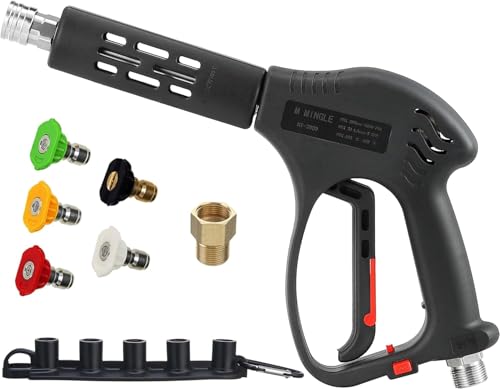
Check Required Accessories for Connection
Before attempting a linkage, ensure you have the necessary components at hand. Typically, you’ll need a compatible adapter to bridge the gap between the cleaning equipment and the extension tool. Verify that this accessory is designed to fit your specific model.
Examine the coupling fittings closely. Most devices come with standard female and male connections; ensure they match. If not, consider purchasing a converter to rectify any size discrepancies.
Don’t overlook the importance of sealing rings. These small but significant pieces provide a watertight seal, preventing leaks during operation. Check that they are intact and replace any damaged seals to maintain optimal performance.
In some cases, a quick-release mechanism can aid in seamless attachment and detachment. If your gear lacks this feature, you might benefit from an upgrade for ease of use in the future.
Lastly, have a lubricant on hand. A small application on the threads can facilitate smooth connections and prolong the lifespan of the components by reducing wear and tear.
Prepare the Equipment for Attachment

Ensure the unit is turned off and disconnected from the power source. This is crucial for safety and prevents accidental operation while adjusting components.
Next, examine the water inlet for blockages or debris. A clear pathway is vital for optimal flow during use.
Check the hose connections for cracks or wear, replacing any damaged parts to maintain pressure and efficiency.
Fill the water tank, if applicable, offering adequate supply for extended tasks. Use clean water to prevent sediment accumulation within the machine.
Verify the chemical reservoir is empty if your model includes one, ensuring that the system operates solely with plain water for a straightforward attachment process.
Finally, conduct a brief inspection of the nozzle and existing fittings. Ensure they are clean and free from any obstruction that might hinder the connection of new equipment.
Attach the Telescopic Lance to the Pressure Washer
Align the connector on the lance with the inlet of the machine. Ensure that both components are clean and free from debris to avoid damage and ensure a proper seal. With a firm push, insert the lance until it clicks into place, indicating a secure attachment.

Secure the Connection

To enhance stability, twist the locking mechanism, if available, to prevent accidental disconnection during operation. Double-check that the assembly feels rigid and does not wobble. This will help maintain consistent water pressure and efficiency.
Perform a Quick Test
Before starting extensive cleaning, turn on the device and briefly activate the lance to check for any leaks and ensure the water flows smoothly. If there are any issues, disconnect and inspect the seals again. Proper attachment is critical for optimal performance.
Test the Connection for Leaks
After securing the attachment, it’s crucial to check for any signs of leaks. This step ensures a reliable and safe operation of your equipment. Begin by turning on the device and allowing it to build up pressure. Pay close attention to the joint where the extension meets the main unit.
Conduct a visual inspection for water drips or splashes. If you notice leakage, assess whether the components are properly tightened. A simple twist may resolve minor issues. However, if leaking continues, consider inspecting the seals and O-rings for wear or damage.

| Inspection Step | Action |
|---|---|
| Turn on the unit | Activate the equipment to pressurise the system |
| Visual check | Look for any escaping water at connection points |
| Tightening | Adjust fittings if leaks are detected |
| Seal check | Examine and replace damaged seals or O-rings |
Performing this test not only prevents water wastage but also safeguards the longevity of the equipment. Once satisfied with the assessment and after making any necessary adjustments, proceed with your cleaning tasks confidently.
Adjust the Lance for Optimal Use


Position the extension tool at the desired length based on your cleaning task. For high-reach areas, fully extend the apparatus to maximise your reach without compromising stability. Conversely, for ground-level cleaning, shorten it to enhance control and precision.
Angle Adjustment
Utilise the adjustable nozzle settings to alter the spray angle. A narrower spray is ideal for tough, embedded dirt, while a broader angle suits general cleaning tasks. Constantly assess the effectiveness and adjust accordingly for best results.
Force Regulation
Monitor and regulate the water pressure settings on the machine. Higher pressure should be employed for stubborn stains or surfaces, such as concrete, while lower settings are suitable for sensitive materials like wood or painted surfaces. Always test on a small, inconspicuous area first.
- Ensure secure locking of all adjustable features after configuration to prevent accidental changes during operation.
- Regularly check for signs of wear or damage on connection points; replace components as needed to maintain optimal performance.
- After adjustments, perform a quick spray test to confirm that the desired pattern and pressure are achieved before commencing full cleaning.
Adjust the lance methodically to suit different tasks, and you’ll notice a significant improvement in both efficiency and effectiveness during your cleaning sessions.
Maintain the Telescopic Lance After Use
After every cleaning session, it’s vital to take care of your extended tool for longevity. Begin by disconnecting it from the equipment, ensuring no water pressure remains. This prevents accidental activation and extends the life of the component.
Cleaning the Lance
Rinse the lance with clean water to remove any residual dirt, detergent, or debris. Pay close attention to the nozzle and any attachments. A gentle brush can help dislodge stubborn particles without scratching surfaces. Ensure there are no clogs that may affect performance in future uses.
Storage Recommendations
Store the lance in a cool, dry place away from direct sunlight. Use protective caps on ends to prevent damage. If the lance is collapsible, avoid overextending or leaving it in a locked position for prolonged periods, as this can lead to wear and tear. Regularly inspect for any signs of wear, replacing parts as needed to maintain optimal functionality.
FAQ:
What tools do I need to connect a Karcher telescopic lance to my pressure washer?
To connect a Karcher telescopic lance to your pressure washer, you’ll need the lance itself, which is designed for your specific Karcher model. Additionally, ensure you have a compatible nozzle that fits your lance and pressure washer. Often, pressure washers come with a quick-connect fitting that matches the lance, so you may not need any extra tools. If your setup requires it, a spanner might be useful for tightening any attachments, but usually, everything can be connected by hand.
Can I use a Karcher telescopic lance with any pressure washer model?
No, Karcher telescopic lances are generally designed to fit specific Karcher models. The compatibility often depends on the design of the quick-connect fittings. It’s essential to check the product specifications for both the lance and the pressure washer to ensure they are compatible. Some lances might come with adapters for different models, but it’s best to verify before making a purchase to avoid any issues.
What are the steps involved in connecting the Karcher telescopic lance to the pressure washer?
Connecting a Karcher telescopic lance to your pressure washer is usually a straightforward process. First, ensure your pressure washer is turned off and disconnected from the power supply. Next, attach the quick-connect fitting of the lance to the high-pressure outlet on the washer; you should hear a click when it locks into place. If your lance has a nozzle, attach it at the end of the lance. Finally, once everything is securely connected, you can turn on your pressure washer and adjust the lance as needed for use. Make sure to refer to the user manuals for specific instructions related to your models.