First, ensure you have the right adapter to fit the inlet of your cleaning device. Most models require a quick-connect fitting, so verify the specifications before proceeding. You’ll need a standard water hose, ideally a high-pressure type, to minimise leaks and ensure a robust flow.
Next, attach the adapter to your water source. This often involves screwing it securely onto the faucet, ensuring a firm seal to prevent any potential water leakage. Use plumber’s tape if necessary for a tighter fit. After securing the adapter, connect your hose to the other end of the adapter, making sure it’s firmly attached and watertight.
Once your hose is linked, turn on your water source gradually. Monitor for leaks at the connections; if you spot any, recheck the fit and tighten as required. A steady flow of water will ensure your device operates efficiently, allowing you to tackle cleaning tasks with ease.
Finally, after setting the system, perform a brief test run to ensure everything works smoothly. This is crucial to confirm that your equipment is functioning optimally and ready for action.
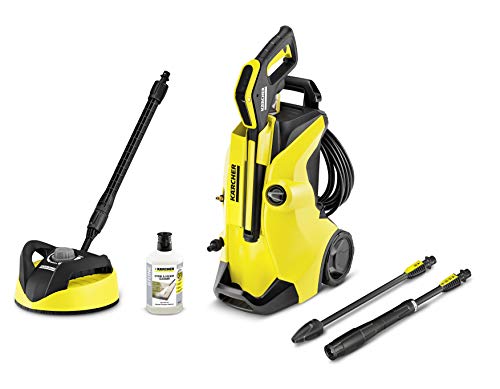
Choosing the right adapter for your pressure washer
.jpg "How to connect pressure washer to sink tap")
Selecting an appropriate connector is vital for the optimal operation of your cleaning machine. Focus on compatibility with your existing hose and the water source. The most common configurations are ¾-inch and ½-inch connectors, so check the specifications of both the machine and the faucet.

Adapters come in various materials, including brass and plastic. Brass typically ensures greater durability and withstands higher pressures, making it a preferred choice for frequent use. However, plastic can be lighter and might suffice for occasional applications.
Pay attention to the thread type. Some fittings have male threads while others have female threads. Ensure the chosen adapter matches to avoid leaks. Additionally, consider the presence of rubber washers, which help create a watertight seal and prevent accidental disconnections.
Here’s a quick reference table summarising the types of adapters based on your needs:
| Adapter Type | Material | Recommended Use |
|---|---|---|
| Standard Garden Hose Adapter | Brass | Frequent users with higher pressure output |
| Quick Connect Adapter | Plastic | Casual users for ease of attachment |
| Universal Adapter | Mixed (brass and plastic) | Versatile for different setups |
While selecting the appropriate attachment, consider purchasing a kit that includes various sizes. This flexibility can save time and headaches when setting up your equipment in different locations. Always test the connection before commencing any task to ensure everything is secure and functional.
Identifying the Right Size of Your Faucet
To ensure compatibility, measure the diameter of the faucet outlet. Standard sizes typically range from ½ inch to ¾ inch. Use a caliper or measuring tape for accurate results. If you find a discrepancy, purchasing an adjustable adapter can solve most issues.
Understanding Thread Types
Faucets may feature various thread types, including male and female threads. Male threads have external threads, while female threads have internal ones. Knowing which type you have can save time and prevent unnecessary purchases. If in doubt, consult the product manual or manufacturer specifications for clarity.
Check the Flow Rate
Identifying the flow rate of your aerator can enhance compatibility. Standard flow rates for household faucets range from 1.5 to 2.2 gallons per minute (GPM). To check, observe the water flow for 10 seconds and multiply by 6 for the GPM. A higher flow rate may be beneficial for more demanding equipment, so consider this metric carefully.
Safety precautions before using your cleaning unit
Always disconnect any electrical devices before approaching the water source to avoid accidental activation. Ensure your hands are dry when handling connectors and attachments. Check the power cord for frays or damage; replace it if necessary.
Inspect hoses for leaks or cracks; a compromised hose could burst under pressure. Firmly secure all fittings and connections to prevent water spray, which can cause injuries or create slippery surfaces. Use protective eyewear to shield your eyes from debris.
Before proceeding, verify that the water source is stable and can handle the flow required by your equipment. Ensure that the area is free of obstacles or hazards that could pose a risk during operation.
Consult your unit’s manual for specific safety recommendations and maintenance checks. Make sure you are wearing appropriate clothing to protect against splashes and high-pressure streams.
Let others know you are working in the area, particularly if you’re in a public space or near others. Always maintain a safe distance from bystanders while operating your device. Familiarise yourself with emergency shut-off procedures in case of unforeseen circumstances.
Steps to securely attach the pressure cleaner hose
Ensure that the hose is properly fitted to prevent leaks and maintain optimal performance. Follow these steps:
- Check the fittings on both the hose and the connector; they should be free of dirt and debris.
- Align the end of the hose with the connector on your water source.
- Firmly push the hose onto the connector until you hear a click or feel it securely seat.
- Use a wrench to tighten the connection slightly, but avoid overtightening as it can damage the threads.
- Test the connection by turning on the water and checking for leaks around the attachment point.
- If leaks occur, turn off the water, detach the hose, and inspect the fittings and washers for damage.
Implement these steps for a reliable setup, ensuring optimal functionality during use.
Checking for leaks after the connection

Inspect all connections visually for any signs of dripping or wetness. Start with the junction point where the hose meets the fixture and then check the hose itself for any signs of moisture.
Steps to check for leaks

- Turn on the water supply gradually. Listen for any unusual noises suggesting air is being drawn into the system.
- Check for moisture accumulation around connection points. Any wet spots indicate a leak requiring immediate attention.
- Use a clean cloth to wipe the areas of potential leaks. This helps in detecting new moisture, confirming if there’s an ongoing issue.
Addressing leaks
- If a leak is detected, turn off the water supply and disconnect the hose.
- Inspect washers and O-rings for damage or wear; replace if necessary.
- Ensure all connections are tightened properly. Reconnect and retest for leaks.
- If the problem persists, consider using tape to enhance the seal at connection points.
These steps will ensure the setup functions properly and helps avoid water wastage during operation.
Adjusting Water Flow Settings on Your Cleaning Device
To modify the water flow, locate your device’s control panel which typically contains flow rate settings. Depending on the model, you might have options like low, medium, or high pressure. Start with the lower settings for delicate surfaces, increasing the intensity gradually based on your needs.
If your unit has interchangeable nozzles, select one that corresponds with your desired outcome. Wider nozzles generally permit more water volume, ideal for rinsing large areas, while narrow nozzles concentrate power for tough stains.
Additionally, be mindful of the input water pressure. If the supply is insufficient, your machine may not operate optimally. Consider using a pressure gauge to ensure it’s within the recommended range for your specific model.
Periodic checks and adjustments can maintain efficiency. After a prolonged use, inspect the flow settings, as mineral buildup in the system may affect performance. Regular cleaning and maintenance will aid in smooth operation and longevity of the equipment.
Remember to always refer to the user manual for specific instructions tailored to your equipment, as each design can have distinct features pertaining to water flow adjustments.
Troubleshooting common connection issues

Ensure all components are secured and properly fitted. If water flow is inconsistent, verify the adapter matches both the machine and the supply outlet. Inspect for blockages in hoses; any debris can hinder performance.
Check seal integrity at each junction. A loose connection may lead to leaks, causing pressure fluctuations. Tightening the fittings often resolves this. If leaks persist, consider replacing worn washers or O-rings in the connections.
If experiencing pressure loss, assess if the water source provides adequate flow. Low supply pressure can affect functionality. Using a pressure gauge may help determine the output.
In cases where the flow appears restricted, clean filters or screens within the system. These components may collect sediment over time and impede water movement.
If the equipment fails to switch on or operate as intended, verify the power supply and check electrical connections. Any issues might not be related to the water connection itself.
Finally, consult the manufacturer’s guide for specific troubleshooting steps tailored to your model. A systematic approach aids in identifying and resolving connection problems efficiently.