


Begin by ensuring the unit is switched off and has completely cooled down. This precaution is crucial to avoid any accidental burns or mishaps. Locate the oil fill cap or dipstick for easy access. Having a suitable container or pan ready will facilitate the collection of the liquid being expelled.
Next, position the equipment on a flat surface to prevent spills. Carefully unscrew the cap or dipstick; be cautious, as residual pressure can lead to a sudden release of contents. Allow the substance to flow into the container, maintaining a steady hand to ensure a clean operation.
Following the extraction, inspect the cap’s gasket for wear and tear. If needed, replace it to prevent leaks in future operations. Clean the area around the filling point to mitigate the risk of contamination during subsequent refills. Once emptied, you’re ready to replenish with fresh lubrication, thus ensuring optimum performance in your device.
Steps for Extracting Lubricant from a Wilks Cleaning Device
Begin with positioning the unit on a stable surface. Ensure the engine is completely cooled to avoid accidents. Then locate the dipstick, usually found near the oil reservoir. Remove it to check the level; this also allows for a clearer path for the liquid to escape.
Next, identify the proper receptacle to catch the used lubricant. A funnel can be useful to direct the flow and prevent mess. Unscrew the oil drain plug using a suitable wrench. Allow the liquid to fully exit, ensuring all of it is collected in the container.

Once the flow ceases, replace the drain plug tightly to avoid leaks. Check the dipstick again to confirm that there is no remaining liquid in the reservoir. Clean the area surrounding the drain point to maintain hygiene. Proper disposal of the used lubricant is crucial; dispose of it at a certified facility or take it to a local recycling centre.
After completion, refill with high-quality lubricant as per the manufacturer’s specifications. Always verify the level before starting the unit again to ensure optimal functioning. Keep the maintenance log updated for future reference.
Identify the Right Tools for the Job

To efficiently complete the task at hand, gather the following tools:
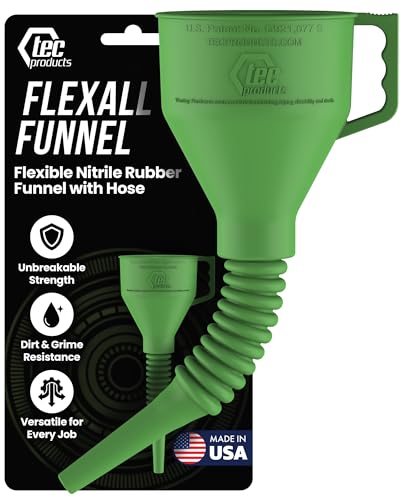
- Flexible Hose: A long and flexible hose will facilitate the process of eliminating fluids.
- Container: Choose a sturdy container that can hold the used liquid. Ensure it is compatible to avoid spills.
- Wrench: An adjustable wrench will assist in loosening any necessary fittings.
- Funnel: A funnel can prevent mess during the repositioning of fluids into the container.
- Rags: Have absorbent rags on hand to manage any accidental spills or splashes.
- Gloves: Disposable gloves protect your hands while working with potentially hazardous substances.
Ensure all tools are clean and functional before beginning. This not only streamlines the process but also prevents contamination. With the right equipment in hand, you’re set for success.
Preparation Steps
Before you start, confirm that your workspace is well-ventilated and that proper safety measures are in place. Keeping the surroundings organised enhances efficiency. Make certain that the equipment is switched off and has cooled down to prevent any accidents.
Upon gathering the necessary items, you are ready to move forward with the procedure safely and effectively.
Locate the Oil Drain Plug on Your Wilks Pressure Washer
The oil outlet is typically found at the lower section of the engine housing. Look for a small, round plug or a bolt, usually accompanied by a label indicating its purpose. It’s often situated on the side or bottom of the engine, making it accessible for quick maintenance. In some models, it may be covered by a plastic cap that can simply be unscrewed.
Using a flashlight can help illuminate the area, especially if it’s located in a tight spot. Be sure to clean the area surrounding the plug to prevent contaminants from entering the crankcase during the process. Check the owner’s manual if you have difficulty spotting it; it usually contains a diagram that highlights the position of this component.
Gather a suitable container to collect the waste liquid, ensuring it fits securely beneath the outlet for a mess-free operation. Confirm that the unit is turned off and cool to the touch before proceeding. Safety should be a priority as you prepare to perform this routine task.
Prepare for Safe Oil Drainage
Ensure to gather necessary supplies like gloves and a suitable container before proceeding. It’s critical to work in a well-ventilated area, far from any ignition sources. This will minimise exposure to any residual fluids and vapours that may escape during the process.
When ready, inspect the equipment carefully, looking for any cracks or damage that could lead to spills or accidents. Always keep a spill kit handy for unexpected leaks. Also, having an absorbent material nearby will help control any accidental drips.
Prior to starting the extraction, allow the machine to cool completely to prevent burns. The appliance should be level to ensure proper flow into your collection vessel. Confirm that the collection container is large enough to hold the extracted material to avoid overflow.
Finally, make sure to have a funnel available for a tidy transfer, which will limit exposure and ensure a clean workspace. This approach will ensure a smooth and secure operation while maintaining safety standards throughout the procedure.
| Item | Purpose |
|---|---|
| Gloves | Protection for hands |
| Container | Collecting used fluids |
| Absorbent material | Controlling spills |
| Funnel | Tidy transfer of fluids |
Drain the Oil Properly and Efficiently
Begin by positioning your machine on a stable surface, ensuring it’s level. This facilitates complete removal of the lubricant without leaving remnants in the reservoir. Have a clean, suitable container ready to collect the used fluid, and make sure it’s large enough to hold everything.
Next, carefully loosen the drain plug using the appropriate tool. Be cautious not to strip the threads. Once loose, allow the liquid to flow out into your collection container. Avoid rushing this process; letting it settle for a moment can help expunge any leftover residue.
While the lubrication is draining, inspect the removed plug and the surrounding area for any signs of wear or damage. This is also an opportune moment to clean the threads of the drain to ensure a secure seal upon reinstallation.
After the collected material has fully drained, clean any splashes or spills quickly to prevent potential hazards. Reinstall the drain plug meticulously, ensuring it is tight enough to avoid leaks during the next operation.
Lastly, check your collection container’s contents. Dispose of the used lubricant according to local regulations; many recycling centres accept such materials. Keeping these practices in mind contributes to both the longevity of your equipment and environmental responsibility.
Dispose of Used Oil in Compliance with Regulations
Follow local legislation when disposing of waste lubricants. Do not pour into drains, on the ground, or in regular trash. Most communities provide drop-off locations for used fluids, making it easy to find safe disposal options.
Recycling Facilities and Services
.jpg "How to drain oil from a wilks pressure washer")
Look for recycling centres or waste collection points that specifically list waste lubricant disposal. Some auto repair shops or service centres may accept used fluids, often at no charge. Research organisations that specialise in hazardous waste to ensure proper handling.
Documentation and Record Keeping

Maintain records of disposal methods, including receipts or confirmations from service providers. This documentation may be required for compliance checks or to protect against potential liability. Staying organised assists in tracking waste management and aligns with regulations.
Check and Replace Oil Filters if Necessary
Examine the filter housing closely after completing the fluid removal process. A clogged filter can significantly hinder performance, leading to inefficiency. Confirm that the filter material is intact and free from debris. If you notice any tears, blockages or a discoloured appearance, it’s time to replace it.
To acquire the proper replacement unit, consult the manual for specifics on part numbers or compatibility with your unit. Always opt for high-quality filters to ensure optimal functionality. Installation is straightforward; remove the old filter and install the new one securely, ensuring a tight fit to prevent leaks.
Before closing the access points, double-check that the new filter is correctly aligned. Many modern filters feature installation indicators or markings to guide proper placement. After reassembling any components, top up with the correct lubricants as recommended in your equipment guidelines.
Conduct a brief operational check after replacement to confirm there are no leaks and that everything is functioning smoothly. Regular inspections and timely replacements of filters will prolong the life of your equipment and maintain its efficiency.


