

First and foremost, ensure the power supply is functioning correctly. Check the outlet by plugging in another device to confirm it’s operational. If your cleaning apparatus relies on a power cord, inspect it for visible damage–frayed wiring or worn insulation can interrupt the flow of electricity.
Next, examine the on/off switch and any safety features or locks that may prevent activation. Make sure all safety mechanisms are disengaged, allowing the unit to operate freely. If the switch feels loose or unresponsive, it might be a signal of internal malfunction.
It’s also beneficial to inspect the fuel or water supply. For gas models, ensure there’s adequate fuel and that the fuel is fresh. In electric versions, check for clogs in the inlet filter or hoses that might disrupt the intake process. Debris can obstruct water flow, making it seem like the machine isn’t working.
Another common culprit could be the motor. Listen for any unusual sounds or a complete lack of noise when attempting to power up the unit. If you hear a clicking sound, it might indicate a malfunction of the starter. In such cases, servicing may be necessary to address worn components.
Lastly, consult the user manual for troubleshooting tips specific to your model. It often provides valuable insight on common problems and their solutions. If all else fails, consider reaching out to a certified technician for assistance.
Diagnosis of Ignition Issues
The first step is to check the fuel system. Ensure there’s adequate fuel in the tank and verify that it isn’t stale or contaminated. Fresh fuel can often resolve starting issues that stem from degraded gasoline.
Inspect the Electrical Components

Examine the plug connection. Loose or corroded wires can interrupt power flow. Disconnect the electrical cord and clean the connections to ensure good contact. If the plug appears worn or damaged, replace it promptly as this can prevent ignition.
Evaluate the Safety Features
Many units are equipped with safety features that prevent operation under certain conditions. Check the trigger gun; if it’s blocked or damaged, it may need replacement. Inspect the safety lock system, ensuring it’s not engaged. Sometimes, simply resetting these features can restore function.
| Component | Common Issues | Resolution |
|---|---|---|
| Fuel System | Stale or contaminated fuel | Replace with fresh fuel |
| Electrical Connections | Loose or corroded connections | Clean and secure connections |
| Trigger Gun | Blocked or broken | Replace if necessary |
| Safety Lock | Engaged system | Reset the system |
By carefully checking these areas, the likelihood of resolving ignition troubles increases significantly. If issues persist, further investigation may be necessary, focusing on the intake valves or pump system.
Check the Power Source and Cables
Begin with confirming the outlet is operational. Use a voltage tester to ensure electricity is present. If the outlet is faulty, check the circuit breaker and reset it if necessary.
Examine the power cable for any signs of damage. Look for fraying, cuts, or exposed wires. If the cable is compromised, it must be replaced to prevent safety hazards and restore functionality.
Ensure connections are secure at both ends of the cable. A loose connection can disrupt the power flow. Disconnect and reconnect to ensure a solid link.
If the equipment uses an extension cord, confirm it’s rated appropriately for the tool’s power requirements. Using an insufficiently rated cord can lead to voltage drops, impacting performance.
Also, verify any switches on the equipment are in the correct position. If there’s a power switch, ensure it’s in the ‘on’ position before attempting again. This simple check often saves time and effort.
Finally, consider any plug adapters you may be using. They should not be worn out or damaged. Testing with a different outlet can confirm if the problem lies within the source or the equipment itself.
Inspect the Fuel System and Add Fuel if Necessary
First, examine the fuel tank. If it’s empty, fill it with fresh fuel. Use gasoline that has not been mixed with alcohol, as this can cause starting difficulties.
Next, check for debris or clogs in the fuel line. Disconnect the line carefully to inspect for any obstructions that could hinder fuel flow. Clean or replace it if necessary.
Pay attention to the fuel filter as well. If clogged, it can restrict fuel supply. Replace if you notice significant dirt build-up.
Additionally, inspect the fuel cap. Ensure it’s not damaged and seals properly. A faulty cap can disrupt fuel flow due to pressure issues.
Lastly, look for leaks in the system. Check connections and hoses for any signs of leaking fuel. Address any leaks to prevent potential hazards.
Examine the Spark Plug for Damage or Fouling

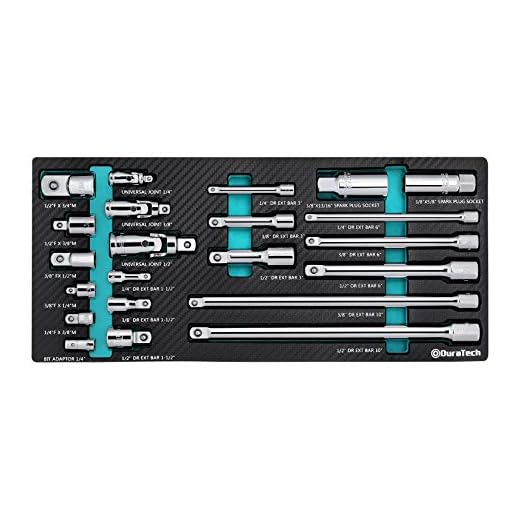
Check the spark plug for any visible signs of wear or contamination. Remove it using a spark plug socket. Inspect the electrode for irregularities or excessive carbon build-up.
- If the electrode is eroded or burnt, replacing the spark plug is necessary.
- A black, sooty residue often indicates a rich fuel mixture; clean it with a wire brush or replace the plug if cleaning is insufficient.
- Signs of oil or fluid on the plug suggest potential engine issues like oil leakage; further investigation is needed.
- Ensure the spark plug gap is correct, typically between 0.6mm and 0.8mm, for optimal ignition.
Once inspected, reattach the spark plug securely. Ensure it is connected to the ignition wire tightly to prevent any firing issues.
Assess the Water Supply and Hose Conditions
Ensure there is adequate water flow from the supply source. Check that your tap is turned on fully, as insufficient water pressure can prevent operation. The supply line should deliver water at a rate of at least 4 to 5 litres per minute.
Inspect the Hose

Examine the hose carefully for any kinks, leaks, or blockages. A damaged or obstructed hose can disrupt the proper functioning of the equipment. Run water through the hose to confirm it is clear, and replace it if any serious issues are present.
Check Connections and Filters
Inspect the connections between the water supply and the unit. Ensure they are tight and free from debris. Many models feature a filter at the water inlet; checking this for clogs can be essential for optimal flow. Clean or replace any filters as necessary to guarantee unobstructed water entry.
Review the Pressure Washer’s Safety Features
First, check for the presence of a safety lock mechanism on the trigger. This feature prevents accidental activation, especially during transport or storage. Ensure it is engaged when not in use.
Look for a thermal relief valve, which protects the motor and pump from overheating. If this feature is malfunctioning, excessive heat could damage components, leading to operational failure. Test it by observing whether it releases water when the unit is idle.
Inspect the power connections and any circuit breakers. Safety features often include automatic shut-off mechanisms triggered by overload. If tripped, resetting the breaker can restore normal function.
Evaluate the hose and nozzle system for any leaks or damage. Many models have protective features that deactivate the unit if a significant water leak is detected. A thorough examination of these components might reveal issues that can affect overall performance.
Examine warning labels and instructional stickers on the device. They provide crucial information about safe operation and maintenance. Familiarise yourself with these guidelines to ensure safe usage.
Lastly, check whether your equipment has an integrated GFCI (Ground Fault Circuit Interrupter). This adds a layer of electrical safety, automatically cutting off power in the event of a fault. Regular testing of this feature can prevent potential hazards during operation.
Consult the User Manual for Troubleshooting Tips
Refer to the user manual for specific guidance tailored to your model. This document contains critical troubleshooting sections that can help diagnose common issues and provide model-specific solutions.
Detailed Diagnosis

In the troubleshooting section, check for any highlighted error codes or symptoms related to your equipment. By identifying the problem accurately, you can save time and effort in addressing it.
Maintenance Recommendations
User manuals often include maintenance schedules and procedures. Following these guidelines will not only enhance operational efficiency but also prolong the lifespan of the equipment. Look for any routine checks that may have been missed, such as inspections of filters or seals.


