


Identify the source of the water escaping from your spray gun. Start by examining the O-ring seals; these are common culprits for leaks. If they’re worn or damaged, replacing them is straightforward and can often resolve the issue.
Next, inspect the connection points. Ensure all fittings are secure and free from debris. A loose connection can exacerbate problems, so tighten any screws or fittings gently to avoid stripping the threads.
Consider the nozzle itself. If it’s clogged or damaged, this could cause water to leak from unwanted areas. Cleaning the nozzle thoroughly or replacing it if necessary may be required to restore proper function.
Finally, review the maintenance practices. Regularly lubricating moving parts and cleaning the components will prolong the lifespan of your equipment and prevent future leaks. Simple preventative measures can save significant effort and money down the line.
Identifying the source of the leak
Begin with a thorough visual inspection of the entire assembly. Ensure the unit is disconnected from electricity and water. Check for visible signs of damage, such as cracks or wear along the length of the device or around fittings.
- Examine the nozzle: Look for any breaks or loose connections. The nozzle frequently experiences wear due to constant use.
- Inspect the hose: Check for kinks, punctures, or abrasions along the length. Damaged hoses are often a primary cause of leaks.
- Assess fittings and connections: Tighten all couplings and connections with a wrench. Loose fittings can allow water to escape.
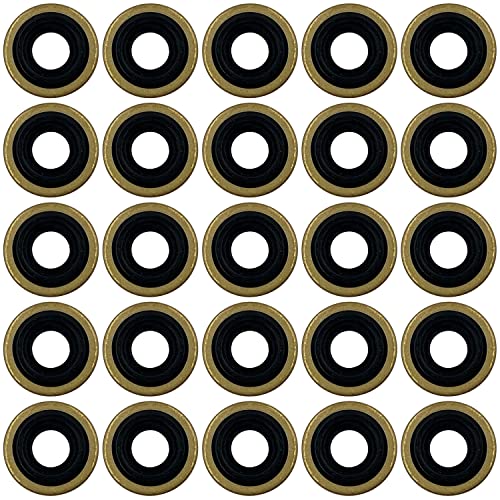
- Check O-rings: These small rubber seals can degrade over time. Remove and inspect them for cracks or stiffness; replace if necessary.
- Review the trigger mechanism: If the mechanism isn’t sealing properly, it may lead to leaks during operation. Ensure it operates smoothly.
After completing the visual check, conduct a pressure test by running water through the unit. Observe for any leaking areas closely. This will help pinpoint the source more accurately.
Finally, don’t overlook the importance of regular maintenance. Maintaining your equipment not only prevents future troubles but can also prolong its lifespan.
Choosing the Right Replacement Parts
For optimal performance, selecting compatible components is paramount. Always consult the specifications of your machine to identify the exact model and part number required.
Pay close attention to the materials used in replacement parts. For instance, brass fittings offer superior durability compared to plastic, while rubber seals provide better resistance to wear and can significantly reduce leakage. Look for parts that are specifically designed to withstand high pressure and temperature variations.
Examine the connection types as well. Many wands utilise different fittings such as quick-connect or threaded connections. Confirm that the replacement part matches the existing connections to ensure a proper fit without the risk of further leaks.
Always opt for original equipment manufacturer (OEM) parts when possible. These components guarantee compatibility and reliability, minimising the risk of future issues. If OEM is not an option, ensure aftermarket parts are sourced from reputable manufacturers with positive reviews.
Lastly, verify the warranty status of your machine. Using non-compatible or low-quality parts may void your warranty. To avoid unnecessary costs, ensure the chosen replacements adhere to the manufacturer’s guidelines.
Disassembling the Pressure Cleaning Tool

Begin by ensuring the device is disconnected from its power source and that there is no residual water in the system. Grab a suitable wrench and carefully remove the nut securing the nozzle to the spray handle. Be cautious not to apply excessive force, as it may damage the threads.
Next, twist the handle assembly clockwise and pull it away from the trigger mechanism. This will expose the internal components. Take note of the order of parts for easier reassembly. Use a soft cloth to clean any debris or buildup present.
Now, examine the seals and O-rings for wear. If they appear damaged, replace them immediately. Using a flat-headed screwdriver, gently pry out the old rings. Ensure that the groove is free from dirt before inserting new ones.
To access the trigger, remove the securing screws with a Phillips screwdriver. After detaching the trigger assembly, inspect it for any signs of damage or obstructions. Clean any debris that may hinder its movement.
Once all components are disassembled and inspected, organise them on a clean workspace. Keep the replacement parts handy for quick installation. Refer to the manufacturer’s schematic if available for guidance during reassembly.
| Part | Inspection Tips | Replacement Notes |
|---|---|---|
| Nozzle | Check for cracks or blockages. | Replace if damaged or frequently clogged. |
| O-rings | Look for cracks or loss of elasticity. | Always replace with exact size from manufacturer. |
| Handle | Ensure secure attachment and inspect for cracks. | Replace if handle is loose or has structural damage. |
| Trigger | Check for smooth movement, inspect springs. | Replace if it jams or has visible wear. |
Replacing Seals and O-Rings
Begin by obtaining the right seals and O-rings for your cleaning tool, ensuring they match the specifications of the original parts. Use callipers to measure existing seals accurately, or refer to the manufacturer’s manual for precise sizes. It’s advisable to choose high-quality replacements made from durable materials such as rubber or silicone for better longevity.
Next, remove the worn-out components carefully. Take your time to avoid damaging surrounding parts during removal. Often, O-rings can be pried off with a flat tool, but ensure not to scratch or nick the housing where they sit. If a seal is stuck, a penetrating oil can assist in loosening it.
Once the old parts are removed, clean the seating area thoroughly with a cloth to remove any debris or residue. This step is crucial as dirt can cause leaks even with new seals installed. After cleaning, apply a small amount of lubricating grease to the new O-ring to ease installation and ensure a proper seal. This grease will also help in preventing future drying or cracking.
Install the new components by pressing them gently into place. Ensure they sit evenly and snugly in their grooves. After installation, reassemble your tool and test for leaks. If everything is done correctly, you should have a secure, leak-free operation.
Reassembling the Wand and Testing
Reattach the handle to the main body of the spray tool, ensuring a secure fit. Begin by aligning the sections precisely before fastening any screws or clips. It’s important to check that all parts sit flush against each other to avoid any future leaks. If applicable, apply a slight amount of lubricant to screw threads for smoother operation.
Testing for Leaks

Before full operation, conduct a thorough test to ensure everything is functioning correctly. Follow these steps:
- Reconnect the unit to the water supply and power source.
- Turn on the supply and briefly activate the trigger, examining all connection points for any signs of moisture or spray.
- If leaks occur, reassess the assembly, focusing on all seals and fasteners to confirm they are correctly seated and tightened.
Final Performance Check

Proceed with a test run of the equipment. Engage various pressure settings and nozzle configurations to evaluate performance under different conditions. Pay close attention to the output during operation; any irregularities might indicate further adjustments are needed. After ensuring everything is in optimal condition, it’s ready for regular use.
Maintaining Your Pressure Cleaner Nozzle to Prevent Leaks

Implement regular inspections of your cleaning tool’s nozzle to identify any signs of wear. I always recommend checking the condition of seals and O-rings every few uses. Cleaning the exterior and ensuring no debris is trapped in joints can greatly reduce the likelihood of leaks.
Utilise a lubricant designed for rubber parts on O-rings and seals during assembly. This not only helps in achieving a secure fit but also extends the life of these components. Apply a thin layer and avoid excess as it may attract dirt.
Always store your equipment in a dry and temperature-regulated environment. Exposure to extreme weather conditions can cause materials to degrade, leading to potential leakage issues. A protective cover can enhance longevity.
Additionally, maintain the cleaning equipment according to the manufacturer’s instructions. Regular servicing not only ensures optimal performance but also helps identify early signs of damage before they escalate into larger issues.
Finally, when you finish using the nozzle, drain any remaining water to prevent internal corrosion. A simple shake can help with this, followed by a quick wipe-down to keep it clean and ready for its next use.