

Check the fuel level first; ensure there’s enough high-quality petrol in the tank. If it’s a model that operates with electricity, make sure the power source is live and connections are secure. A simple oversight, such as a faulty extension lead or a tripped breaker, can prevent the machine from responding.
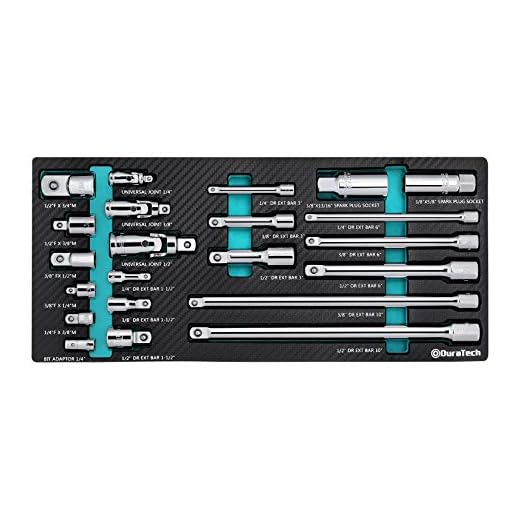
Inspect the spark plug next. A dirty or damaged spark plug often hinders ignition. Remove it for a thorough examination–clean it with a wire brush if necessary, or consider replacing it if it’s showing signs of wear. Always ensure the gap is adjusted according to the manufacturer’s specifications.
Don’t overlook the air filter. A clogged filter can restrict airflow, making it difficult for the engine to perform optimally. Clean or replace the filter to promote efficient operation. Managing these components can significantly improve your chances of rekindling function in your cleaning equipment.
Lastly, review the user manual for troubleshooting tips specific to your model. Each device has its quirks, and knowing these can save you a lot of frustration. With these key checks and adjustments, you should be able to breathe new life into your cleaning device.
Check the Fuel Level and Quality
Ensure the fuel tank has an adequate amount of clean fuel. A low fuel level might prevent ignition. If the gauge shows it’s empty, refill it with fresh, high-quality fuel suitable for your unit.
Examine the fuel’s condition. Old or contaminated petrol can impair engine performance, leading to starting issues. If the fuel appears cloudy, has a foul smell, or shows signs of separation, it’s best to drain it and refill with new petrol.
Consider using a fuel stabiliser. This additive can help to prolong fuel life and keep it in good condition, especially if the machine isn’t used frequently. Make it a habit to empty the fuel tank if the unit will be stored for an extended period, as stale fuel will cause problems over time.
In addition, always check the fuel filter, as a blockage can restrict fuel flow, rendering the engine unable to function correctly. If it’s dirty or clogged, replacing it can aid in reviving your equipment.
Inspect the Power Source and Connections

Ensure the power outlet is functional by testing it with another appliance. If the outlet is operational, check the cord for any visible damage such as fraying or cuts. A damaged cord may prevent electrical flow, so replacing or repairing it is crucial.
Connection Quality
Verify that all connections are secure. Loose or corroded connections can impede the flow of electricity. For plugs, ensure they fit snugly in the socket without wobbling. If your device uses an extension cord, make sure it’s rated for the amperage required.
Voltage Specifications
Confirm the voltage rating of your motor and the outlet. A mismatch can lead to insufficient power delivery. If using a generator, ensure it meets the required wattage and voltage specifications. If voltage drops, the unit may not perform correctly.
If any abnormalities in the power source or connections persist, consider consulting a professional for further evaluation to prevent potential damage to your equipment.
Examine the Spark Plug Condition
Remove the spark plug and inspect it closely for any signs of wear or damage. A faulty spark plug may be covered in carbon deposits, which can impede ignition. If you notice heavy grime or corrosion, cleaning may not suffice; replacement is advisable.
Check the electrode gap using a feeler gauge. The gap should match the manufacturer’s specifications–too wide or narrow can stifle performance. If the gap is out of range, adjust it with a spark plug tool or replace the component.
Ensure the spark plug wire is firmly connected; loose connections can interrupt the electrical flow needed for ignition. If the wire shows signs of wear or damage, replace it to maintain consistent performance.
For optimal functionality, a good practice is to replace the spark plug annually, particularly if you use the machine frequently. Regular maintenance keeps the ignition system in top condition and reduces the risk of starting difficulties.
Assess the oil level

Check the oil level in the engine to ensure optimal functionality. Before inspecting, ensure the unit is on a level surface to allow an accurate reading. Locate the dipstick, usually situated near the top of the engine. Remove the dipstick, clean it with a cloth, then insert it back without screwing it in.
Remove the dipstick again to observe the oil level marked on it. It should align between the minimum and maximum indicators. If the reading is below the minimum, top it up with the recommended oil type specified in the manual. Avoid overfilling, as this can cause foaming and damage the engine.
| Oil Type | Recommended Viscosity |
|---|---|
| Semi-synthetic 10W-30 | 10W-30 |
| Synthetic 5W-30 | 5W-30 |
After refilling, recheck the oil level to confirm it’s within the proper range. Regular monitoring of the oil level not only promotes longevity but also enhances operational efficiency. Neglecting to maintain adequate oil can lead to significant engine wear.
Clear any fuel line blockages

Begin by inspecting the fuel lines for obstructions. Disconnect the fuel line from the tank and the carburettor, ensuring hazards are mitigated. Look for visible clogs or kinks in the hose; even minor bends can impede fuel flow. Clean the line using compressed air if available, or replace it if severely damaged.
Check the fuel filter
If your model is equipped with a fuel filter, remove it for examination. Accumulated debris can restrict fuel, leading to performance issues. Clean the filter with fuel or replace it based on the manufacturer’s recommendations to ensure uninterrupted flow.
Inspect the carburettor
After addressing the fuel lines and filter, focus on the carburettor. Disassemble it if necessary, and thoroughly clean the jets and passages. Deposits may have built up, restricting fuel intake. Ensure all components are free from obstruction, as even small restrictions can affect overall operation.
Test the ignition switch and starter assembly
Confirm the functionality of the ignition switch and starter assembly by following these steps:
- Access the ignition switch: Locate it on your machine’s control panel. Ensure it is in the ‘on’ position.
- Inspect for damage: Look for any visible cracks or debris around the ignition switch that may impede its function.
- Check the connections: Make certain all wiring connected to the ignition switch is secure and free from corrosion.
- Test the switch: Use a multimeter to check for continuity. A reading of zero indicates a faulty switch that needs replacement.
- Examine the starter assembly: Remove any coverings and inspect for visible signs of wear or damage.
- Manually engage the starter: If possible, test the starter mechanism manually to identify any persistent issues.
- Listen for sounds: When attempting to activate the starter, pay attention for unusual sounds that may indicate a malfunction.
If any components show signs of failure, consider replacing them to restore proper operation.
Review the user manual for specific troubleshooting tips

Referring to the user manual is a critical step in addressing issues. It contains tailored guidance that aligns with your model, offering specific procedures and diagnostic workflows.
Key Points to Check
- Look for the troubleshooting section; it usually addresses common starting issues.
- Understand the diagrams; these visuals can help identify parts quickly.
- Follow manufacturer-recommended procedures for checks and maintenance.
Troubleshooting Tables
Many manuals feature troubleshooting tables that correlate symptoms with potential causes. These tables provide insights into resolving your difficulty efficiently.
- Cross-reference any unusual sounds or indicators against the documented issues.
- Utilise the checklist for inspection before moving to repairs or replacements.
By familiarising yourself with the specific advice in the manual, you save time and efforts and enhance the chances of a swift recovery for your equipment.
FAQ:
What should I check if my pressure washer won’t start?
If your pressure washer is having trouble starting, there are several things to inspect. Firstly, ensure that the power supply is functioning; check if the outlet is operational and that the extension cord, if used, is in good condition. Next, examine the fuel level if you have a gas-powered model—make sure it’s filled with the appropriate fuel. Additionally, check the oil level and ensure it’s not contaminated. For electric models, inspect the power cord for any visible damage or fraying. Lastly, look at the spark plug for any signs of wear or carbon build-up; if it’s dirty, cleaning or replacing it might be necessary.
How can I troubleshoot a gas pressure washer that won’t start?
Troubleshooting a gas pressure washer requires a systematic approach. Start by checking the fuel—ensure it is fresh and not mixed with old or contaminated gas. If your machine has a fuel shutoff valve, verify that it is open. Next, check the oil level and add oil if needed. The air filter should also be inspected; a clogged filter can prevent the engine from starting properly. If the pull cord is hard to pull, it may indicate a problem with the engine itself or a stuck internal part. Lastly, examine the spark plug; if it looks dirty or damaged, replacing it can significantly help in getting the engine to start.
What could be the reason my electric pressure washer doesn’t start?
There are several potential reasons why your electric pressure washer may not be starting. First, ensure that it is plugged into a working outlet; you can test the outlet with another device to confirm it is functioning. Check the power cord for any signs of damage or wear. If the machine has a reset button, make sure to press it, as it may have tripped due to an overload. Verify that the water supply is connected and adequately flowing, as some models won’t start without proper water pressure. Additionally, examine the safety features of the machine; many electric pressure washers have mechanisms that prevent starting when not in the correct position. If these checks do not solve the issue, it might be best to consult the user manual or seek professional assistance to diagnose any internal faults.


