

Begin by ensuring the cleaning machine is powered off and disconnected from any electrical source. Next, locate the water intake point on the unit, usually situated at the front or side. For optimal performance, use a standard garden pipe with a diameter compatible with your appliance’s specifications, typically ranging from 1/2 inch to 3/4 inch.
Next, attach one end of your garden pipe securely to the intake connector. Turn the threaded fitting clockwise until it’s snug, but avoid over-tightening, as this may cause damage. A rubber washer can be placed inside the connector for additional sealing and to prevent leaks during operation.
After securing the connection, connect the opposite end of the pipe to your water source. Make sure the fitting is also tightened properly here, ensuring no water seeps out during use. With everything in place, turn on your water supply to check for leaks before starting the machine, ensuring a safe and efficient cleaning experience.
Connecting a Garden Pipe to a High-Pressure Cleaner
Ensure the inlet is clean before attachment. A dirty entry can lead to damage or decreased efficiency.
Securely attach one end of the flexible tubing to the inlet on the machine. It should click or lock into place, preventing leaks during operation.
Twist the other end of the tubing onto the water supply, making sure it fits snugly. It’s important to use the right diameter to avoid pressure loss.
If using a connector, check for compatibility with both the garden pipe and the cleaner’s inlet. An improper fit can cause issues.
After everything is connected, turn on the water supply gradually while checking for leaks at both connection points. Tighten as necessary.
Always maintain a flow of water before starting the high-pressure cleaner. Running the unit without water can cause significant damage to internal parts.
Regularly inspect the tubing for wear and tear. A damaged pipe can lead to inefficiencies and unsafe operation.
Choosing the Right Water Hose for Your Pressure Washer

Select a durable material such as reinforced vinyl or rubber for longevity. Both options resist kinks and wear, ensuring optimal performance during usage.
Opt for a diameter of 5/8 inch, as it provides an ideal flow rate, minimizing pressure loss. This size balances water delivery effectively without reducing efficiency.
Consider the length of the pipe. A maximum of 50 feet is advisable to prevent decreased performance. Excessive length can lead to a drop in water supply pressure, impacting the cleaning capability.
Look for connectors that are compatible with your machine. Standard sizes are typically 3/4 inch, so check your pressure equipment’s specifications to avoid mismatches.
A temperature rating of at least 140°F is necessary if using hot water. Ensure the selected model can handle higher temperatures to prevent damage and extend life.
Incorporate additional features like anti-kink designs or lightweight characteristics if mobility is essential. This makes manoeuvring easier during clean-up tasks.
Review product warranties and customer feedback to gauge reliability. A robust warranty usually indicates the manufacturer’s confidence in durability.
By considering these specific aspects, you’ll ensure a proper fit that maximizes your cleaning setup’s capabilities without compromising efficiency or effectiveness.
Identifying Connection Points on the Cleaning Equipment

Look for two specific openings on your unit for connecting accessories. The first is the inlet, typically located on the rear or side of the body. This is where you attach the supply line. The inlet is often marked with a blue or green indicator, making it easy to identify. Ensure the connection is tight to prevent leaks.
The second opening is for the high-pressure line, usually positioned at the front. This outlet is where the fitted nozzle or wand connects. Check that this coupling is secure as well, allowing for optimal operation during use.
Common Features to Observe

Many models have protective caps on these connections. Always remove these before attaching your lines. Additionally, some units might include quick-connect features. Familiarise yourself with these to save time when setting up and disconnecting.
Regular Maintenance Checks
Inspect the connection points for any wear or damage. Cracks or deformities can lead to faults during operation. Clean these areas regularly to ensure a proper seal and functionality. Using thread tape on threads can also help in achieving a leak-proof bond.
Preparing the Hose for Attachment
Ensure the end of the tube is clean and free from debris. A dirty end can cause leaks or reduce flow efficiency once attached. Inspect the connection threads for any signs of damage; if they appear stripped or worn, replace the tube immediately to prevent further issues.
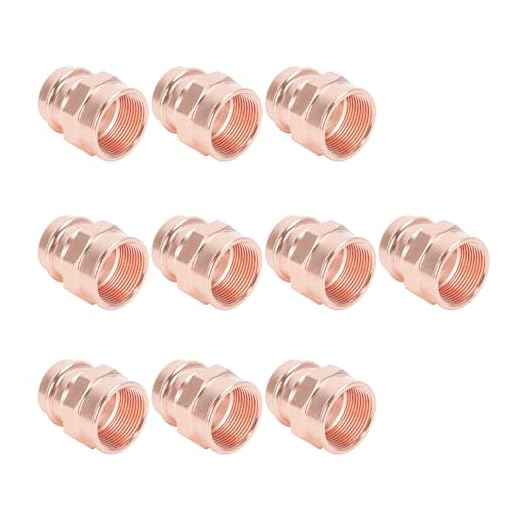
Before attaching, check if the fitting matches the inlet of the cleaning apparatus. Most models require a standard connector, but some units may need specific attachments. Use an adapter if necessary to ensure a secure fit.
Checking for Leaks
- Fill the tube with water and turn on the supply to identify any leaks.
- Inspect all connection points thoroughly.
- Replace seals or fittings if water seeps out.
Testing Water Flow
With the tube connected to the supply but not yet to the cleaner, let the water run for a few minutes. This action flushes out any remaining debris and confirms that the water flows freely. A strong, steady stream indicates readiness for use. If flow seems weak or inconsistent, cleanse the interior of the tube to eliminate any blockages.
Connecting the Water Supply to the Cleaning Unit
Ensure the fitting is securely tightened to prevent leaks. Follow these steps for successful attachment:
- Check the connectors on both the supply line and the machine.
- Align the connector of the supply line with the inlet on the cleaning device.
- Push the connector firmly into the inlet until it clicks into place.
- Turn the locking mechanism, if equipped, to secure the connector.
- Inspect for any signs of leakage around the connection. Tighten further if necessary.
For enhanced performance, ensure the connection is directly from the tap, avoiding any long extensions or additional fittings that might restrict water flow.
Prior to commencing any task, verify that the supply is turned on. An absence of water will lead to device damage. Keep a check on the end of the line for clogs that may impede flow.
Utilising a filter at the inlet can help protect the machine from debris, prolonging its lifespan. Regular maintenance of both your coupling and supply will ensure optimal efficiency and reliability during operation.
Checking for Leaks After Connecting
To ensure a secure setup, thoroughly inspect for any leaks after you’ve completed the attachment. Start by turning on the water supply and observing the connection points closely. Look for any signs of dripping or moisture accumulation, as these are indicators of potential issues.
Use the following checklist to facilitate your inspection:
| Observation | Action |
|---|---|
| Drips at connection points | Tighten fittings and check for proper alignment. |
| Constant spraying | Switch off water and inspect seals for damage; replace if necessary. |
| No water flow | Check for kinks or blockages in the tubing; rectify as needed. |
| Excessive noise from fittings | Examine connections for excessive pressure; adjust accordingly. |
If everything appears correct but some leaks persist, consider replacing any worn out seals or washers. A simple swap can enhance the integrity of the whole system, preventing frustrating interruptions during use.
After the inspection, it’s wise to run the equipment briefly at low pressure to further verify the reliability of the connections. This practical step can help identify any weaknesses before undertaking larger cleaning tasks.
Ensuring Proper Water Supply Before Use
Verify that the source provides an adequate flow rate of at least 5 litres per minute. This ensures optimal performance during operation. If the flow rate is insufficient, consider using a pump or checking for clogs in the supply line.
Check Supply Line Condition
Inspect the supply line for any kinks, blockages, or damage. These issues can restrict flow and decrease efficiency. If you find any problems, replace or repair the line as needed.
Maintain Consistent Pressure
Make sure the supply point delivers consistent pressure. Fluctuations can lead to operational issues and reduced efficiency. If fluctuations are noted, adjustments may be necessary at the manifold or the valve controlling the flow.
Maintaining the Connection for Future Use
To ensure a seamless setup in subsequent uses, it’s vital to thoroughly clean the interface points after each session. This removes any debris or residue that may hinder effective sealing during future operations.
Consider applying a small amount of lubricant to the connection threads. This practice not only facilitates easier attachment but also prevents corrosion over time. A silicone-based grease is recommended; it withstands water exposure effectively.
Storing the Components
Store the assembly in a dry place, preferably in a designated storage bin. Elevate it off the ground to prevent water accumulation. If available, use protective bags to keep connectors dust-free, which can impair their functionality if neglected.
Regular Inspections
Conduct periodic assessments of the connectors and attached fittings. Look for any signs of wear, cracks, or leaks that could lead to inefficiencies. Replace any damaged elements immediately to maintain performance standards.
Adherence to these practices ensures that your equipment remains in optimal condition, ready for use at any time. These small but significant steps can prolong the life of your setup and enhance your overall experience.


