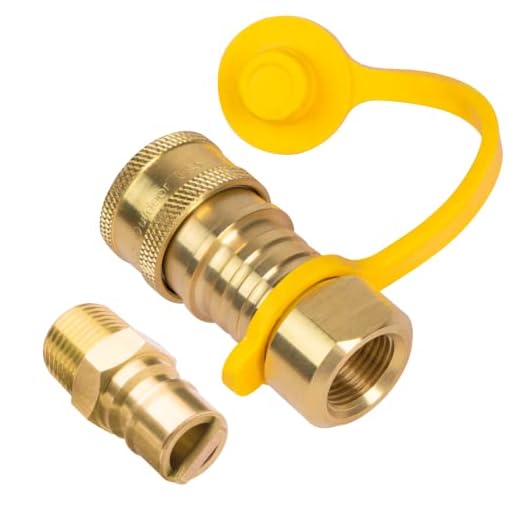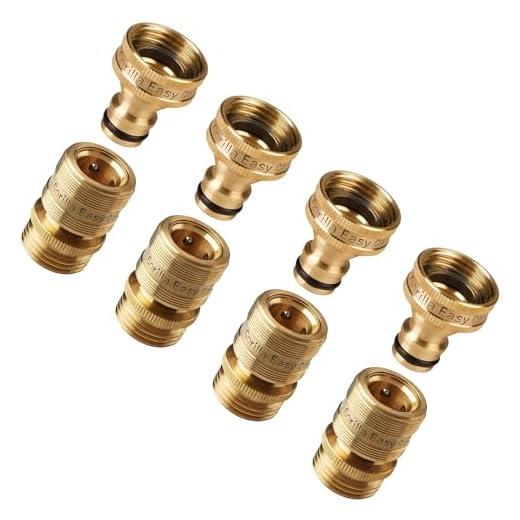


Ensure to take precise measurements of the outer diameter and thread type of your connectors. Using calipers or a standard measuring tape can provide reliable results. Accurately documenting these measurements helps avoid compatibility issues with diverse cleaning devices.
Pay close attention to the thread specifications, as various manufacturers may utilise different standards, such as BSP, NPT, or metric threads. Verify the thread type to confirm compatibility with hoses and nozzles, minimising the risk of leaks or operational failures.
Don’t overlook the importance of checking the connector’s locking mechanism. Determine whether it’s a simple push-and-lock or requires a twist to engage. Understanding these variations supports a seamless connection and enhances performance during use.
Understanding the Sizes of Quick Connect Fittings

For selecting the right connectors, focus on three key factors: diameter, thread type, and brand compatibility. It’s essential to match the diameter with the hose or nozzle to ensure a secure fit and prevent leaks. Common sizes include 1/4 inch and 3/8 inch. Always verify the internal diameter of the hose or external diameter of the accessories for an accurate selection.
Thread Types
Different manufacturers might use various thread types. Recognising the distinctions between NPT (National Pipe Thread), BSP (British Standard Pipe), and metric threads can influence compatibility. Ensure you distinguish between male and female threads to guarantee a proper connection.
Brand Compatibility

Components from different brands might appear similar but can vary in design and fit. To avoid compatibility issues, use connectors recommended by the manufacturer of your cleaning equipment. Additionally, consider that adapting components can compromise performance, leading to inefficiencies.
| Size | Internal Diameter (mm) | Common Use |
|---|---|---|
| 1/4 inch | 6.35 | Standard pressure equipment |
| 3/8 inch | 9.53 | Higher flow applications |
| ½ inch | 12.7 | Heavy-duty usage |
Taking time to consider these variables not only saves time during setup but also enhances the overall efficiency of your cleaning tasks. Always keep a flexible compatibility strategy while exploring varied options on the market for the best outcomes.
Tools Required for Measuring Quick Connect Assemblies
Begin with a reliable tape measure or caliper for precise dimensions. Digital calipers provide both imperial and metric measurements, making them versatile for various components.
- Tape Measure: Ideal for larger fittings or when working outdoors; ensure it is sturdy and easy to read.
- Digital Caliper: Offers accuracy down to 0.01 mm, perfect for small threaded areas.
- Thread Pitch Gauge: Essential for identifying the specific thread sizes. A varied set allows for easier identification of different types.
- Socket Set: Useful for loosening tightly secured connections, especially for this style of fitting.
- Pliers: Adjustable pliers can aid in gripping and rotating components without damaging them.
Ensure all tools are in good condition to obtain accurate readings. It’s beneficial to have a cloth on hand for cleaning fittings before taking measurements, as debris can lead to incorrect sizes.
Step-by-step guide to measuring fitting diameter
Begin with a selection of tools for accurate results. A calliper or measuring tape is ideal. If using a tape, ensure it’s flexible for a snug fit around the attachment. Use a clean surface to prevent misreading.
Next, if utilising a calliper, open the jaws to slightly larger than the fitting’s width, then close them until they gently touch both sides. Record the measurement displayed on the scale. For a tape, wrap it around the widest portion of the connector snugly. Mark the point where it overlaps and measure that length.
For round fittings, obtain both the outer and inner diameter. The outer diameter is taken from the widest external surface, while the inner diameter is measured by inserting a smaller tool or using the calliper’s internal jaws. Keep in mind that some connectors may have flared or stepped designs, which require careful measurement.
Double-check all readings to confirm accuracy. It’s beneficial to take multiple measurements to ensure consistency, especially with irregular shapes. When satisfied with the results, document each size clearly to avoid confusion during future tasks.
Identifying the Thread Type of Quick Connection Components

To ascertain the thread type of coupling elements, start with a visual inspection. Look for markings or specifications on the fitting itself; many manufacturers indicate the thread type directly. Common types include NPT (National Pipe Thread), BSP (British Standard Pipe), and metric threads.
If markings are absent, I recommend using a thread gauge tool. This simple device helps to ascertain the thread profile and pitch accurately. Place the gauge against the threads to determine the correct classification.
For a more detailed analysis, use calipers to measure both the outer diameter and the thread count. Count the number of threads within a one-inch length, which provides a vital clue regarding the thread type. Typically, NPT threads have a tapered profile whereas BSP threads maintain a parallel profile.
In addition, consider the application and compatibility of the component. Sometimes, different thread types can appear similar but may yield issues when improperly matched. Ensuring compatibility with adjoining components avoids leaks and enhances the overall performance of the system.
Lastly, when in doubt, consult the manufacturer or the fitting documentation. Such sources often provide comprehensive details on the thread profiles and their respective applications, ensuring informed choices in component selection.
Identifying the Material of Quick Connect Fittings

Begin by examining the exterior of the connector. If the surface is shiny and reflective, it’s likely brass. This material generally has good resistance to corrosion, making it popular in various applications. If the connector feels lightweight and cold to the touch, it’s probably made of aluminium. Aluminium connections are less durable but provide a good balance between weight and strength.
Next, look for any specific markings or colouring. Stainless steel fittings often feature a brushed finish and may have a slightly more substantial weight than their brass counterparts. This metal offers enhanced resistance to rust and chemical damage. If you find plastic components, confirm they are high-density polyethylene or nylon, usually reinforced for added strength.
Conducting a Simple Test
A straightforward method involves using a magnet. If a magnet sticks to the fitting, it’s likely stainless steel or iron-based; if it does not, you’re probably looking at brass, aluminium, or plastic. Additionally, consider the threading. Metal parts generally exhibit sharper, more defined threads, while plastic may appear smoother and less detailed.
Testing Durability
For a definitive assessment, perform a strength test. Gently twist or apply pressure to check for flexibility or cracking. Brass and stainless steel connectors will resist deformation under stress, while plastic can break or crack more easily. This method helps ensure the longevity of your tools in demanding conditions.
Common standards for quick connect fitting measurements
Typically, standards for these attachments vary, but there are industry norms to keep in mind. The primary measurements include the diameter, thread pitch, and shape of the connector. Most fall under the dimensions of 1/4″, 3/8″, or 1/2″. Each size indicates the internal diameter, which directly affects compatibility with hoses and nozzles.
Thread types generally adhere to either National Pipe Thread (NPT) or British Standard Pipe (BSP) standards. NPT threads are tapered, enabling a tight fit when twisted, while BSP threads are parallel, requiring a sealing method to prevent leaks. It’s crucial to determine which type you are dealing with to ensure proper alignment and connection.
Material standards also play a role, with popular choices being brass, stainless steel, or plastic. Brass is preferred for its durability and corrosion resistance, while stainless steel offers strength but can be heavier. Plastic is lightweight and cost-effective but may not withstand the same pressures over time. Knowing the material aids in understanding the wear and longevity of the attachment.
Placement for measurements follows the metric or imperial systems, depending on the region of use. In the USA, inches prevail, while metric dimensions are standard in Europe. Being aware of these differences is essential for international compatibility.
In summary, familiarising yourself with these common standards will help in identifying and selecting the appropriate attachments efficiently.
Troubleshooting Measurement Discrepancies in Fittings
If you encounter inconsistencies in the dimensions of your connectors, start by confirming the calibration of your measuring instruments. Always use reliable tools like calipers or measuring tapes that have been recently calibrated. If the measurements are still off, consider the following:
- Check for Debris: Examine the fitting for any dirt or debris that might affect the measurement. Clean the surfaces thoroughly before measuring again.
- Inspect for Wear: Look for signs of wear or damage on the threads or sealing surfaces. Wear can cause fittings to appear larger or smaller than their actual dimensions.
- Verify Seal Type: Consider the type of seals used in conjunction with the fittings. Different sealing mechanisms can influence how tightly parts fit together, leading to measurement variances.
- Temperature Effects: Account for temperature changes that might cause materials to expand or contract. It’s best to take measurements at room temperature for accuracy.
- Consistency in Measurement Technique: Use the same technique every time you measure. For example, ensure you’re measuring the same portion of the connector each time to avoid discrepancies.
If problems persist, compare your findings with industry standards or consult manufacturer specifications. This might identify if there are common discrepancies between your measurements and those stated by manufacturers.
In case of uncertainty, consider cross-referencing with another fitting of the same type. This can validate your measurements and help establish a baseline for accuracy.


