

The key to achieving a spotless exterior lies in meticulous attention to detail. First, gather the right tools: a quality high-pressure sprayer, a suitable detergent, and soft brushes. Fill the detergent reservoir according to the manufacturer’s instructions, ensuring the mixture is safe for your vehicle’s finish. Start by rinsing the surface with water to remove loose debris that could scratch the paint during subsequent cleaning steps.
Adjust the nozzle for a wide spray pattern, keeping the washer at an optimal distance of 2-3 feet from the surface. This approach provides a broad coverage area without causing damage. Move in a systematic manner, working from the top down, highlighting the importance of not missing any spots. Implement a sweeping motion while consistently keeping the nozzle in motion to avoid concentrated pressure on any one area.
After the initial rinse, apply detergent using the low-pressure setting. Allow it to dwell for the recommended time to break down stubborn grime, but take care not to let it dry on the surface. Finally, rinse thoroughly, ensuring all soap is removed and that you’re left with a gleaming finish. This method not only enhances the aesthetic appeal but also preserves the integrity of your vehicle’s exterior.
Step-by-Step Technique for a Spotless Finish
Begin by selecting an appropriate nozzle, ideally a wide-angle one, to achieve a balance between coverage and pressure. This prevents damage to delicate surfaces while ensuring a thorough clean.
Pre-soak surfaces using a low-pressure setting, applying a suitable detergent to loosen dirt and grime. Focus on problematic areas, such as wheel arches and behind the number plates, where debris often accumulates.
After allowing the detergent to dwell for a few minutes, switch to a high-pressure nozzle. Start at the top and work your way down, moving in a systematic left-to-right motion. This method ensures that dirt is pushed down and away from the painted surfaces.
Pay special attention to the wheels. Utilize a dedicated wheel cleaning attachment or a brush along with the jet to remove built-up brake dust. It is critical to maintain a safe distance to avoid damaging the finish.
After the main clean, use a soft cloth or drying towel to avoid water spots. Dry the vehicle section by section, beginning with the roof and moving downward. This also gives you a chance to inspect for any missed spots or imperfections.
Finally, consider applying a wax or sealant post-cleaning to protect the exterior. This adds an extra layer of shine and makes subsequent maintenance easier, keeping your vehicle looking pristine for longer.
Selecting the Right Pressure Washer for Car Cleaning
For effective vehicle detailing, I recommend choosing a machine with a pressure rating between 1200 to 1900 PSI. This range offers sufficient power for dirt removal without risking damage to paintwork.
As for the flow rate, opt for models delivering 1.4 to 1.6 gallons per minute (GPM). A higher flow rate helps rinse soap off efficiently, minimising streaks.
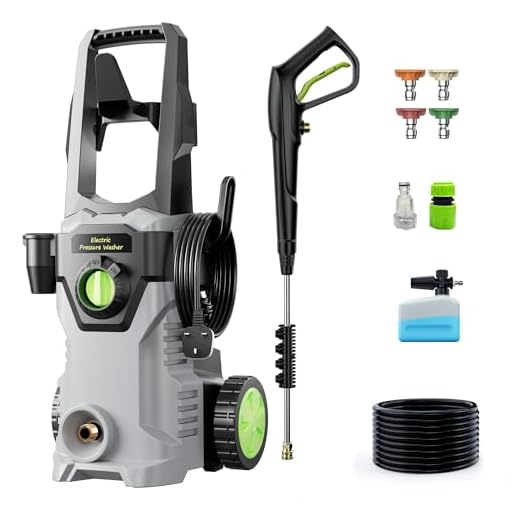
When considering nozzle types, a fan nozzle (25° to 40°) is ideal for broad coverage, while a soap nozzle (usually 40°) aids in mixing cleaning agents. Adjustable nozzles provide versatility; a rotating nozzle can tackle stubborn grime.
Electric units are typically quieter and more user-friendly, while gas models offer portability and increased power. If you anticipate frequent use, investing in a gas-powered model may be beneficial, despite the increased maintenance requirement.
| Feature | Recommendation |
|---|---|
| Pressure (PSI) | 1200 – 1900 |
| Flow Rate (GPM) | 1.4 – 1.6 |
| Nozzle Type | Fan and Soap Nozzles |
| Power Source | Electric or Gas |
Investing in a quality foam cannon can significantly enhance cleaning efficiency. These attachments mix detergent with the water flow for thorough application, allowing for a better pre-soak and loosening of dirt.
Durability matters; look for a unit with a solid frame, brass fittings, and a quality hose to withstand frequent use. Brands known for longevity tend to have better customer reviews, so researching reputable options will pay off in the long run.
Preparing Your Vehicle for a Pressure Clean
Before engaging in the cleaning process, ensure the exterior is free from loose debris. Walk around the vehicle and inspect for dirt, leaves, or any other materials that could scratch the surface during the cleaning phase.
- Remove any personal items from the cabin and trunk to avoid accidental damage.
- Secure or remove any add-ons, such as antennas or spoilers, to prevent them from becoming dislodged.
Check all seals, especially around doors and windows. Ensure they are intact, as excessive water intrusion can lead to damage.
If the exterior has wax or ceramic coatings, consider their durability against high-pressure streams. It’s advisable to test a small area first if unsure.
- Rinse the vehicle lightly with water to eliminate larger particles.
- Evaluate any specific areas needing additional attention, such as wheel wells or undercarriage.
Using a foam cannon can prepare the surface for a deeper cleanse. Pre-soaking can help loosen tough grime. Select a pH-neutral detergent appropriate for the vehicle’s finish to avoid any adverse reactions.
Ensure appropriate footwear and clothing. Closed-toe shoes are recommended, and rain gear can protect you from splashes. Maintain a safe distance while cleaning to avoid risks associated with high-pressure streams.
Choosing the Correct Nozzle for Different Surfaces
Select a nozzle based on the surface conditions. For delicate paint finishes, use a 40-degree fan nozzle. It disperses water widely, reducing the risk of damage. This is ideal for rinsing away shampoo or soap without applying too much pressure.
For moderate dirt and grime, I recommend a 25-degree nozzle. Its narrower spray creates more impact while remaining gentle enough for most surfaces. This option suits the bodywork where slight abrasion may be necessary.
When tackling stubborn stains or heavy debris, the 15-degree nozzle offers concentrated pressure. Use this sparingly on tough areas like wheel wells and grilles, ensuring to maintain a safe distance to avoid damaging paint or delicate parts.
Finally, a soap nozzle can be invaluable for applying detergents. This attachment allows for properly mixing detergent with water at a lower pressure, making it easier to coat surfaces evenly and effectively break down contaminants.
Always assess the surface before selecting a nozzle. Test on a small, inconspicuous area first, especially for sensitive finishes. Proper nozzle selection not only aids in cleaning efficacy but also protects your vehicle from unintentional damage.
Applying Soap and Detergent Effectively
For optimal results, select a specially formulated detergent designed for automotive surfaces. These products often contain ingredients that break down dirt and grease without harming the paint. Look for options that are pH-neutral and biodegradable to ensure safety for both your vehicle and the environment.
Proper Mixing and Dilution
Follow the manufacturer’s instructions for mixing ratios when preparing the soap solution. Typically, a concentrated product will require dilution with water, usually around 1 part soap to 10 parts water. Use a clean bucket for mixing to avoid contamination from other cleaning agents.
Application Method
Utilise the foam cannon attachment if your model allows for it. This provides an even coating of soap, which clings to surfaces more effectively than manual application. Start from the top of the vehicle and work downwards, ensuring all areas are covered. Allow the soap to dwell for a few minutes for maximum penetration of dirt and grime before rinsing thoroughly.
Ensuring the Right Distance and Angle during Cleaning
Maintaining an optimal distance and angle while spraying is key for effective results. Positioning the nozzle roughly 60 cm away from the surface prevents damage while still removing grime efficiently.
Recommended Nozzle Angles
- For vertical panels, hold the spray at a slight downward angle–around 30 to 45 degrees–to avoid water pooling and ensure thorough coverage.
- For horizontal surfaces, adjust the nozzle to a horizontal angle, allowing debris to be lifted away from the surface easily.
Monitoring Distance

As you clean, you may need to adjust the distance based on the type of cleaning needed:
- For light dirt, maintain the 60 cm distance.
- For stubborn stains, decreasing the distance to about 30 cm can enhance cleaning power while still being cautious.
- Keep a consistent distance to avoid uneven cleaning and potential damage.
Regularly evaluating the angle and distance can significantly affect overall results and prolong the lifespan of the vehicle’s finish. Take your time to adjust as needed for the best possible outcome.
Drying Your Vehicle after Pressure Cleaning

Immediately after rinsing off the soap, grab a high-quality microfiber towel for drying. This fabric is highly absorbent and safe for paintwork, preventing scratches. Focus on a methodical approach, starting from the roof downwards. This ensures water does not drip onto already dried areas, which can lead to streaks.
Techniques for Effective Drying
Employ the blotting technique instead of dragging the towel across the surface. This reduces the risk of swirling marks. For larger areas, a drying aid spray can enhance results, promoting a flawless finish while providing additional protection against contaminants.
Final Touches

Pay special attention to crevices and areas where water may pool, such as around door seals and under the bonnet. A clean, soft detailing brush can help reach these spots, ensuring every section is thoroughly dried. After drying, consider applying a wax or sealant for further protection against the elements.
Maintaining Your Pressure Washer for Longevity
Regularly inspect the air filter and replace it when it becomes dirty to ensure optimal performance. A clean air filter prevents excess dust and debris from entering the motor, prolonging its life.
Make it a habit to change the oil based on the manufacturer’s recommendations. Fresh oil reduces friction within the engine, maintaining efficiency and reducing wear.
After each use, drain the water from the pump to prevent freezing in colder months, which can crack internal components. This simple step can save you from costly repairs.
Check the hoses and connections for leaks or damage. Replace any worn-out parts immediately to maintain pressure and prevent losing water flow.
Store the equipment in a dry place, away from harsh elements, to prevent rust and corrosion. Keeping it indoors will also protect it from temperature fluctuations.
Use the right detergent type to avoid damage to the machine’s components. Always rinse the detergent container to prevent build-up that can lead to malfunction.
Inspect and clean the nozzle frequently to avoid clogs that can decrease pressure, ensuring a consistent flow for optimal cleaning.
Lastly, refer to the owner’s manual for specific maintenance schedules and guidelines. Following the manufacturer’s instructions is key to extending the life of your equipment.


