


This equipment typically requires a specific reservoir designed for detergents. Locate this compartment, which is often separate from the water tank, ensuring you don’t mix cleaning agents with plain water. Consult your product manual if you’re unsure about its location or capacity.
Before filling, ensure the tank and surrounding area are clean and dry. Carefully pour your chosen cleaning solution into the designated chamber. Use a funnel if necessary to avoid spills. Fill to the indicated line, as overfilling could lead to inefficient performance.
After adding the cleaner, securely close the compartment lid. It’s advisable to check for leaks or spills before starting the machine. Setting the correct nozzle according to the manufacturer’s specifications will optimise the cleaning process, allowing the agent to be effectively dispensed under pressure.

Finally, be mindful of safety instructions related to the cleaner being used. Some substances may require protective gear, such as gloves or goggles, to avoid skin irritation or harmful reactions. Always follow the guidelines for optimal results and safety while operating your high-pressure device.
Steps for Adding Detergent to Your Cleaning Device

Begin by locating the detergent tank on the machine, usually situated at the rear or side. Ensure the pressure equipment is turned off and disconnected from the power source before proceeding.
Next, choose a compatible cleaning agent specifically designed for your model. Many brands offer concentrated solutions, which require dilution according to the instructions provided on the label.
Procedure
Follow these sequential steps:
| Step | Action |
|---|---|
| 1 | Open the detergent tank cap carefully to avoid spills. |
| 2 | Pour the recommended amount of detergent into the tank, ensuring not to exceed the maximum fill line. |
| 3 | Securely close the tank cap to prevent leaks during operation. |
| 4 | Reattach any hoses or attachments previously removed. |
After completing the steps above, activate your unit and adjust settings as required to initiate cleaning. Keep an eye on the detergent level and refill as necessary for uninterrupted cleaning. Always rinse the nozzle with clean water after use to prevent clogs from dried detergent residues.
Choosing the Right Cleaning Agent for Your Equipment

Opt for a detergent specifically formulated for high-pressure cleaning appliances. These products are usually biodegradable and gentle on surfaces but tough on grime. Ensure the solution is compatible with your device’s specifications as outlined in the user manual. It’s vital to check the pH level; neutral or slightly alkaline cleaners are more suitable for most applications.
Surface Compatibility
Consider the type of surface you will be cleaning. For instance, delicate materials such as wood or painted surfaces require softer agents. Conversely, tougher substances like concrete can handle stronger formulations. Always perform a patch test in an inconspicuous area to avoid potential damage.
Environmental Impact
Select eco-friendly agents that are safe for the environment. Many brands now offer sustainable options that effectively eliminate dirt and stains without harming plants or animals. Reading labels for certifications and ingredient lists can help make an informed choice.
Understanding the Soap Injection System
The soap injection system is critical for achieving optimal cleaning results. This feature can be either an integrated tank or a direct attachment on the lance. When a unit has a built-in tank, it enables the seamless mixing of detergent with the water stream, providing thorough coverage as you clean.
To effectively utilise this system, it’s crucial to ensure compatibility between the detergent and your equipment. Most models operate with low-pressure settings for foam application, allowing the mixture to cling to surfaces and penetrate grime effectively. Ensuring that the soap dial is set appropriately guarantees that the right amount of cleaner is drawn into the system during operation.
Regular maintenance of the injection system is vital. Periodically check for blockages and clean the suction tube. Over time, residue can build up and hinder performance. Also, rinsing the system with clean water after use can prolong its life and maintain efficiency.
When utilising a machine equipped with such a system, adjust the nozzle to a wider spray pattern when applying detergent. This technique helps distribute the cleaning agent evenly over surfaces, maximising the effectiveness of the cleaning process.
Leveraging this feature not only enhances the cleaning outcome but also reduces manual scrubbing, saving both time and effort. Understanding your model’s specific soap injection mechanism will provide better control over your cleaning tasks, leading to more satisfying results.
Preparing Your Pressure Washer for Soap Application
The first step is to ensure the machine is powered off and disconnected from the mains supply. This prevents any accidental activation while working with the detergent system.
Next, remove the high-pressure nozzle and substitute it with the dedicated foam or detergent nozzle if available. This component typically delivers the cleaning agent effectively. If your model uses an injector system, check the injector or cleaning solution compartment for any debris or residues. Clean these parts thoroughly to ensure proper function.
It’s vital to use the correct dilution of the cleaning agent as indicated on the container. Misuse or excess concentration can lead to residue build-up and may damage components over time.
System Check
Before adding the cleaner, inspect hoses and connections for leaks or damage, as any weakness can compromise performance. After confirming everything is secure, fill the designated reservoir with the prepared solution. If your machine draws from an external bottle, connect it securely to the inlet.
Final Preparations
Once the solution is in place, perform a test run at low pressure. This checks the application system and ensures the fluid is being drawn correctly. Proceed with cleaning only after confirming that everything operates smoothly.
Checking for Compatibility with Soap Types
Before selecting a cleaning agent, verifying compatibility with your equipment is crucial. Consult the manufacturer’s guidelines to ensure the formula you choose aligns with your machine’s specifications. Some detergents may contain harsh chemicals that can damage sensitive components.
I recommend prioritising biodegradable options. They’re environmentally friendly and often compatible with a wider range of devices. Products labelled as safe for pressure appliances typically indicate compatibility.
Different types of cleaners, such as those designed for vehicles, homes, or industrial use, can vary significantly. Ensure the chosen cleaner is suitable for the surfaces you intend to clean to avoid damage. For instance, some formulas may be too aggressive for soft materials or delicate finishes.
Always perform a patch test if unsure. Apply a small amount on an inconspicuous area and observe the reaction before widespread application. This practice helps minimise the risk of adverse effects.
Mixing different brands or types can be risky. I’ve seen many users combine incompatible formulas, leading to clogged systems or ineffective cleaning. Stick with one type at a time and follow mixing instructions if necessary.
Regular maintenance of the detergent system is vital. Residual cleaners from previous uses might react negatively with new products. Thoroughly rinse the system before introducing a new formula to maintain performance and longevity.
Measuring the Correct Amount of Soap
To achieve optimal cleaning results, it’s critical to measure the right volume of cleaning solution. Typically, the amount varies based on the formulation and the dilution instructions from the manufacturer. Following are precise measurements and methods to consider:
- Read Product Instructions: Start by checking the label on your cleaning agent. Most commercial solutions will provide specific dilution ratios, often expressed in parts water to parts cleaner.
- Use a Measuring Tool: Employ a measuring cup or syringe for accuracy. This prevents over-concentration, which could damage surfaces or the equipment.
- Common Ratios: A frequently used ratio is 1:10 (cleaner to water). For stronger cleaning tasks, you might consider 1:5. Always adjust according to stubbornness of the stains.
After measuring, pour the mixture into the detergent reservoir, ensuring it’s sealed properly. If the amount seems too much or too little, refer back to the solution’s guidelines. Make adjustments as necessary, as an excess of cleaner could lead to ineffective rinsing and leave residues.

Lastly, conducting a test on a small section can also help gauge effectiveness before applying it broadly to larger areas.
Adding Cleaning Solution to the Reservoir or Foamer
Begin by ensuring your device is completely powered off and disconnected from its electrical source. Depending on your model, locate the detergent tank or foamer attachment.

If utilising a reservoir:
- Open the tank lid, turning it counterclockwise if necessary.
- Carefully pour the pre-measured cleaning liquid into the reservoir, ensuring not to overfill it.
- Once filled, securely close the tank lid to prevent leaks during operation.
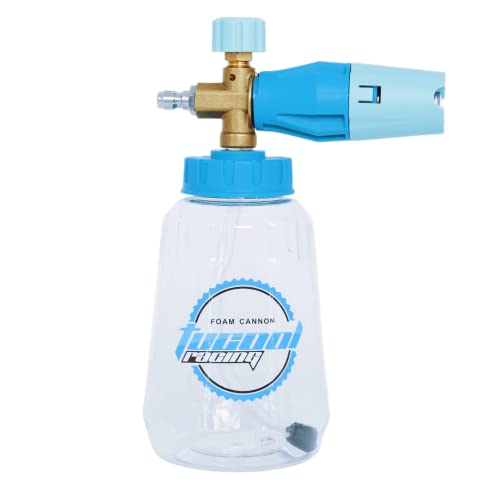
For units equipped with a foam cannon:
- Attach the foam cannon to the spray gun, ensuring a snug connection.
- Unlock the filling chamber by turning the cap.
- Pour the appropriate amount of cleaning agent into the chamber as outlined in your user manual.
- Reattach the cap and check for tightness.
Always refer to the manufacturer’s guidelines regarding the maximum fill levels and specific products that are permissible. This will help avoid any potential damage to the equipment.
Double-check your setup before activating the unit, ensuring all connections are secure and there’s no leakage. Following these steps ensures optimal performance and effective cleaning results.
Adjusting the Pressure Washer Settings for Soap Use
The effectiveness of the cleaning solution relies heavily on the correct adjustment of your equipment’s settings. Here’s what to do:

1. Choose the Right Nozzle
- Select a low-pressure nozzle, typically marked as 25 degrees or 40 degrees, which allows for a gentler application.
- Using a rotating nozzle can be counterproductive when applying the cleaning solution, as it adds unnecessary pressure.
2. Set the Pressure Level
- Reduce the pressure level on your machine. Aim for a setting around 1000 to 1500 PSI, which is effective for applying solutions without causing damage.
- For machines without adjustable settings, consider using a soap injector or a foamer attached to the lance.
3. Utilize the Right Flow Rate
- Check your model’s specifications for the appropriate flow rate. Most detergents require a flow rate of 1.5 to 2 GPM to mix effectively.
- A validation check ensures you’re using a rate that distributes the cleaning compound uniformly.
Following these guidelines enhances the application of the cleaning solution, leading to optimal results on various surfaces. Proper adjustments not only improve performance but also prolong the life of the equipment and protect the surfaces you’re cleaning.
Maintaining Your Washer After Cleaning Solution Application

Immediately after using the cleaning agent, it’s crucial to flush the system with clean water. This prevents residue build-up in the injector, hoses, and gun. Run your unit for about five minutes with plain water to clear out any remaining mixture.
Inspect the nozzle for clogging. A blocked nozzle can hinder performance and cause damage. Replace or clean it according to the manufacturer’s instructions.
Next, examine various components for wear and tear. Check hoses and connections for any signs of leakage or cracking. Maintain them by ensuring they are properly coiled and stored away from direct sunlight.
It’s wise to clean the soap reservoir after each use. Rinse it thoroughly to prevent any leftover product from solidifying or becoming a breeding ground for bacteria.
Keep the motor and pump in optimal condition by scheduling regular maintenance. Check oil levels if applicable, and replace filters as per the manufacturer’s recommendations.
To prolong the longevity of your appliance, always store it in a dry, sheltered area. Avoid leaving it exposed to the elements, which can cause rust and other degradation.
| Maintenance Task | Frequency |
|---|---|
| Flush system with water | After each use |
| Inspect hoses and connections | Monthly |
| Clean detergent reservoir | After each use |
| Check oil levels and filters | Every 50 hours of use |
| Store machine in a dry area | Always |
Following these steps ensures reliable operation and enhances the durability of your equipment over time.


