
For those stubborn stains left behind after high-pressure cleaning, an effective way to tackle the issue is through the use of a wood brightener. This product not only revitalises the surface but also helps to restore its natural appearance. Apply it according to the manufacturer’s instructions, allowing adequate time for it to penetrate the discoloured areas.
Once the wood brightener has done its work, a gentle scrubbing with a stiff-bristle brush can aid in lifting away the remnants. Use a circular motion to ensure even coverage and avoid damaging the fibres of the timber. Rinse thoroughly with clean water to wash away any lingering product and dirt.
Additionally, a mixture of vinegar and water serves as an eco-friendly alternative for treating unsightly residues. Combine equal parts of white vinegar and water, soak a cloth in the solution, and apply it directly onto the affected area. After a short period, scrub and rinse thoroughly to enhance the surface’s appearance.
Addressing Unsightly Residues on Timber Surfaces
Start with a gentle cleanser specifically formulated for untreated timber. Mix the solution according to the manufacturer’s instructions and apply it to the affected areas using a soft-bristle brush.
After allowing the cleaner to sit for several minutes, scrub the surface lightly, focusing on the discoloured spots. Rinse thoroughly with clean water to eliminate residue. Repeat this step if necessary.
In cases where the blemishes persist, whitening agents like oxalic acid can be used. Prepare a solution by dissolving the acid in warm water, following the packaging guidelines. Apply it precisely to the damaged regions with a sponge or cloth. Leave it for about 10-15 minutes, then rinse.
For deeper restoration, consider sanding the surface lightly with fine-grit sandpaper. This helps blend the discolouration with the surrounding area. Always sand in the direction of the wood grain to avoid creating further damage.
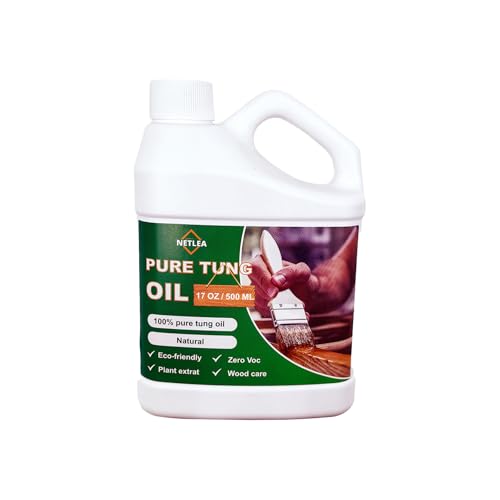
Once the surface is smooth, apply a suitable wood finishing product to protect against future issues. Select a penetrating oil or sealant that matches the original finish of the surface to maintain consistency in appearance.
- Always test any cleaner or treatment on a small, inconspicuous area first.
- Wear protective gear, including gloves and a mask, when handling chemicals.
- Regularly maintain your timber by cleaning and sealing it to prevent future discolouration.
Identifying Types of Cleaning Equipment Impressions on Timber Surfaces
Recognising the different forms of damage caused by high-powered cleaning devices is key to addressing the issue effectively. There are several distinct types of impressions that may be left on timber, each requiring a tailored approach for remediation.
Deep Groove Patterns
These lines are often the result of excessive force or incorrect nozzle distance. They can penetrate the surface, leading to splintering and rough textures. If gouges are significant, sanding may be necessary to smoothen the area before applying any restorative coatings.
Faded or Discoloured Areas
This type of damage appears as lighter patches on the surface and typically occurs when excessive moisture is introduced too rapidly. The finish may be compromised, affecting the wood’s natural colour. Applying a suitable stain can help re-establish uniformity in appearance.
Understanding these variations allows for more informed decisions in treatment and restoration, ensuring the longevity and aesthetic appeal of the timber surface.
Preparing Your Timber Surface for Cleaning
Clear the area around the timber surface of any furniture, plants, or obstacles that could hinder the cleaning process. This not only allows for a thorough job but also prevents damage to your belongings.
Conduct an inspection of the boards for any loose or damaged sections. Secure or replace any problematic pieces to ensure a uniform surface during cleaning. Sand down rough spots where necessary, as these may trap dirt or cleaning solution.
Assess the wood for previous treatments or finishes. If your surface has been sealed, it’s imperative to determine whether these products are compatible with the cleaning agents planned for use. If uncertain, testing a small inconspicuous area can prevent an adverse reaction.
Gather necessary supplies, including a broom for debris removal, a scraper for stubborn spots, and the recommended cleaning agents suitable for your timber type. A sturdy brush with stiff bristles can assist in tackling grills or grooves.
Consider weather conditions; aim for a dry and mild day when the surface is not exposed to direct sunlight. This reduces the risk of drying solutions too quickly and enables better absorption of cleaning agents.
| Task | Details |
|---|---|
| Area Clearance | Remove all items from the timber surface. |
| Surface Inspection | Check for loose or damaged boards; secure or replace them. |
| Assessment of Treatments | Identify finishes; conduct a patch test if unsure of compatibility. |
| Supply Gathering | Collect brushes, scrapers, brooms, and suitable cleaning solutions. |
| Weather Check | Plan for a mild, dry day, avoiding direct sunlight. |
With these preparations, you can turn your attention to the intricate cleaning process with confidence, ensuring that the timber maintains its appeal and durability.
Choosing the Right Cleaning Solution for Wood
Opt for a pH-neutral cleaner designed for timber surfaces. These formulations prevent potential damage to the grain while effectively breaking down residues. Always read labels to ensure compatibility with the specific type of lumber on your outdoor space.
Natural Options
Vinegar and water solutions can be effective for light cleaning tasks. Mix equal parts of white vinegar and water in a spray bottle. This method is suitable for routine maintenance and can help brighten the surface without harsh chemicals.
Commercial Products
If opting for a commercially available solution, look for eco-friendly brands. Concentrated formulas often yield better results when diluted as instructed. Brands like Behr or Thompson’s WaterSeal offer products tailored for exterior wood, ensuring enhanced protection against the elements while cleaning.
Always test any cleaner on a small, inconspicuous section first. This way, you confirm that the product does not alter the appearance or finish of the timber. With the right solution, the process of rejuvenating your outdoor area becomes straightforward and efficient.
Using Sandpaper to Address Deep Impressions
For deeper indentations on your surface, sandpaper is a practical choice. Opt for medium-grit sandpaper, around 80 to 120 grit, to start effectively smoothing out those stubborn areas. Ensure you sand along the grain; this preserves the natural look and texture of the timber.
Step-by-Step Process
Begin by cleaning the affected region to remove dust and debris. With a sanding block, apply consistent pressure while working the sandpaper over the deep impressions. Periodically check your progress to avoid oversanding, which can lead to unevenness. Transition to finer grit, such as 220, to get a smoother finish.
Finishing Touches
After sanding, wipe the dust away with a damp cloth. Allow the area to dry fully before applying a suitable wood treatment. This not only enhances the colour but also protects the surface against the elements.
Regular maintenance and inspection can prevent deeper abrasions from appearing in the future. Taking these proactive steps ensures your outdoor area looks its best year-round.
Applying Wood Stain to Restore Original Finish

Select a high-quality wood stain that matches the original colour of your flooring. Test the stain on a hidden area to confirm the match before proceeding.
Thoroughly clean the surface to remove any debris or remaining cleaning agents. Ensure the wood is completely dry to allow for optimal absorption. I recommend waiting at least 24 hours after cleaning.
Use a brush or a roller to apply the stain, starting in a corner and working towards the exit to avoid stepping on stained areas. Maintain a wet edge to prevent lap marks. Apply evenly in the direction of the grain for a consistent finish. Make sure to coat the edges and ends for balanced colour.
- Apply the first coat generously and allow it to penetrate for 5-15 minutes, then wipe off the excess with a clean cloth.
- After the first coat has dried completely, usually 24 hours, assess the colour depth and apply a second coat if necessary.
Allow the final coat to cure as per the manufacturer’s instructions, typically 48-72 hours, before heavy use or placing furniture back. This step ensures the stain fully adheres to the surface and develops resistance to moisture and UV rays.
For protection and longevity, consider applying a polyurethane finish once the stain is fully cured. This adds an extra layer against wear while enhancing the colour.
Maintaining Your Deck to Prevent Future Marks
Regular maintenance is a proactive approach that greatly reduces blemishes on your outdoor surface. I recommend cleaning your platform with a soft-bristle broom and mild soap solution every few months. This simple routine keeps dirt and grime from embedding into the fibres of the timber.
Sealing Your Surface
Applying a quality sealant is vital. A transparent sealant creates a protective layer that helps repel water and prevents discolouration. Ensure the wood is completely dry before application; this guarantees proper adhesion and longevity of the sealant.
Choosing Appropriate Footwear

Using soft-soled shoes outdoors prevents unintentional scuffs and scratches. Hard-soled footwear can leave marks and damage protective coatings over time. Opting for sandals or dedicated outdoor shoes is a simple yet effective practice.
Regular inspections should be part of your maintenance routine. Look for signs of wear, such as splintering or fading, and address them promptly. Catching issues early can save you time and effort later on, keeping your surface looking pristine.
Lastly, optimise your landscaping. Ensure plants and shrubs are well-maintained and not encroaching on your space. Overhanging branches can cause stains from sap or debris. A tidy garden enhances not only aesthetics but also protects your outdoor area.

