


Begin by disconnecting the unit from any power source and draining all residual water to prevent spills. Locate the necessary tools: a multimeter for electrical checks, a wrench set, and a new cleaning mechanism appropriate for your model. Familiarise yourself with the user manual; it contains vital diagrams that simplify the process.
Next, identify the areas that require attention. If you notice persistent leaks or decreased water pressure, inspect the seals and connections. Often, a worn gasket or loose fitting is at fault. Tighten or replace as needed using the appropriate sizes from your wrench kit. Be cautious not to overtighten, which may cause further damage.
Once you’ve addressed any visible issues, focus on the internal components. Remove the casing to access the motor and pump assembly. Check for any signs of wear or corrosion. If components appear damaged, refer to your manual for replacement parts. After installing the new pieces, ensure everything is secure before reassembling the unit.

Lastly, run a series of tests before putting the equipment back into regular service. Monitor for leaks and listen for irregular sounds which might indicate an installation issue. Following these steps guarantees a reliable and efficient operation for your cleaning tasks.
Steps to Swap Out Your Cleaning Machine

Begin by ensuring that the device is disconnected from the power source. Safety is paramount in this process. Next, gather necessary tools: a wrench, screwdriver, and replacement component.
Proceed with these specific steps:
- Access the compartment housing the unit. This may require unscrewing several screws.
- Identify the power and water connections; detach them carefully to prevent damage.
- Remove mounting hardware that secures the component in place. Keep these screws for future use.
- Carefully extract the worn unit, ensuring no residual parts are left behind in the compartment.
- Align the new item with the existing mounts and connections. Ensure it fits snugly.
- Reconnect the water and power supplies, ensuring there are no leaks.
- Screw everything back together, ensuring the device is sealed properly to avoid any operational issues.
- Conduct a functionality test. Check for leaks and listen for any unusual sounds during operation.
By following these steps carefully, you can achieve a successful transition. Always refer to the manufacturer’s guidelines for any specific instructions related to your model.
Identifying the Right Replacement Parts for Your Fluidmaster
To ensure seamless functionality, always verify the model number of your unit before purchasing components. This number can typically be found on a label or stamped on the body of the equipment. Look for specific part references in the user manual, which provide details on compatible replacements.
Utilising Manufacturer Resources

Check official websites for parts catalogues. Many manufacturers offer interactive diagrams that identify each component. This visual guide assists in cross-referencing to find matching items quickly. Additionally, customer support can provide clarification on compatibility if you encounter challenges.
Considering Quality and Compatibility
Selecting original equipment manufacturer (OEM) parts is advisable for guaranteed fit and performance. While aftermarket options can be more affordable, they may lack durability. Read reviews and seek recommendations from reputable suppliers to avoid poor-quality replacements. Ensure compatibility with existing components to prevent future malfunctions.
Lastly, stay informed about warranty terms, as using non-OEM parts could void protections. Always weigh cost against reliability when making your decision.
Gathering Tools Needed for the Replacement Process
The first step is assembling the right tools to ensure a seamless transition. A basic toolkit typically suffices. Gather a socket set, adjustable wrenches, and screwdrivers–both flathead and Phillips. These will be instrumental in loosening and tightening fasteners during the task.
Specific Tools and Their Utility

A pair of pliers will assist with gripping and manipulating small components. Consider purchasing a pipe wrench if there are any stubborn fittings; this tool provides added leverage. Additionally, a torque wrench is beneficial for ensuring that bolts are secured to the correct specifications.
Include a utility knife for any necessary cutting, especially if new hoses or seals need to be adjusted. Finally, prepare a bucket or container to catch any residual fluid during disassembly. Proper collection aids in maintaining cleanliness in your workspace.
Safety Equipment
Don’t overlook personal safety gear. Protective eyewear is vital to shield your eyes from any flying debris during the procedure. Heavy-duty gloves will protect your hands, especially if handling sharp components. If working in a cramped or awkward position, kneepads can provide extra comfort and protection.
In summary, gathering the correct tools and safety equipment lays a solid foundation for a successful installation. Taking the time to prepare will streamline the entire process and contribute to a hassle-free experience.
Safely Disconnecting the Pressure Washer from the Supply Lines
Ensure the unit is completely powered down before starting any disconnection. Unplug the device from the electrical source and, if applicable, turn off the water supply at the faucet or outlet. It’s crucial to relieve any residual pressure in the system; you can do this by squeezing the trigger on the gun for a few seconds while ensuring it is directed away from yourself and bystanders.
Disconnecting the Water Supply
Loosen the hose connection at the water inlet carefully. A wrench may be required but take care not to overtighten during reassembly later. Before detaching, have a bucket or towel handy to catch any residual water to prevent mess. If your setup includes a quick connect fitting, simply pull back the collar and disconnect.
Handling Electrical Connections

If your model uses an electric pump, double-check the power cables are disconnected as well. Look for frayed wires or damage before making any further decisions regarding repairs or replacements. If there are electrical connections that must be undone, document their arrangement for easier reinstallation later.
After all connections are secure, store the hoses and cables properly, maintaining the integrity and longevity of your equipment.
Steps to Remove the Old Cleaning Device from the System
Begin by turning off the main water supply. Ensure the entire system is depressurised to prevent any accidental sprays or leaks.
Next, locate the fittings connecting the existing unit. Use an appropriate wrench to loosen and disconnect these connections. Be ready with a small container or towels to catch any residual water.
After detaching the fittings, carefully remove the device from its mounting position. If it’s secured with screws, use a screwdriver to remove them first. Gently lift it to avoid damaging any surrounding components.
Inspect the hoses and fittings once the device is removed. Look for any wear or damage that may require attention before installing the new unit. It’s essential to ensure that all connections are clean and free of debris.
Final Steps Before Installation
Before proceeding with the new unit, double-check the alignment of the water and power lines. This alignment is critical for a smooth installation later. Organise all the parts you removed, ensuring nothing is lost, as it may be necessary for the new setup.
Once everything is inspected and cleared, the area should be ready for the installation of the new cleaning device, ensuring a seamless transition in performance and functionality.
Installing the New Pressure Cleaning Unit Correctly
Begin with ensuring the surface where the equipment will be mounted is clean and free from debris. This prevents any obstructions during installation and ensures a stable operation.
Align the new component with the existing fittings. It should match the dimensions precisely to avoid leaks or misconfiguration. Carefully insert the new unit and secure it to the frame or mounting bracket ensuring all screws are tightened according to the manufacturer’s specifications.
Connecting Supply Lines

Next, attach the supply lines meticulously. Use new O-rings or seals to prevent leaks. After connecting, check the integrity of the connections; they should be snug but not excessively tight to avoid damage.
Testing for Proper Functionality
Once all connections are secure, restore power and water supply. Monitor the system closely for any signs of leaks. Run a brief operational test to ensure everything functions as intended, paying attention to how the unit engages and maintains pressure. If anomalies are detected, disconnect and re-examine all connections.
Testing for Leaks and Ensuring Proper Functionality After Replacement
After installing the new unit, it’s critical to verify that everything operates smoothly without leaks. To begin, connect the water supply and turn on the unit. Inspect all connection points meticulously for any signs of moisture. This includes checking the fittings where hoses meet the unit and where the water lines enter the system.
Leak Testing Procedure
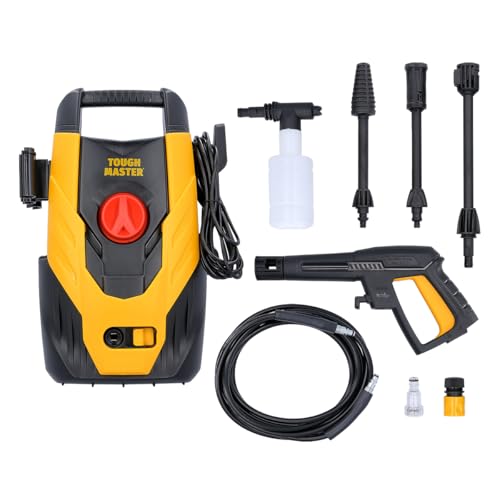
.jpg "How to replace a fluidmaster purpose pressure washer")
Begin by observing the connections for several minutes. If any dampness appears, tighten those areas carefully but avoid over-tightening to prevent damage. Next, perform a functional test by activating the device and observing its operation. Make sure the water flow is consistent and powerful, indicating that all components are working correctly.
Additional Functionality Checks
During the operation phase, listen for unusual sounds that could suggest improper installation or faulty parts. If the machine vibrates excessively, recheck the fittings and ensure everything is secured. It’s also important to run the unit for a short while to test its performance under standard conditions; this will help identify any potential issues before using it for an extended time.
| Check | Action |
|---|---|
| Connection points | Tighten and inspect for moisture |
| Water flow | Ensure consistent output |
| Noise level | Listen for abnormal sounds |
| Vibration | Recheck fittings if excessive |
Finally, if everything checks out, monitor the system over the next few days for any signs of leaks or issues that may arise during normal use. Keeping an eye on your installation will support longevity and reliability, ensuring your cleaning tasks are handled effectively.


