


First and foremost, ensure you power down the unit and disconnect it from the water source and power supply. This step is key to avoiding any potential hazards before you start working. Gather the necessary tools, including a wrench set, screwdrivers, and replacement non-return devices, tailored for your specific equipment model.
Next, locate the non-return components, typically situated in the water inlet or outlet areas. Carefully unscrew the surrounding casing, ensuring you don’t lose any small parts. Gently extract the old units so as not to damage the fittings. Clean the area thoroughly to eliminate debris or any mineral build-up, which can affect the performance of the new elements.

Insert the new non-return devices, ensuring they fit snugly in their designated spaces. Tighten the screws evenly; over-tightening can lead to cracks or misalignment. Reassemble the casing, making sure all seals are in place to prevent leaks during operation. Once everything is secured, reconnect your apparatus to the water and electrical supply, then test it to confirm efficiency.
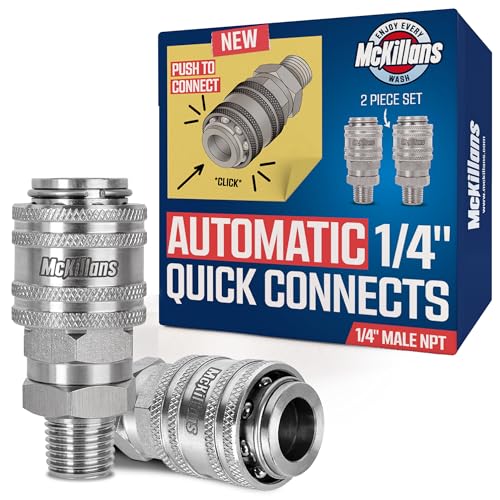
Steps to Swap Out Non-return Mechanisms on Your Cleaning Machine
Gather necessary tools: a wrench, screwdrivers, and a replacement set of non-return mechanisms tailored for your specific model.
Preparation Process

- Disconnect the power source to eliminate any risk of accidental activation.
- Ensure the water supply is turned off and release any remaining pressure in the system.
- Remove the housing or casing if applicable, taking careful note of screws and fasteners.
Mechanism Removal

- Identify the positions of the non-return components; they are usually located near the pump.
- Use your wrench to loosen bolts securing the components in place.
- Gently pull out the old components, being cautious of any remnants that may need cleaning before installation of new ones.
Installation of New Components
- Align the new non-return pieces with their appropriate slots.
- Secure in place using the previously removed bolts, ensuring a snug fit to prevent leaks.
Once the components are installed, reassemble the machine and reconnect the water source and power. Perform a system test to verify that the new components function optimally. Regular maintenance checks can prolong the lifespan of your cleaning device.
Identifying the Symptoms of a Faulty Check Valve
Monitor for inconsistent water flow from the nozzle. If you notice fluctuations during operation, it may indicate a malfunctioning component.
Pay attention to unexpected pressure drops. If the output seems weaker than usual, it could be a sign that backflow is not being properly managed, leading to inadequate power during use.
Listen for unusual noises. A gurgling or bubbling sound can suggest that water is not flowing correctly and may be indicative of internal issues within the device.
Watch for leakage around the connections. If water seeps out around the fitting points, it’s possible that the seal is compromised, which can disrupt the performance significantly.
Test the ability to maintain pressure. After operating for a period, if the appliance fails to hold pressure, it indicates that a serious hindrance might be present in flow management.
Inspect for sediment buildup or discoloration in the fluid. These may signal contamination that affects the overall functioning of the system and potentially leads to breakdowns.
Check for pulsating or uneven spray patterns. This can stem from inadequate sealing or blockages causing irregularities in how water is expelled.
Gathering the Necessary Tools and Replacement Parts
Begin by collecting a few crucial tools: a socket wrench set, screwdrivers (both flathead and Phillips), and pliers. If any parts are stubborn, a rubber mallet can provide the needed persuasion without damaging components. Don’t forget safety goggles and gloves to protect your eyes and hands during the process.
Parts Identification
Next, acquire the appropriate components tailored to your specific make and model. Consult the manufacturer’s manual to ensure compatibility. Look for online retailers that provide detailed descriptions and images to confirm the exact specifications. Consider investing in high-quality replacements to maintain the device’s performance.
Additional Supplies
A tube of silicone grease will assist in the assembly process, ensuring a tight seal to prevent leaks. If your system has any wear, do not hesitate to replace O-rings or gaskets, as these are often the source of issues. Having extra fasteners or nuts on hand will save you time should any parts be lost during assembly.
Draining the Equipment and Depressing the System

Begin by ensuring the device is completely powered off and unplugged from the electrical outlet to prevent any accidental activation. It’s crucial to relieve all pressure within the system. Locate and unscrew the drain plug, often found at the base of the unit. Allow excess water to fully empty into a bucket or suitable container. This step prevents leaks and spills during maintenance.
Next, activate the trigger gun to release any remaining water from the internal components. Ensure that the trigger is held down for several seconds until no more water exits. After this, you might hear a slight hiss as air enters the system, which indicates the pressure has been adequately released.
For complete safety, check the pressure gauge if equipped; it should read zero. This confirmation is essential before proceeding with any further disassembly. If your equipment includes a safety lock or another pressure safety feature, ensure it is engaged following the depressurisation process.
| Step | Action | Notes |
|---|---|---|
| 1 | Power off and unplug | Prevents accidental activation |
| 2 | Remove drain plug | Collect water in a bucket |
| 3 | Squeeze trigger gun | Releases residual water and air |
| 4 | Check pressure gauge | Ensure it reads zero |
After these actions, your equipment will be adequately drained and depressurised, setting the stage for any necessary maintenance work. This procedure not only safeguards personal safety but also protects the integrity of the device during repairs.
Removing the Old Check Valve with Care

To ensure a successful extraction, begin by inspecting the components surrounding the old unit. Look for any signs of corrosion or damage that might complicate removal. Using an adjustable wrench, grip the fitting tightly without applying excessive force that could lead to breakage.
Technique for Effective Removal

Gently rotate the old unit counterclockwise while stabilising the body of the machine. If it feels stuck, applying a penetrating oil can ease the process. Allow the lubricant to sit for a few minutes before attempting to turn it again. Avoid using brute force, as this can lead to harm to the surrounding parts.
As you unscrew, keep your hand steady to prevent any debris from falling into the system, as this could interfere with proper function. Once the old part is free, inspect the seating area for any remnants or damage, which may require additional cleaning or repairs.
Post-Removal Inspection
After removal, examine the old component for wear patterns. Identify any specific issues that might have led to the failure. This knowledge not only informs your next steps but also helps in selecting a quality replacement that addresses the underlying problems effectively.
Installing the New Check Valve Properly
To ensure optimal performance, align the new component correctly with its seat. This guarantees a proper seal that prevents leaks and maintains consistent flow.
Here’s a step-by-step approach to achieve this:
- Apply a small amount of pipe thread sealant on the threads of the new component before installation. This creates a tight seal and reduces the risk of future leaks.
- Carefully screw the new part into place, avoiding cross-threading. Hand-tighten first, then use a wrench to secure it further without overtightening.
- Verify the orientation of the arrow on the component. It should match the flow direction indicated on the assembly to function correctly.
- Reconnect the water supply line, ensuring that the connections are tight and secure.
- Once everything is in place, refill the system with water and check for any signs of leakage around the new component.
Testing is crucial. After making the connections, start the motor and observe the functionality. If there are no leaks and the water flows smoothly, the installation was successful.
Regular maintenance of this part will prolong its lifespan and keep your equipment in prime condition. Check it periodically to clean any debris that may affect performance.
Testing the Equipment After Replacement
Begin the assessment by reconnecting the hose and ensuring all attachments are secure. Then, proceed to fill the tank with clean water. Start the engine to allow the motor to warm up while observing any unusual noises or vibrations that might indicate issues. Keep an eye on the pressure gauge; it should reach the recommended level without delay or fluctuation.
Performing a Functional Test
Next, engage the trigger gun to release water. Monitor the flow; it should be steady and without interruptions. If spluttering or a weak stream occurs, shut down the machine immediately. Check for leaks around the new components, ensuring everything is sealed properly.
Final Checks and Maintenance
After performing a full cycle of use, clean and inspect all connections again. Regular maintenance will prevent future concerns and ensure long-lasting functionality. Document any changes or observations for future reference. A successful test confirms that the service was performed correctly and the machine is ready for optimal performance.


