


First, ensure the engine is completely cool and disconnected from any power source to prevent accidental starts during the process. This safety measure is non-negotiable.
Next, gather a comprehensive toolkit that includes wrenches, screwdrivers, and a suitable replacement vessel to streamline your task. A good quality replacement will fit perfectly and support optimal fuel flow.
As you begin dismantling the old container, take note of the connecting hoses and how they are secured. Document the arrangement to facilitate reassembly. Pay attention to any gaskets or seals that might need replacing during this process–they’re often the source of fuel leaks if not in perfect condition.

After the old container is removed, clean the connection points thoroughly to avoid debris that could lead to future issues. Position the new container, ensuring all connections meet snugly without excess force, which can cause damage.
Finally, test your cleaning apparatus for any leaks before fully reassembling everything. This step is crucial to guarantee the fuel system works seamlessly and will prolong the lifespan of your equipment.
Steps for Swapping Out the Fuel Container on a Cleaning Device
First, ensure the engine is completely cool and disconnect the spark plug wire to prevent accidental starting. Always work in a ventilated area away from open flames.
Gather Necessary Tools
You will need a socket set, screwdriver, container for any residual fuel, and a clean cloth. Having these on hand will make the process smoother.
Drain Residual Fuel

Use a siphon pump or a similar tool to drain any remaining liquid from the container. This reduces spills and makes handling easier. Ensure it’s stored safely in an appropriate container.
Next, examine the mounting points on the device carefully. Use a socket to remove any screws or bolts securing the container in place. Keep track of these fasteners, as you’ll need them for reinstallation.
Once detached, compare the old and new containers to confirm compatibility. Ensure that all connections line up correctly before securing the new unit in place.
After positioning the new container, fasten it with the previously removed screws or bolts. Avoid overtightening, as this may cause damage.
Reconnect the spark plug wire, and fill the new container with fuel, checking for leaks before starting the engine. Testing in a safe area is crucial. Adjust any hoses or connections as necessary based on the new setup.
Cleansing the exterior surfaces also helps maintain functionality. By following these steps with precision, your cleaning apparatus will be ready for effective operation once again.
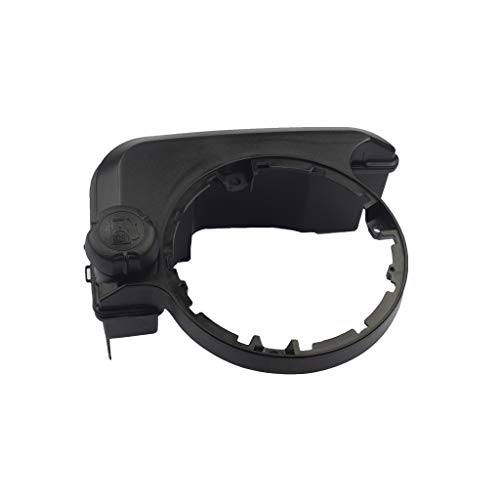
Identifying the Right Replacement Fuel Reservoir for Your Model
Start by checking the model number and manufacturer of your equipment. This information is typically found on the data plate near the engine or the chassis. Once you have this, cross-reference it with the manufacturer’s parts catalogue or website to find the specific fuel reservoir designed for your model.
Review the specifications such as capacity, materials, and dimensions. Ensure that the replacement reservoir matches your original in these aspects, as discrepancies can lead to poor performance or fitting issues. Additionally, note any compatibility issues related to the fuel system or connections.
If possible, consult forums or user groups focused on your specific brand. Owners often share insights about suitable replacements and their own experiences. This can provide practical advice that might not be available from official sources.
Lastly, consider purchasing from reputable suppliers or authorised dealers to ensure authenticity and quality. This guarantees you receive a reliable product that meets the manufacturer’s standards, essential for maintaining efficiency and longevity.
Gathering Necessary Tools and Materials for the Replacement

Begin with acquiring a set of basic hand tools: a socket wrench set, screwdrivers (flathead and Phillips), and pliers. These will assist in loosening and tightening various components during the task.
For a more efficient process, a pair of safety gloves is advisable to protect hands from potential injuries. Eye protection is also recommended to guard against debris or splashes when working with fuels.
The correct replacement component should be sourced, ensuring compatibility with your specific model. Consult the manufacturer’s specifications or technical documents to verify the dimensions and fitting requirements.
Have some sealant or gasket adhesive on hand. This will help create a secure seal that prevents leaks during operation.
A suitable container for fuel is necessary for safely storing the old liquid before replacement. This ensures that spillage does not occur and maintains a clean working area.
Consider a funnel if transferring fuel to the new assembly; it simplifies the pouring process and minimizes spills. Having a rag or absorbent cloth nearby is prudent for any clean-up that may be required.
Before starting, organise your workspace to keep everything within reach. A clear area will help streamline the entire operation and make it more manageable.
Draining the Existing Fuel from the Reservoir Safely
To safely drain the fuel, follow these steps meticulously:
- Gather safety equipment, including gloves and safety goggles.
- Find a suitable container that can hold the fuel securely.
- Ensure the appliance is turned off and cooled down to prevent any ignition.
- Locate the fuel valve, if available, which allows for draining without removing the tank.
- Position your container beneath the draining point.
- Open the fuel valve or unscrew the drain plug carefully. Tilt the apparatus slightly if needed to facilitate the flow.
- Monitor the transfer closely to avoid spills; catch any excess fuel with absorbent materials.
- Once emptied, securely seal the container and label it accordingly for proper disposal.
- Clean any spills with appropriate cleaners and always wash hands thoroughly after handling fuel.
Following these precise steps reduces risks associated with fuel handling and protects the environment from hazardous waste. Always dispose of the used fuel at designated collection points.
Removing the Old Fuel Reservoir: Step-by-Step Instructions
Begin by ensuring the appliance is turned off and disconnected from the power source. Locate the screws or bolts securing the fuel container to the frame. Using the appropriate screwdriver or socket wrench, carefully remove these fasteners. Keep them in a safe place to avoid losing any parts.
Once the fasteners are removed, gently lift the reservoir from its mount. Be cautious, as some models may have attached hoses or fittings that can be damaged if pulled too forcefully. If necessary, refer to the user manual for guidance on these connections.
Disconnecting Fuel Lines
Next, locate the fuel lines. Identify the clips or clamps that hold the hoses in place. Using pliers, carefully detach these clamps to free the hoses. Make sure to have a cloth or container handy to catch any residual fuel that may spill out during this process. Once the hoses are disconnected, inspect them for damage; consider replacing them if they show signs of wear.
Inspecting the Area
After successful removal, examine the mounting area for debris or damage. Clean the surface to ensure a proper fit for the new reservoir. This step is essential to prevent leaks and ensure functionality. Make sure there are no obstructions that could complicate the installation of the new unit.
Installing the New Petrol Tank Properly
Before securing the replacement container, ensure that the mounting brackets align correctly with the base of the unit. It’s crucial to check for any debris that may interfere with the fit. Clean the area thoroughly to provide a flat surface for the new component.
Securing the New Component

Begin by positioning the fresh container in place, ensuring the threads of the fuel outlet are oriented towards the hose connection. Use the fasteners provided with the new item or those from the previous fitting, tightening them in a criss-cross pattern to achieve even pressure.
Reconnecting Hoses and Fuel Lines
Attach the fuel line carefully, making sure it fits snugly over the outlet. If your model employs clamps, ensure they are firmly tightened to prevent leaks. Inspect the connections to avoid any future mishaps.
| Action | Description |
|---|---|
| Align Brackets | Ensure proper alignment of mounting brackets for stability. |
| Clean Area | Remove any dirt or debris from the installation surface. |
| Fasten | Tighten the fasteners in a criss-cross pattern. |
| Attach Fuel Line | Securely install the fuel line, checking for snugness of the connection. |
Once the component is securely fastened and all hoses are connected, it’s time to fill it with fuel. Monitor for any leaks by conducting a simple test: pour a small amount of petrol into the new container and observe for any signs of leakage around the fittings.

By following these steps meticulously, you’ll ensure that the installation is solid, allowing your cleaning equipment to function at its best once again.
Conducting a Leak Test After Replacement


After installing the new fuel reservoir, it’s crucial to conduct a thorough leak inspection. Begin by filling the compartment with a small amount of fresh fuel to test for leaks. Do not fill to capacity during this initial check.
Visual Inspection

Closely examine the seams and joints where the new component connects to the machinery. Look for any signs of dampness or pooling around these areas, which may indicate a leakage issue. It’s best to have a flashlight handy for a detailed examination, especially in dimly lit settings.
Pressure Test
Activate the equipment momentarily at low pressure to allow the system to stabilize. Observe for any escaping fuel, which could signify improper sealing. If any leaks are detected, immediately shut off the unit and tighten necessary connections or replace faulty seals before retesting.
Before concluding, ensure the workspace is free of flammable materials and that you have a fire extinguisher accessible, adhering to safety guidelines during this testing phase. Completing this critical step guarantees safe and effective operation moving forward.
Maintaining the Petrol Reservoir for Future Use

After successfully performing the change, it’s critical to ensure longevity and reliability of the new fuel storage component. Regular maintenance can prevent future issues.
-
Inspection: Frequently check for signs of wear, cracks, or corrosion on the newly installed reservoir. Address any damages immediately to prevent fuel leaks.
-
Fuel Quality: Use high-quality fuel. Avoid keeping fuel in the storage for extended periods as it can degrade. If using fuel stabilisers, adhere to the manufacturer’s recommendations for optimum results.
-
Proper Storage: If the cleaning device is not in use for a while, consider draining the reservoir to prevent sediment build-up and maintain cleanliness.
-
Sealing: Ensure that the cap fits securely after each use. A well-sealed reservoir prevents contamination from dirt and moisture.
-
Regular Cleaning: Clean the exterior of the storage area regularly to avoid accumulation of dust and debris that could affect functionality.
Following these guidelines creates a stable and effective environment for the reservoir’s future performance, avoiding inconvenient mishaps during operation.


