


Begin with ensuring all components are readily available. You should have the main unit, high-pressure hose, lance, and any nozzles that came with your machine. Familiarise yourself with the user manual for specific instructions related to your model; it is essential in guiding you through the process.
Plug the unit into a suitable power outlet, making sure the cord is not in the way of movement. Attach the high-pressure hose to the designated outlet. Ensure the connection is tight to prevent any leaks. This step is fundamental for safe operation and optimal performance.
Next, connect the other end of the hose to your spray lance. Choose the appropriate nozzle for your task–different nozzles control spray patterns, which will impact your cleaning efficiency. For general cleaning, a medium nozzle works best; for tougher jobs, a tighter spray may be required.

Before activating the machine, check the water supply. Your cleaner must have a constant flow of water; connect the garden hose to the inlet, ensuring it is free of kinks. Turn on the water supply and let it run for a few moments to eliminate any air in the system, then you’re ready to commence cleaning.
Incorporating these steps ensures a seamless start. Regular maintenance and understanding the specifics of your equipment contribute to longevity and outstanding results in your cleaning endeavours.
Unboxing and Inspecting Your Cleaning Equipment

Carefully remove the packaging, ensuring that all items are accounted for. Examine each component, including the main unit, hose, spray gun, and any included accessories. Refer to the manual for a detailed list of parts and ensure that nothing is missing.
Check for Damage
Inspect the exterior for any signs of damage from shipping, like dents or scratches. Look closely at the hoses and connections to identify any leaks or cracks. A thorough inspection ensures optimal operation and longevity of the device.
Familiarise Yourself with Components

Take a moment to familiarise yourself with each part. Understand how to connect the hose and spray gun, and note where the detergent tank is located. Knowledge of your equipment’s components facilitates a smoother setup process.
Assembling the Nilfisk Washer Components
Begin with connecting the high-pressure hose to the unit. Align the connector with the designated inlet and twist it clockwise until secure. Ensure there are no gaps, as leaks can impact performance.
Next, attach the nozzle to the lance. Depending on your specific model, you may have several nozzles available. Select the appropriate one for your task, aligning it with the lance until you hear a click. This signifies a firm attachment.
For the detergent bottle, remove any caps and insert the bottle into the designated compartment, ensuring it clicks into place. This allows for seamless cleaning without manual application.
Now, proceed to connect your water supply. Attach a garden hose to the water inlet. Make sure the hose is free of kinks and debris. For added stability, consider using a hose with a rubber washer to prevent leaks.
Before powering on, check all connections again, including the electric cord. The cord should be securely plugged into an outlet that meets the manufacturer’s voltage requirements. Avoid extension cords to prevent potential hazards and ensure optimum performance.
| Component | Action |
|---|---|
| High-pressure hose | Connect to the unit and twist to secure. |
| Nozzle | Attach to the lance until you hear a click. |
| Detergent bottle | Insert into the compartment until it clicks. |
| Water supply | Connect garden hose to the inlet, ensuring no kinks. |
| Electric cord | Check connection to outlet; avoid using extensions. |
Finally, review the assembly against the user manual, ensuring all components are correctly positioned. You’re now prepared for effective operation.
Connecting the Water Supply to Your Cleaning Equipment

Ensure a reliable water supply by using a garden hose with a minimum diameter of 1/2 inch, avoiding any restrictions. A hose length of up to 30 metres is optimal; longer lengths can lead to decreased water flow.
Steps for Connection
1. Inspect the garden hose for cracks or kinks. A damaged hose can reduce pressure and flow. If necessary, replace it before proceeding.
2. Connect one end of the hose to a suitable water source, ensuring a secure fit to prevent leaks. The other end attaches to the inlet on the equipment, typically found near the base.
3. Check that all connections are tight to avoid any water loss during operation.
Water Quality Considerations
Avoid using hot water, as it can damage internal components. Use clean, fresh water to maintain performance. If your supply includes sediment, consider installing a filter to prevent clogging.
Before switching on the device, ensure the hose is filled with water and no air is present. A quick test can be done by squeezing the trigger; if water flows freely, you’re ready to begin.
Connecting to the Power Supply

Ensure your water cleaning device is powered correctly to avoid malfunctions. Begin by locating the power cable and confirm it is free from damage. If any fraying or breaking is visible, substitute it immediately.
Choosing the Right Outlet
Select an electrical outlet that meets the following criteria:
- Grounded and rated for the voltage specified in the product manual.
- Capable of handling the required amperage without tripping.
- Located near the intended operating area to reduce extension cable use.
Using Extension Cords
If necessary, opt for a heavy-duty extension cord that meets or exceeds the power requirements of your machine. Follow these guidelines:
- The cord should have a minimum gauge of 12 AWG for longer distances.
- Avoid coiling the cord during use, as this could lead to overheating.
- Check for compatibility with the plug type of your device to ensure a secure connection.
Once connected, triple-check that there are no obstacles or water sources around the power supply to maintain safety standards. Always switch off the power when performing maintenance or checks. Proper usage of the electrical system will promote longevity and performance of your cleaning equipment.
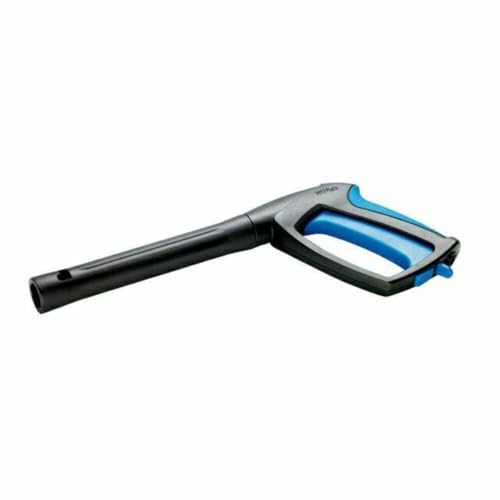
Attaching and selecting the correct nozzle for your task
For optimal results, it’s crucial to match the nozzle to the specific cleaning job. Begin by identifying your task–cleaning patios, vehicles, or removing grime from walls demands different approaches.
The most common nozzles include:

- 0° (Red) Nozzle: Produces a concentrated jet for tough stains like grease or paint. Use with caution as it can damage delicate surfaces.
- 15° (Yellow) Nozzle: Effective for severe grime, ideal for concrete cleaning. Offers a balance between power and safety for most hard surfaces.
- 25° (Green) Nozzle: Perfect for general cleaning tasks, including vehicles and outdoor furniture. It provides a wider spray for effective dirt removal without risk of damage.
- 40° (White) Nozzle: Best suited for gentle surfaces like wood and glass. This option uses a wider spray pattern, ensuring a delicate touch.
- Soap Nozzle: Allows for soap application, an invaluable tool for deep cleaning. Follow with a rinsing nozzle for the best results.
Ensure that the nozzle fits snugly onto the lance. A loose attachment can lead to decreased water pressure or even detachment during use, which could result in injury. To attach, align the nozzle with the lance and twist until secure. Always check for any leaks before starting.
Test your setup on a small, inconspicuous area to gauge effectiveness and avoid damage to your surfaces. Selecting the right nozzle not only improves cleaning efficiency but also prolongs the life of your equipment.
Running a Safety Check Before Operating Your High-Pressure Cleaner

Before starting, I carefully examine the entire assembly. I ensure that all components are securely attached and there are no signs of damage. A quick inspection of the hoses and connections is crucial. Any leaks or wear could lead to accidents or malfunction during use.
I pay particular attention to the power cord. It should be free from cuts or frays to prevent electrical hazards. If I notice any damage, I replace it immediately. I also verify that the electrical outlet is rated to handle the power requirements of the equipment.
Next, I check the water supply. I ensure that the inlet filter is clean and unobstructed. A blocked filter can result in low water flow, which may cause the machine to overheat or function improperly. Running water through the hose before connecting it can help identify any potential blockage.
It’s vital that I wear appropriate personal protective equipment. Safety goggles and gloves are non-negotiable, as they protect against debris and high-pressure spray. Footwear should also provide a solid grip and protection against slipping.
Finally, I make sure to review the user manual for any specific safety instructions or warnings. Each model may have unique features or precautions that shouldn’t be overlooked. By systematically checking these elements, I ensure a safe and effective cleaning session.
Storing Your High-Pressure Cleaner After Use
After your cleaning session, follow these steps to properly store your high-pressure cleaner, ensuring optimal maintenance and longevity.
Draining Water and Detaching Accessories
- Turn off the appliance and disconnect it from the power source.
- Release any residual pressure by pulling the trigger on the gun while holding it in a safe position.
- Disconnect the water supply hose and direct it to drain any remaining water.
- Detach any nozzles or attachments and clean them thoroughly to prevent clogs.
Cleaning and Maintenance
- Wipe down the exterior with a damp cloth to remove dirt and grime.
- Inspect the power cable for any signs of wear or damage.
- Check all hoses for leaks and replace them if necessary.
- Consult the user manual for specific maintenance tasks recommended by the manufacturer.
Storage Conditions
- Store the unit in a dry, cool place, away from direct sunlight to prevent damage.
- Keep the equipment upright or on a stable surface to avoid tipping.
- If possible, use the original packaging or a protective cover to safeguard it from dust and debris.
Following these guidelines ensures your equipment remains in optimal condition, ready for your next cleaning project.


