


First, ensure your machine is positioned on a stable, flat surface. This provides a solid foundation while you engage with its functions. Check the fuel tank, ensuring it is filled with the appropriate petrol, as this setup is critical for effective performance.
Next, locate the choke lever. If the engine is cold, set the choke to the ‘closed’ position. This will enrich the fuel mixture, making it easier for the engine to ignite. After adjusting the choke, find the primer bulb and press it several times to supply fuel to the carburettor.
Once you have done this, it’s time to engage the ignition switch. Turn it on, then use the recoil starter to pull the cord. A brisk, firm pull will typically suffice to initiate the engine. After the unit comes to life, adjust the choke back to the ‘open’ position if necessary, allowing the engine to run smoothly.
Finally, ensure you are familiar with the pressure controls on the handle. Adjust these settings to fit the task at hand, whether it’s for light cleaning or more intensive work. With these steps followed accurately, your cleaning equipment should be ready for action.
Initiating a Honda Gasoline Cleaner
Ensure the fuel tank is filled with fresh petrol. Keep a funnel handy to avoid spills during refuelling. Verify that the on/off switch is in the ‘on’ position.
Engage the choke, which is typically found on the engine; this enriches the air-fuel mixture for easier ignition.
Utilise the primer bulb, pressing it several times until fuel is visible in the clear fuel line. This prevents air locks and ensures a smoother start.
Position the appliance on a stable, level surface and ensure the nozzle is pointed away from you or any bystander to prevent accidents.
Firmly grip the recoil starter handle and pull it swiftly. If it doesn’t ignite within a few pulls, wait a moment before trying again; allow some time for the engine to clear excess fuel.
Once the engine engages, gradually disengage the choke to allow it to warm up. Keep an eye on the idle speed, adjusting as needed via the throttle lever.
Once the machine reaches the proper operating temperature, ensure that the water supply is active and ready for operation. At this stage, the cleaner will be prepared for use.
Preparing the Pressure Cleaner for Use

Check the fuel level before use. Ensure that the tank has adequate petrol to avoid interruptions during operation. If necessary, fill it with the recommended fuel type for optimal performance.
Inspect the oil level in the engine. Add oil if required, ensuring it meets the specifications outlined in the manual. This step is crucial to maintain engine health.
Examine all hoses and fittings for leaks or damages. Verify that connections are secure. Any wear can lead to leaks or reduced efficiency, so replacing damaged components before starting is advisable.
Make sure the nozzle is clean and appropriately fitted. A clogged or incorrectly sized nozzle can compromise cleaning power. Switch between different nozzle sizes based on the cleaning task at hand.
Position the unit on a stable and level surface. This prevents tipping and enhances stability during operation. Maintain a safe distance from combustible materials to mitigate fire risks.
Check that the water source is functional and connected. Ensure the intake filter is clean for optimal water flow. Run some water through the system before powering up to remove any debris.
Review safety features, such as the trigger lock and emergency shut-off. Familiarising yourself with these controls will help in managing the device safely.
Finally, wear appropriate personal protective equipment, including gloves and goggles for safety. This ensures protection against debris and potential splashes while you work.
Checking Fuel and Oil Levels
Ensure that the fuel tank is adequately filled with fresh, clean fuel. I always recommend using unleaded petrol for optimal performance. Check the level through the transparent gauge on the side of the tank; it should be filled to the indicated mark, avoiding overfilling.
Fuel Quality
It’s crucial to use fuel that hasn’t been sitting for an extended period. Old fuel can cause starting issues and damage the engine. If the fuel hasn’t been used for over a month, consider draining it and refilling with new petrol.
Oil Check
Monitor the engine oil level with the dipstick. Remove it, wipe it clean, and reinsert to check the level. The oil should reach the upper mark on the dipstick. If it’s low, add the recommended type of oil specified in the user manual. Regularly changing the oil helps maintain engine health and efficiency.
Most importantly, never run the equipment with insufficient oil, as this could lead to serious engine damage.
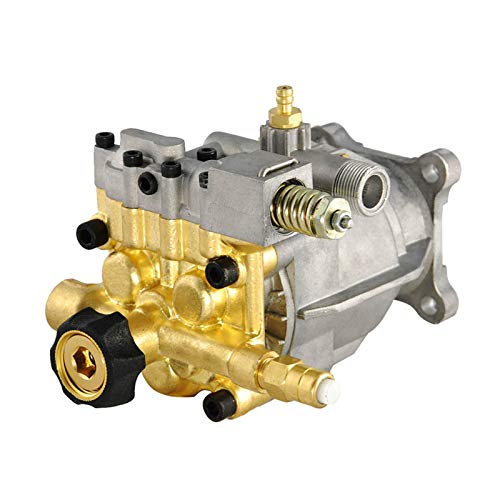
Connecting the Hose and Nozzles
Before proceeding with the assembly, ensure the unit is placed on a stable surface. First, locate the high-pressure hose. Connect one end to the outlet on the machine, ensuring a firm, secure fit. It’s crucial to twist the connector until it seats properly for a leak-free seal. Avoid overtightening; this can damage the threading.
Attaching the Nozzle
Select the nozzle that corresponds to your cleaning task. For general cleaning, a wider nozzle works best, while more focused streams are suitable for tougher stains. Align the nozzle with the gun and push it in until you hear a click, indicating it’s locked in place. Always double-check this connection before operating.
Final Checks

After the hose and nozzle are securely connected, inspect the entire setup for any potential leaks or damages. A quick visual check helps ensure everything is functioning as it should for optimal results. This step is key to a smooth operation and a safe cleaning experience.
Setting Up the Water Supply
Ensure a steady water flow before commencing operation. Connect a suitable garden hose to your water source, ensuring it’s free from kinks and blockages. Use a hose length adequate for your work area to avoid any interruptions.
Check for leaks at the connection points, tightening any fittings if necessary. Clear any debris from the inlet screen of the unit to maintain optimal water intake. If using a water filter, ensure it’s clean to prevent any obstructions during use.
Turn on the water supply fully to fill the system before activating the motor. This prevents potential damage and ensures efficient operation. Test water flow by briefly activating the trigger gun; a steady stream indicates the system is primed and ready for action.
Engaging the Choke and Throttle Settings

Adjust the choke lever to the ‘CLOSED’ position before attempting ignition. This action enriches the fuel mixture, aiding combustion in the initial stages. After a few pulls on the recoil starter, switch the choke to ‘OPEN’ once the engine fires up. This transition is crucial for optimal performance and to prevent stalling.
The throttle setting also plays a significant role in operation. Initially set the throttle to ‘RUN’ mode. This configuration allows for maximum output once the engine warms up, ensuring that you achieve peak efficiency during usage. Be mindful not to remain in a lower throttle position for too long, as this can lead to incomplete combustion and increased emissions.
| Throttle Position | Purpose |
|---|---|
| Idle | Reduces engine speed while waiting for the equipment to be used. |
| Run | Provides full power to the machinery for effective cleaning tasks. |
Regularly check both the choke and throttle mechanisms to ensure they operate smoothly. If the choke does not engage or the throttle sticks, perform a timely inspection to prevent operational issues. Proper management of these settings significantly enhances both performance and longevity of your equipment.
Starting the Engine Safely
Ensure personal protective equipment is worn: safety goggles, gloves, and suitable footwear are a must. Always operate in a well-ventilated area to prevent the accumulation of harmful fumes. Stand clear of moving parts and maintain a safe distance from the nozzle during operation.
Verify Safety Mechanisms
Check that the safety lock on the trigger is engaged. This prevents accidental activation while preparing the machine. Familiarise yourself with emergency shut-off features; understanding their locations can expedite response during unforeseen events.
Confirm Ground Stability
Position the device on a flat, stable surface to avoid tipping over while in use. Uneven terrain can lead to mishaps, so it’s wise to inspect the area for debris or obstacles that might interfere with operation. Keeping the worksite tidy contributes to a safer working environment.
Testing the Pressure Output

To ensure optimal functionality, assessing the output force is critical. Begin by directing the spray nozzle at a suitable surface, ideally a flat, non-damaging area such as concrete or pavement.
Follow these steps for an accurate evaluation:
- Turn on the water supply and ensure there are no leaks in the hose.
- Engage the trigger to release any trapped air in the system.
- Block the nozzle to build pressure and observe the gauge, if available.
- Release the trigger and note the pressure; compare it with the product specifications.
If the measured output deviates significantly from the manufacturer’s stated limits, investigate potential causes:
- Check for clogs in the nozzle or hose.
- Inspect connections for tightness and any signs of wear.
- Assess the pump’s functionality, including any unusual noises during operation.
After adjustments, repeat the testing process to verify improvements. A consistent pressure level leads to more effective cleaning and enhances equipment longevity.


