Ensure the device is on a level surface before attempting operation. This will prevent any mishaps related to fuel spillage or tipping over while you work.
Next, check the fuel level. If it’s low, use the appropriate fuel as specified in the owner’s manual; this can significantly affect the performance of your machine. Fill the tank securely to avoid leaks.
Engage the choke if the engine is cold. Pull the recoil starter slowly, avoiding a sudden jerk, which can stress the mechanism. Once the engine catches, adjust the choke to the run position.

When you’re set, turn on the water supply and connect the garden hose. Ensure all connections are tight to prevent leaks. Once the engine is running smoothly, pull the trigger on the spray gun to release pressure and begin your cleaning task.
Should you encounter difficulties, recheck the connections and fuel levels before restarting the procedure. This can save you time and frustration.
Guidelines for Initiating Operation of Your Cleaning Equipment
Ensure the fuel tank is filled with fresh fuel. A petrol mix, if required, should follow the manufacturer’s guidelines, typically a ratio of 50:1 with high-quality oil. Check the oil level in the engine, and top up if it’s low.
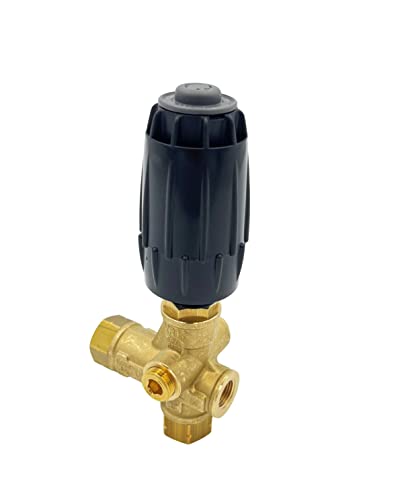
Setting Up Connections
Connect your hose securely to the water source. It’s vital to use a non-kink, durable hose to maintain consistent water flow. Then, attach the other end of the hose to the inlet on your device. Make sure all connections are tight to avoid leaks.
Activating the Unit

Engage the safety latch on the trigger gun, then turn the ignition on. Pull the choke lever out, followed by pushing the primer bulb until you see fuel in the clear line. This primes the system. Finally, pull the recoil starter to ignite the engine, retract the choke once it’s running smoothly.
Checking the Fuel Level Before Starting

Always verify the fuel level prior to ignition. Insufficient fuel can hinder performance and damage the engine. Take the following steps:
- Locate the fuel tank, typically situated on the top or side of the motor.
- Inspect the fuel gauge if available. If not, remove the cap and visually check the fuel level.
- Ensure the fuel is clean and free from debris. Contaminated fuel can affect operation.
If the tank is low, fill with the appropriate fuel type specified in the user manual. For optimal performance, use fresh fuel; stale fuel can create complications.
After refuelling, secure the cap tightly to prevent spills or evaporation. Check for any leaks around the fuel line and connections. This prevents potential hazards and ensures reliability during operation.
By performing this simple inspection, you enhance the longevity and efficiency of your equipment.
Setting Up the Water Supply Connection
Ensure a secure connection to your water source using a garden hose compatible with your equipment’s inlet. Inspect the hose for leaks or damage prior to attachment. If the hose is in good condition, connect it by threading it onto the inlet located on the machine’s chassis clockwise until snug.
Water Source Considerations
Select an adequate water supply, ideally from a tap or outdoor spigot. Avoid using stagnant water from buckets or tanks, as this can lead to blockages or damage. If you’re utilising well water, confirm the pressure is adequate to meet the operational requirements of the unit.
Check for Obstructions
Before turning on the water, verify that the inlet screen is free of dirt or debris. This screens allows for maximum flow and prevents the entry of foreign particles, which could harm the internal components. Regular maintenance of this filter will prolong the life of your equipment.
Understanding the Ignition System
Ensure the ignition system functions correctly before activating your equipment. This system initiates the combustion process, providing the necessary power. First, inspect the spark plug; it should be clean and undamaged. Replace it if there’s any sign of wear or fouling.
Next, check the ignition coil for any signs of damage. A faulty coil can lead to misfiring or prevent the engine from running altogether. Testing the coil with a multimeter can confirm its operational integrity; refer to the manufacturer’s specifications for resistance values.
Pay attention to the ignition switch; it must be in the ‘On’ position for the engine to operate. If electrical connections appear corroded or loose, clean or secure them properly. A strong battery is also critical, as a weak one can impede proper ignition.
Complete your checks by ensuring the fuel is fresh and stabilised, as stale fuel can lead to ignition issues. This comprehensive approach guarantees the ignition system functions smoothly, allowing the unit to operate as intended.
Preparing the Equipment for Operation

Before proceeding with the cleaning task, I ensure the equipment is set up properly to guarantee optimal results and safety. Here’s what I do:
Inspect the Equipment
- Verify that all connections, including hoses and nozzles, are secure and free from leaks.
- Check the condition of the power cord for any signs of wear or damage, replacing it if necessary.
- Ensure the nozzle type is appropriate for the intended cleaning surface, switching nozzles if required.
Prepare the Cleaning Solution

- Only use detergent recommended by the manufacturer, as improper solutions can cause damage.
- Mix the cleaning agent as per the instructions on the label to ensure effectiveness.
- Pour the solution into the designated reservoir, avoiding overfilling.
These steps facilitate a seamless cleaning process and minimize potential risks associated with equipment failure.
Engine Activation: Step-by-Step Guide
Engaging the engine of your cleaning device involves precise actions to ensure safe and effective operation. Follow these instructions closely:
1. Ensure Safety First

Before attempting to activate the engine, wear safety goggles and ensure your workspace is clear of obstructions. This will help prevent accidents during the initial phases of operation.
2. Locate the Choke
Find the choke lever, usually situated near the air filter. Move it to the ‘closed’ position if the unit hasn’t been warmed up recently. This helps to enrich the air-fuel mixture for easier ignition.
3. Depress the Primer Bulb
If equipped, press the primer bulb multiple times until you see fuel filling the bulb. This step primes the fuel system and ensures adequate fuel reaches the engine for ignition.
4. Engage the Throttle
Adjust the throttle to an appropriate speed, typically in the ‘fast’ position. This setting enhances engine performance and ensures a smoother startup.
5. Pull the Starter Cord
Firmly grip the handle and pull the starter cord swiftly but steadily. If the engine does not engage after a few attempts, revisit previous steps to ensure everything is in the correct position.

6. Monitor Engine Response
Once the engine roars to life, gradually move the choke to the ‘open’ position for optimal performance. Watch for consistent idling, which indicates a successful engagement.
7. Check Exhaust Emissions
Monitor for any unusual smoke or odours. If present, it may indicate fuel issues or other mechanical problems that need addressing.
| Step | Action |
|---|---|
| 1 | Wear safety goggles and clear workspace |
| 2 | Set choke lever to closed |
| 3 | Press primer bulb until full |
| 4 | Set throttle to fast |
| 5 | Pull starter cord firmly |
| 6 | Move choke to open after ignition |
| 7 | Check for smoke or odours |
Following these steps will ensure efficient engagement of the engine, allowing for smooth operation throughout your cleaning tasks.
Adjusting the Pressure Settings for Different Tasks
To achieve optimal results for various cleaning tasks, adjusting the pressure settings is crucial. For delicate surfaces such as wood decks or painted surfaces, reduce the pressure to around 1200 to 1500 PSI to prevent damage. When tackling tougher stains on concrete or brick, increase the pressure to 2500 PSI or higher for effective removal.
For vehicle cleaning, a mid-range setting of approximately 1500 to 2000 PSI works best, ensuring the paint isn’t harmed while still effectively removing dirt and grease. For garden surfaces, especially paved areas, you might want to set the pressure to 2000 to 2500 PSI, allowing you to eliminate moss and grime efficiently without excessive effort.

Switching between nozzles can also improve your cleaning efficiency. A 25-degree nozzle works well for general clean-up on most surfaces, while a 0-degree nozzle is suitable for focused jobs, such as heavy-duty removal of paint or tough stains. Remember to adjust both the nozzle and pressure based on your specific task.
After each use, it’s wise to revert the settings to a lower pressure to prolong the life of the equipment and ensure safety. Understanding your cleaning requirements and making appropriate adjustments will enhance the effectiveness of your cleaning sessions significantly.
Safety Precautions Before Using the High-Pressure Cleaner
Ensure to wear appropriate personal protective equipment, including safety goggles, gloves, and sturdy footwear. This protects against debris and chemicals that may be expelled during operation. Long pants and closed-toe shoes help shield your legs and feet from potential hazards.
Inspect the work area thoroughly. Remove any obstacles, such as garden tools, furniture, or loose debris, that might become projectiles. Checking the surface for stability and ensuring there’s enough space to move freely is also crucial. Be particularly cautious around delicate surfaces to avoid damage.
Handling Chemicals and Detergents
If using cleaning agents, refer to the manufacturer’s instructions. Always dilute cleaners properly and avoid mixing different chemicals, as this can create harmful fumes. Wash hands thoroughly after handling produces and ensure the area is well-ventilated.
Electrical Safety
If your machine requires an electrical outlet, ensure the cord is in good condition. Do not operate the unit in wet conditions or near standing water. Use a Ground Fault Circuit Interrupter (GFCI) for additional protection. Make certain the extension cord is rated for outdoor use if necessary.
FAQ:
What are the initial steps to start a Subaru pressure washer?
To start a Subaru pressure washer, first ensure that you are in a well-ventilated area and that the unit is on a stable surface. Check the fuel level and add fuel if necessary. Make sure the oil level is adequate by checking the dipstick. Then, connect a water supply hose to the washer and turn on the water. Prior to starting the engine, locate the choke and set it to the “choke” position. Next, pull the starter cord firmly to start the engine. After a few attempts, if the engine starts, you can adjust the choke to the “run” position. Always remember to squeeze the gun trigger to release any residual pressure before you start your machine.
What safety precautions should I take before using my Subaru pressure washer?
Before using your Subaru pressure washer, it is important to follow several safety precautions. Always wear appropriate protective gear, including safety goggles, gloves, and closed-toed shoes. Ensure that the work area is clear of any obstacles, people, or pets to prevent accidents. Inspect the pressure washer for any damage and ensure that all connections are secure. Familiarise yourself with the machine’s manual to understand its operation and safety features. Avoid directing the nozzle at yourself or others, and never operate the washer without water supply as it can damage the unit. Finally, never bypass any safety mechanisms; they are in place to protect you while operating the machine.