

Your first step should involve checking the output pressure when the machine is running. If the performance seems off, a closer inspection of the bypass functionality is necessary. Engage the trigger of your cleaning equipment while monitoring the discharge; a continuous flow indicates a malfunction in the mechanism.
Next, observe any unusual noises or vibrations during operation. These can signal a failing component. A properly functioning system should operate quietly, with a smooth pressure delivery. If you notice fluctuating or weak output, it’s time to assess connections and seals for potential leaks.
Additionally, consider the ease of engagement. A functional bypass should allow for seamless transitions between idle and operational states. If you encounter resistance or a lagged response, this points to a needed adjustment or replacement of the affected parts.
For my final recommendation, maintain a regular inspection schedule to prevent prolonged issues. Periodic checks of seals, fittings, and overall functionality can save you considerable time and resources, ensuring your equipment is always ready for action.
Identifying the Location of the Bypass Component
Locate the bypass component by examining the assembly near the motor or the pump unit. Typically, it is positioned in line with the pressure discharge hose and often mounted onto the pump body. Take note of the following key points during your search:
- Look for a cylindrical or rounded fixture with an outlet hose connected to it.
- Check for any identifying marks or labels indicating its purpose–these can often provide valuable hints.
- Inspect both sides of the unit, as sometimes this component can be obscured by other parts.
Additionally, reference the user manual for your specific model, as it usually contains diagrams that clearly indicate the layout and parts. If the manual is unavailable, you may find helpful resources online or in forums dedicated to cleaning equipment.
Common Locations to Check
Pay attention to these common areas where the component may reside:
- On the side of the pump assembly, often secured with bolts.
- Adjacent to the discharge port, usually where water exits towards the nozzle.
- Below the pressure gauge, in models equipped with this feature.
By thoroughly investigating these areas, identifying the bypass component becomes a straightforward task, allowing you to proceed with any necessary evaluations or repairs efficiently.
Gathering Necessary Tools for Testing

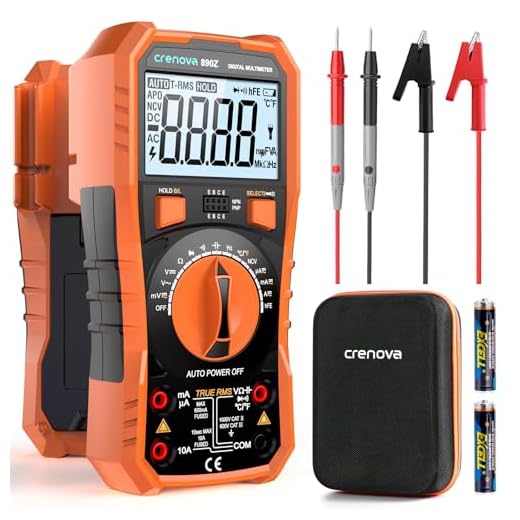
Begin by assembling a few key items to ensure a smooth evaluation process. You will need a multimeter to measure electrical continuity and check for any faults in the components involved.
Recommended Tools

A pressure gauge is also essential to assess performance and confirm proper pressure levels during the examination. Additionally, a pair of adjustable wrenches will facilitate the disassembly of components for closer inspection.
Safety Equipment
Don’t overlook personal protection gear. Safety goggles and gloves should be worn to protect against any unexpected fluid spray or sharp edges during your work.
With these tools and equipment at hand, you’re set for a thorough check of your unit’s functionality and to pinpoint any issues effectively.
Disconnecting the Pressure Cleaner for Safety
Before any maintenance, always disconnect the power source to avoid accidental activation. Unplug the equipment from the electrical outlet, ensuring that no water is present in the connections. If your model operates on gas, turn off the fuel valve and let the engine cool completely. This step is essential to prevent any unexpected start during the inspection.
Removing the Hose and Accessories
Detach any hoses and attachments. Start with the high-pressure hose, releasing any remaining pressure by squeezing the trigger on the lance. Disconnect the garden hose and any other fittings to ensure there’s no residual water inside the system. Store these components in a safe place to avoid damage.
Ensuring a Safe Environment
Confirm that the area surrounding the equipment is clear of obstacles and hazards. Keep the workspace dry to prevent slipping or other accidents. Always wear protective gear, such as gloves and safety glasses, to shield against water spray or debris that may pose risks during inspection or repair. Prioritising safety at every step will save potential injuries and ensure a smooth process.
Performing a Visual Inspection of the Unloading Component

Begin by closely examining the exterior of the unloading mechanism. Look for any signs of damage, including cracks, corrosion, or excessive wear. Components should fit securely without any noticeable gaps that could indicate a misalignment.
Checking Seals and Connections
Next, assess the seals and connections. Ensure that seals are intact and show no signs of deterioration. Any leaks around the fittings can lead to inefficient operation and should be addressed immediately. Tighten any loose connections with appropriate tools.
Inspecting the Spring Mechanism
The spring inside this system is vital for regulating pressure. Gently remove the cover if applicable, and visually check the spring for deformities or signs of fatigue. A compromised spring can affect functionality and needs replacement if damaged.
Finally, ensure that all moving parts operate freely. Manually actuate the mechanism, if possible, to confirm it returns to its resting position without sticking. This can indicate that everything is functioning as intended.
Using a Multimeter to Check Electrical Components
Grab a multimeter to assess the electrical integrity of your device’s components. Set your device to the ‘Ohms’ setting, which allows you to measure resistance.
Testing Switches and Connectors
Begin by checking the on/off switch. Disconnect all power sources for safety. Connect the probes to the switch terminals; a functional switch should show continuity when activated. Non-responsiveness indicates a faulty switch.
Inspect connectors by placing the probes on both ends. A reading close to zero suggests a solid connection. If there’s no continuity, replace the connectors to restore proper function.
Evaluating Wires and Motors
.jpg)
Use the multimeter to evaluate wire integrity. Check for breaks or shorts by measuring resistance along the wire’s length. A reading of ‘infinity’ means an open circuit due to a break, while a reading of zero indicates a short.
For motors, inspect the windings. Disconnect the motor from the power supply, then measure the resistance across the terminals. A reading outside the typical range indicates potential motor failure.
Keep your multimeter handy for ongoing assessments and promptly address any irregular readings to maintain the device’s performance.
Testing Valve Operation Under Pressure
Maintain safety by wearing protective gear, including gloves and goggles. Begin the evaluation by reconnecting the unit to a water source and ensuring it’s securely fastened before powering it up.
Observe the device as it starts running. Carefully monitor any fluctuations or irregularities in the water flow. A consistent, strong stream of water indicates proper function. If there is pulsation or fluctuation, it may signal an issue within the valve system.
Check the pressure gauge, if equipped, to confirm the readings align with the manufacturer’s specifications. A discrepancy in the expected pressure can indicate malfunctioning components.
For a more in-depth analysis, apply a small load, such as a nozzle adjustment or accessory attachment during operation. If the flow alters dramatically or the motor cycles frequently between on and off modes, this suggests further investigation is warranted.
| Observation | Possible Issue | Recommended Action |
|---|---|---|
| Inconsistent water flow | Malfunctioning mechanism | Inspect and clean components |
| Low pressure reading | Leak or blockage | Examine connections and hoses |
| Frequent motor cycling | Pressure regulation failure | Service or replace affected parts |
During the evaluation, listen for unusual sounds from the pump. A steady humming indicates normal operation, while grinding noises may point to internal issues. If concerns arise, consult the manufacturer’s guidelines for specific troubleshooting steps.
After assessment, shut down the system completely and disconnect it from the power source. Document any findings or irregularities for future reference or further repairs.
Interpreting Test Results and Troubleshooting Issues
Results indicate the performance and condition of components. Start by carefully analysing any discrepancies in pressure output or flow rate observed during checks.
Common Indicators and Their Meanings
- Low Pressure: A significant drop could point to a malfunctioning mechanism or blockage. Inspect for debris or sealing issues.
- Unusual Noises: Sounds such as hissing or clicking may signal internal wear or failure. Disassemble to examine parts for damage.
- Intermittent Operation: Constant engagement and disengagement implies potential electrical problems or a faulty seal. Further electrical tests might be necessary.
Troubleshooting Steps

- Check for any visible signs of wear on the mechanism. Look for cracks or corrosion that could hinder performance.
- Ensure connections are tight and components are in good condition. Loose fittings can lead to leaks.
- Review your electrical readings. If readings are inconsistent, consider replacing worn connectors or wiring.
- Consult the manufacturer’s specifications for permissible pressure ranges and compare them to your findings.
- If all else fails, replacement of the malfunctioning component may be the best option.
Regular maintenance and timely diagnosis prevent future complications. Keep a detailed log of observed behaviours for ongoing analysis.


