For optimal results, ensure the connection between your high-pressure cleaning device and the garden tap is secure. Begin by attaching one end of the flexible pipe to the inlet of the cleaner, ensuring it fits snugly to prevent leaks. Subsequently, connect the opposite end to the water source, ensuring a tight seal.
Before activating the machine, turn on the garden tap fully to supply a steady flow of water. This reduces strain on the motor and ensures consistent pressure while in operation. It’s advisable to check for any signs of leaks around both connections. If you spot any, disconnect and reattach until secure.
Always refer to the user manual of your device to confirm compatibility with your water supply system. Different models may have specific requirements. As you proceed with cleaning tasks, keep an eye on the pressure gauge, adjusting as necessary to manage the intensity of the spray for various surfaces.

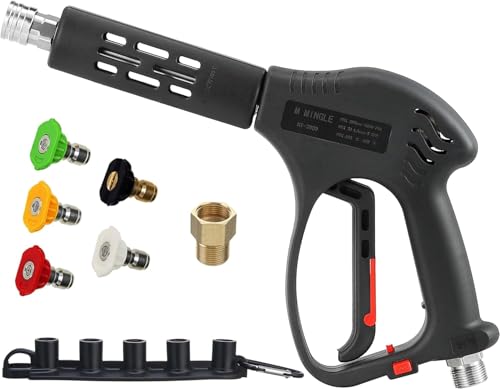
The right surface attachment can transform your cleaning experience. Select the appropriate nozzle based on the task at hand–wider angles for large areas and narrow jets for stubborn dirt. Regularly maintain your equipment, cleaning filters and hoses, to prolong its lifespan and enhance its performance significantly.
Choosing the Right Cleaning Machine for Your Needs

For effective results, select a model that matches the intended task. For light tasks such as washing cars or garden furniture, a machine with a pressure rating of 1,300 to 1,600 PSI suffices. In contrast, heavy-duty jobs like removing paint or cleaning driveways necessitate a unit ranging between 2,000 and 3,000 PSI.
Consider the design as well. Electric models are quieter and require less maintenance, whereas gas-powered variants deliver higher performance but tend to be noisier and heavier. If mobility is a priority, opt for portable machines with wheels.
Evaluate the flow rate as well; a higher GPM (gallons per minute) will expedite cleaning, especially for larger surfaces. Additionally, check for adjustable nozzles and accessories that allow for versatile applications.
Finally, ensure you choose a reputable brand known for reliability and customer support. Prioritising warranty terms can also save you future expenses on repairs or replacements.
Preparing Your Outdoor Hose for Pressure Washing

Inspect the outdoor connector and remove any debris or dirt that could obstruct water flow. A clean attachment ensures an unobstructed path for effective cleaning.
Verify the hose length; it should be sufficiently long to reach all areas you intend to clean. An inadequate length may necessitate moving the cleaning device frequently, which could impact efficiency.
Check for kinks, cracks, or leaks in the tubing. Any damage can reduce water pressure and lead to wasted water. Replace any compromised sections to maintain a solid connection.
Testing Water Flow
Before commencing, turn on the spigot to check the water flow through the pipe. A steady stream indicates good pressure, while weak flow suggests potential issues in the line.
Connection Preparation
Ensure the connection between the faucet and the line is secure. Tighten any fittings to prevent leaks during operation. Use a wrench if necessary, but avoid over-tightening, which can damage the fittings.
| Action | Purpose |
|---|---|
| Inspect connector | Removes obstructions, allows smooth flow |
| Check hose length | Enables reach to all cleaning areas |
| Examine hose for damage | Prevents pressure loss, saves water |
| Turn on spigot | Tests water flow before starting |
| Secure connections | Reduces chances of leaks during use |
By moving through these preliminary steps, you set a strong foundation for an efficient and productive cleaning session.
Connecting the pressure cleaner to the outdoor water supply

To establish a seamless connection, ensure the water source is turned off before initiating the setup. Begin by attaching a suitable connector to the end of your garden pipe, ensuring it is compatible with the equipment’s inlet. A secure fit is crucial to prevent leaks during operation.
Follow these steps to ensure a proper connection:
- Inspect the nozzle on the garden pipe for any debris or damage before connecting it. A clean nozzle facilitates optimal water flow.
- Slide the connector onto the garden pipe, tightening it by hand until you achieve a snug fit. Avoid over-tightening, as this could cause damage.
- Next, attach the opposite end of the garden pipe to the inlet of the cleaning equipment. Ensure you line up the threads correctly to prevent cross-threading.
- Once connected, turn on the water source slowly to allow it to fill the system. Check for leaks at both connection points.
- If leaks are observed, turn off the water source and verify the tightness of both connections before turning the water back on.
After securing the connections, proceed to check for proper water flow by squeezing the trigger of the cleaning device. Water should flow freely, indicating a successful setup.
Finally, confirm that the water supply remains uninterrupted and that all connections remain tight throughout the operation. This careful approach prevents any disruptions during your cleaning tasks.
Adjusting Pressure Settings for Different Surfaces
For the optimal cleaning experience, it’s crucial to set the correct force for the surface being treated. Soft materials, like wood or painted surfaces, should typically be cleaned at a lower intensity–around 1,200 to 1,500 PSI is ideal. This prevents damage while effectively removing dirt and grime.
For brick and concrete, a medium setting of 2,000 to 2,500 PSI works well. This level allows for the removal of ingrained stains without etching the surface. However, always test in a small area first to ensure the chosen strength doesn’t cause unintended harm.
For tasks involving vehicles or outdoor furniture made from plastic or vinyl, a gentle approach at approximately 1,500 PSI is advisable. This preserves the integrity of the materials while still achieving a thorough clean.
In cases where stubborn stains or heavy mildew are present, consider employing a higher intensity–up to 3,000 PSI. Such force is suitable for unyielding surfaces, including concrete driveways or stone pathways. Always be cautious, as excessive pressure can lead to surface damage.
Regularly assess the condition of the surfaces you plan to clean. If unsure, consult the manufacturer’s recommendations for pressure limits, ensuring proper care and maintenance. Adjust as needed based on the specific requirements and your results.
Safe Operation Tips While Using the High-Pressure Device

Always wear appropriate personal protective equipment, including safety goggles, gloves, and sturdy footwear. This minimizes the risk of injury from debris and high-velocity water.
Maintain a safe distance from your surroundings. Keep at least two feet away from any surfaces, especially delicate ones, to prevent damage. Avoid spraying near electrical outlets, power lines, or areas with exposed wiring.
Before commencing, inspect the cord and connections for any damage. Ensure the power supply is intact and grounded to avoid electrical hazards. Never operate the device in wet conditions or during rainfall.
Consider wind direction. Direct the nozzle downwind to prevent water and debris from being blown back towards you or other people in the vicinity.
Engage the safety lock when not in use. This prevents accidental activation and ensures that others nearby are kept safe.
Always start with a lower setting on the device and gradually increase it as required. Understanding the optimal settings for various tasks reduces the likelihood of unintentional harm to surfaces and yourself.
Never point the nozzle at others or yourself, even when the device is not in operation. The risk of injury from accidental activation is significant.
Be aware of your footing. Use anti-slip footwear and operate on stable surfaces to maintain balance while working. Wet areas can be hazardous.
After completing your task, turn off the device and disconnect it from the supply before performing any maintenance or adjustments. This ensures safety and prevents unexpected accidents.
Cleaning and maintaining your pressure cleaning device after use
Thoroughly rinse the water inlet filter to remove debris after every session. This ensures optimal flow and prevents blockages that can lead to performance issues.
Flush out detergent lines and nozzles by running plain water through the unit for a few minutes. This step helps in preventing build-up and keeps the sprayer ready for future tasks.
Checking and storing components
Inspect the hose for any kinks or damages. Replace as necessary to avoid leaks that may lead to diminished efficacy during future operations.
Store the motor in a dry location away from extreme temperatures. Protect it with a cover to prevent dust accumulation, ensuring longevity.
Maintenance schedule

Conduct regular checks on the plumbing and connections. Tightening joints and ensuring tight seals can prevent unexpected leaks. Set a routine maintenance schedule, ideally every few months, depending on usage frequency. This practice will prolong the life of your equipment significantly.