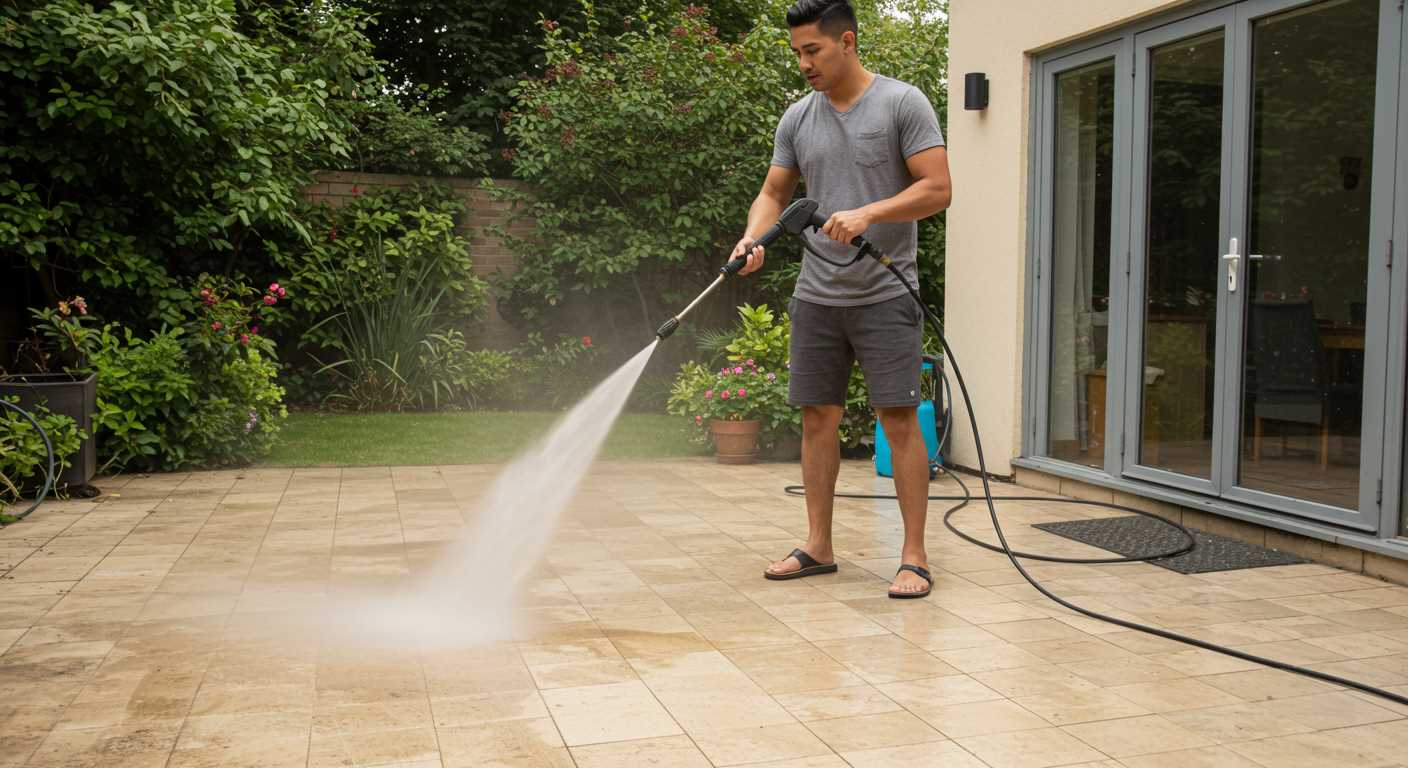


Switching out the nozzle is a simple way to boost performance. A wide-angle attachment is perfect for rinsing surfaces quickly, while a narrow jet is ideal for tackling stubborn grime. These nozzles are interchangeable, allowing for seamless transitions based on your cleaning task.
Incorporating specific brushes can enhance the efficacy of your device. For example, a rotating brush is excellent for cleaning vehicles, offering an effective solution for removing dirt without damaging the paint. Pair this with an appropriate detergent to maximise results on slick surfaces.
If tackling large areas, consider a surface cleaner. This accessory covers more ground in less time, providing even coverage on patios or driveways. Ensure that you maintain a steady pace to prevent streaks while utilising it.
Investing time in familiarising with each attachment significantly improves results. Always consult the instruction manual for usage guidelines and maintenance tips, ensuring longevity of both the accessories and your equipment.
Attaching Accessories for Optimal Performance
First, identify the specific tool required for your task. For cleaning vehicles, the foam nozzle is ideal, while the rotating brush is perfect for cobblestones.
Ensure compatibility by checking the connection points on both the main unit and the accessory. They are designed to fit snugly, so align them properly before pushing firmly until you hear a click.
Adjust the spray angle for different surfaces. Use a wide spray for delicate tasks like washing cars, or a narrow jet for stubborn stains on driveways. This provides targeted cleaning without damaging the surface.
For foam cannon applications, mix the correct ratio of detergent and water as detailed in the instruction manual. Fill the cannon, then attach it to the unit. Engage the spray mode and operate the trigger for an even coat of foam.
After each use, detach the accessory and rinse it thoroughly to remove any residue. This prolongs its lifespan and maintains performance for future cleaning tasks.
Keep all accessories stored in a dry place, organised and clearly labelled. This facilitates quick access and ensures you won’t waste time looking for the right tool.
Selecting the Right Attachment for Your Cleaning Task

For effective cleaning, it is crucial to match the right tool with the specific task at hand. Each nozzle or accessory has unique characteristics designed for different surfaces and levels of grime. Consider the task before proceeding.
For concrete surfaces, a rotary nozzle is highly effective. It combines the power of a fan spray with concentrated pressure, making it ideal for stubborn stains. If the job involves delicate surfaces like wood or vehicle paint, a low-pressure detergent nozzle or foam lance will be more suitable, providing necessary cleaning without causing damage.
When tackling large areas such as driveways or decks, a surface cleaner attachment can significantly reduce cleaning time. Its design allows for efficient coverage, preventing streaks and ensuring an even clean. For corners and tight spaces, a pivoting nozzle gives you the flexibility needed to reach those hard-to-access areas.
If the task involves removing moss or algae from your roof or walls, a telescopic extension lance paired with a soap applicator is recommended. This setup can extend up to several metres, ensuring safety by allowing you to clean without climbing ladders.
For cleaning vehicles, consider a dedicated car wash brush attachment. This brush typically comes with soft bristles that won’t scratch the paint, along with a quick-connecting feature that enables a swift switch between rinsing and washing.
Finally, always check the manufacturer’s recommendations for compatibility. Using the correct attachments not only boosts efficiency but also prolongs the lifespan of your cleaning equipment. Choose wisely based on the surface type and the nature of the grime for optimal results.
Proper Installation of Karcher Attachments

Ensure a secure connection between the main unit and the accessory by following these steps carefully:
- Turn off the machine and disconnect from the power supply.
- Identify the correct attachment for your specific task. Refer to the user manual for compatibility.
- Align the connector of the accessory with the nozzle of the unit. Match the grooves to ensure a snug fit.
- Apply light pressure and twist clockwise until you hear a click. This indicates it is locked in place.
- Before starting, double-check all connections for tightness, as loose fittings may cause leaks.
Additional details to keep in mind:
- For rotary brushes or surface cleaners, confirm that the spinning mechanism moves freely before usage.
- Cleansing agents can be used with certain implements; verify that the accessory is rated for such use to avoid damage.
- Regularly inspect attachments for wear and tear. Replace any that show signs of damage to maintain performance.
Following these guidelines will enhance your cleaning experience and prolong the lifespan of both the equipment and the accessories.
Understanding the Functionality of Different Attachments
The brush attachment is fantastic for scrubbing surfaces. It excels at lifting stubborn grime effectively, making it ideal for patios and driveways. By applying moderate pressure, you ensure that you don’t damage the underlying material while achieving a thorough clean.
The foam nozzle is excellent for applying detergents evenly. It creates a thick layer of foam that clings to surfaces, allowing the cleaning solution to work longer before rinsing. This is particularly useful on vehicles and delicate surfaces, ensuring that the wash is gentle yet effective.
The rotary nozzle enhances cleaning power by increasing the intensity of the water jet. I recommend using this attachment for tougher jobs like removing oil stains or dirt accumulation on concrete. The spinning action allows for a wider coverage area, reducing the time spent on each task.
Surface cleaners are perfect for large areas. Their design allows for simultaneous cleaning of multiple surfaces, significantly speeding up the process. They are especially handy for decks and large patio spaces, ensuring an even and thorough clean without stripes.
The extension wand expands your reach, making it easier to clean high areas without the need for ladders. This is particularly useful for gutters and roofs. Ensure you maintain a steady hand, as the length may alter the centre of gravity, requiring you to adjust your technique.
The squeegee attachment is designed for glass surfaces. It effectively removes water and prevents streaks, ensuring a pristine finish. Utilize it on windows and glass doors for professional-looking results after cleaning.
Knowing the specific strengths of each tool allows for more efficient cleaning. Each brings unique functionality tailored to various surfaces and cleaning challenges. Experimenting with different combinations can yield the best outcomes for your specific projects.
Using Turbo Nozzle for Heavy-Duty Cleaning
The turbo nozzle is tailored for tackling tough grime and stubborn stains. To maximize its potential, position the nozzle a few inches from the surface, allowing the concentrated spray to penetrate effectively without causing damage.
Begin by adjusting the spray pattern to a narrow stream. This setting enhances cleaning power, especially on surfaces like driveways and patios. Move the nozzle in a slow, sweeping motion to ensure thorough coverage, allowing the water to cut through dirt and debris.
For optimal results, pre-soak the area with a suitable detergent if dealing with particularly caked-on substances. Allow it to sit for a few minutes before using the turbo attachment, which will help lift the grime for easier removal.
Vigilance is key; keep an eye on the surface to avoid etching or discolouration, especially on softer materials. If you notice any adverse effects, adjust the distance or spray angle accordingly.
Lastly, periodically check for clogs in the nozzle tip during prolonged use, as dirt buildup can diminish performance. Clean it with a pin or brush if necessary, ensuring your cleaning sessions remain effective throughout.
Implementing the Foam Lance for Car Care
.jpg)
For optimal results while washing your vehicle, incorporating a foam lance is key. This tool delivers a thick foam that clings to the surface, allowing detergent to penetrate dirt and grime effectively. To get started, ensure you have the correct foam lance compatible with your machine. Adding a suitable car shampoo to the lance’s reservoir will enhance the cleaning process.
Step-by-Step Guide to Application

First, fill the foam lance with a high-quality, pH-neutral car shampoo, following the manufacturer’s dilution recommendations. Connect the lance securely to your device, replacing the standard nozzle if necessary. Adjust the foam settings to achieve a suitable thickness; a denser foam stays longer on the surface, improving cleaning efficiency.
Begin applying the foam from the bottom up to prevent streaking and allow the dirt to slide down. Cover all areas thoroughly, allowing the foam to dwell for a few minutes. After this dwell time, rinse off with clean water, ensuring no residue remains. This method promotes a swirl-free finish, enhancing the vehicle’s appearance significantly.
Maintenance Tips for the Foam Lance
After each use, rinse the lance to prevent product buildup, which can clog the nozzle. Store it away from direct sunlight to maintain its longevity. Regular checks will ensure that the lance continues to perform well, making your car care routine both effective and efficient.
Employing Surface Cleaners for Patios and Driveways

To achieve a spotless patio or driveway, I always recommend opting for a surface cleaner attachment. It effectively covers larger areas, minimising streaks and providing a uniform finish. Begin by connecting the cleaner to the nozzle and ensuring it is securely fastened. Adjust the pressure setting according to the surface type; for most concrete surfaces, a higher pressure works best.
Preparation Steps
Clear the area of any furniture, plants, or debris. This allows for unhindered access and prevents damage. Wet the surface lightly to loosen debris and dirt before engaging the cleaning tool. This preliminary step enhances the efficiency of the cleaning process.
Technique for Optimal Results

When operating the device, keep the surface cleaner flat against the ground and move it slowly in a straight path. Avoid lifting it away from the ground to prevent streaks. Overlapping each pass by a few inches ensures complete coverage, especially in corners and edges where dirt tends to accumulate.
| Surface Type | Recommended Pressure | Cleaning Frequency |
|---|---|---|
| Concrete | 1500 – 2500 PSI | Every 6 months |
| Brick | 1200 – 2000 PSI | Every 1 year |
| Paving Stones | 1300 – 2200 PSI | Every 1 – 2 years |
After finishing, inspect the area for any missed spots. If necessary, touch up any areas by going over them again with the cleaner. Rinse the surface afterwards to remove any residual dirt or cleaning solution. Completing this process not only refreshes the appearance but also extends the life of your outdoor surfaces.
Cleaning and Maintaining Your Attachments for Longevity
To prolong the lifespan of your cleaning tools, regular maintenance is critical. After each use, ensure you clean each component to prevent residue build-up.
Daily Care Steps
- Rinse all parts with clean water, focusing on nozzles and connections.
- Inspect for clogs; clear any obstructions using a soft-bristled brush or a pin.
- Dry components thoroughly to avoid rust and deterioration.
Periodic Maintenance
Every few months, deep cleaning is advisable:
- Disassemble nozzles and soak them in a cleaning solution to remove stubborn debris.
- Check seals and O-rings for wear; replace if they show signs of damage.
- Store in a dry, cool environment, utilising protective covers to prevent dust accumulation.
By following these specific guidelines, not only will you enhance the performance of your cleaning tools, but you will also ensure they remain in optimal condition for years to come.


