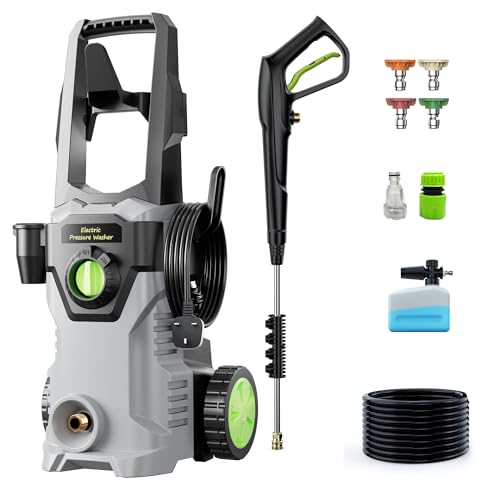
Begin by gathering a few essential tools: a high-pressure cleaning unit, a suitable detergent for automotive surfaces, a foam cannon or attachment, and microfibre cloths. These items will ensure that you achieve the best results without damaging the vehicle’s finish.
First, ensure the device is stationed on a level surface, preferably in a shaded area to prevent premature drying of the cleaning solution. Connect the water supply, and before switching the device on, check all hoses and connections for leaks. This simple step can save you time and energy during the cleaning process.
Next, apply the detergent specifically formulated for automotive applications to the foam cannon. This will allow you to evenly distribute the solution across the vehicle’s exterior, working from the bottom upwards to avoid streaking. Allow the foam to sit for a few minutes to break down dirt and contaminants effectively.

Switch to a gentle nozzle to start rinsing the vehicle. Maintain a safe distance of approximately 30 centimetres from the surface to prevent any damage. Use a sweeping motion, ensuring every section receives thorough attention, particularly areas prone to grime accumulation.
After rinsing, you can follow up with a microfibre cloth to dry off any remaining water. This not only prevents water spots but also adds a layer of shine. Regular maintenance with this approach will keep your vehicle looking pristine.
Optimising Your Karcher for Car Cleaning
Begin with the right nozzle attachment. A wide spray pattern is ideal for rinsing, while a narrow jet helps tackle stubborn grime. A foam lance can also enhance the cleaning process, delivering detergent evenly across the surface.
- Choose a safe detergent specifically designed for automotive paint. Regular cleaners may damage the finish.
- Fill the foam lance with the recommended detergent and attach it securely to the lance.
Position your equipment a safe distance (around 2-3 feet) from the vehicle. This prevents damage while ensuring effective clean-up. Start spraying from the top, working your way down to avoid directing dirt back onto already cleaned surfaces.
- Rinse the vehicle to remove loose dirt and debris.
- Apply foam generously, letting it sit for a few minutes to break down stubborn dirt.
- Using the appropriate nozzle, rinse off the foam from top to bottom.
After rinsing, dry the surface with a microfibre cloth to avoid water spots. Regular maintenance of the equipment helps keep it in prime condition for future use.
Check the user manual for maintenance tips specific to your model, ensuring longevity and performance. Replace worn parts as necessary, and periodically clean filters and hoses to maintain flow and pressure.
Choosing the Right Karcher Pressure Washer Model
Select a model with a minimum of 120 bar pressure for automotive cleaning. This ensures effective removal of dirt without damaging the paintwork. The K2 and K3 series offer adequate power for light to moderate tasks, while the K4 and K5 are suitable for larger vehicles and tougher grime.
Look for features like adjustable nozzles. A variable nozzle allows for tailored spray patterns, which is helpful for reaching tight spots around the wheels and undercarriage. Additionally, models with built-in detergent tanks simplify the process when applying cleaning agents.
Consider the portability of the unit and weight, especially if you intend to move it around your premises or store it in a confined space. Lightweight options, like the K2, are more convenient for regular use.
Evaluate the power source; electric models are easier to maintain and quieter during operation compared to petrol options. Take into account the hose length as well–longer hoses offer more flexibility and reduce the need to frequently reposition the device during the cleaning process.
Finally, check for availability of compatible accessories. Extra brushes and cloths specifically designed for vehicle cleaning can enhance your experience and results.
Preparing Your Vehicle for Cleaning

Begin by ensuring the vehicle is parked in a shaded area, avoiding direct sunlight to prevent streaking during the cleaning process. Remove any personal items and loose debris from both the interior and exterior. This includes taking out mats and cleaning out the trunk.
Check for Damage
Inspect the surface for any scratches, dents, or damaged paint. Areas that need special care should be identified before applying high-pressure water. If there are any areas with wax or sealant, take note that these may require additional attention.
Pre-Rinse and Target Tough Spots

Apply a gentle rinse with a hose to remove loose dirt and grime. Pay particular attention to the wheel wells and undercarriage, which often collect substantial debris. Spot treat any areas with significant stains or mud, using a suitable pre-wash solution to ensure effective cleaning.
Setting Up Your Karcher Pressure Washer

Begin with positioning the device on a stable, flat surface near a water source and a power outlet. Ensure the power cord is long enough to connect without stretching or straining.
Next, attach the supplied hose to the inlet connector. Tighten it firmly to prevent leaks. Connect the other end to your water source, ensuring the tap is fully open before starting the unit.
Install the selected nozzle, paying attention to the spray angle; a wider angle is suitable for larger areas, while a narrower angle concentrates force for stubborn dirt.
Check the detergent tank if your model includes one. If needed, dilute the cleaning solution according to instructions on the label. Fill the tank carefully, avoiding spills.
After setting up connections, turn on the water supply and press the trigger on the gun until a steady stream flows to eliminate air from the system. Monitor for leaks, making adjustments if necessary.
Lastly, connect the power cord to the outlet. Make sure the switch is off before plugging in. After everything is secure, you are ready to operate the machine efficiently.
Selecting the Appropriate Nozzle for Vehicle Cleaning
For optimal results while cleaning your vehicle, the choice of nozzle is paramount. I recommend using a 25° fan nozzle for general cleaning. This size provides a balanced spray pattern that effectively lifts dirt without causing damage to the paintwork.
If you are dealing with stubborn grime or mud, consider switching to a 15° nozzle. Its narrower spray concentrates the force of the water, allowing for deeper penetration into tougher stains. However, maintain a safe distance to prevent stripping away protective coatings.

A foam nozzle is ideal for initial stages, as it allows detergent application to loosen dirt before rinsing. Applying a thick layer of foam enhances cleaning performance, especially on larger surfaces.
To summarise the key aspects: choose the 25° nozzle for routine washes, the 15° nozzle for tougher stains, and include a foam nozzle for pre-wash treatments. Remember, always adjust the distance from the surface being cleaned and test on a small area first to ensure compatibility with your vehicle’s finish.
Using Detergents with Your Pressure Washer
Opt for specific automotive cleaning solutions compatible with your equipment. These formulations are designed to enhance cleaning efficiency without compromising the vehicle’s surface.
Types of Detergents
- Foaming Agents: Create a thick foam that clings to surfaces, allowing dirt and grime to loosen effectively.
- pH-Neutral Soaps: Safe for all types of coatings; they clean without risking damage to finishes.
- Spot Removers: Target stubborn stains like tar, tree sap, or bird droppings effectively.
Application Tips
- Follow manufacturer instructions for dilution ratios to avoid damaging the vehicle.
- Apply detergent from the bottom to the top to prevent streaks and ensure even coverage.
- Rinse thoroughly to remove any residue, preventing streaking or damage to the surface.
Always conduct a patch test on a less visible area to confirm compatibility before full application. Proper selection and application of detergents greatly enhance your cleaning experience, leading to excellent results.

Working from Top to Bottom: Washing Technique
Begin at the roof, applying water gently to prevent dirt or debris from falling onto already cleaned sections. Maintain a consistent distance of around 30 cm from the surface. This avoids potential damage and ensures thorough coverage.
Step-by-Step Approach
1. Approach the roof. Use a sweeping motion across the surface, activating the spray to loosen grime.
2. Transition to the windows and mirrors. Ensure these areas remain streak-free by wiping them after cleaning. Consider using a separate nozzle for a more controlled spray.
3. Move to the upper body of the vehicle. Maintain a downward angle while working on the bonnet and doors, allowing any soapy residue to run downwards.
4. Clean the lower sections. As you progress, pay close attention to wheel arches and sills, which accumulate more dirt. Finish by addressing the wheels and tyres, using a dedicated brush to apply additional cleaning solution if necessary.
Technique Tips
| Area | Technique | Tip |
|---|---|---|
| Roof | Sweeping motion | Avoid excess pressure |
| Windows | Controlled spray | Wipe after cleaning |
| Body | Downward angle | Use lower pressure |
| Wheels | Brush with solution | Focus on dirt removal |
By adhering to this systematic method, cleaning becomes more efficient, and surfaces remain pristine, with minimal effort required for maintenance in subsequent sessions.
Rinsing and Drying Your Vehicle Post-Cleansing
After completing the cleaning of your vehicle, thoroughly rinse it using a light spray to remove any remaining suds and debris. Focus on areas where soap may accumulate, such as around the wheels and under the mirrors, ensuring nothing is left behind.
While rinsing, maintain a distance of around 60-80cm to avoid damaging the paint. Start from the top and work your way down, allowing the water to flow off the surface naturally. For best results, use a turbo nozzle for the final rinse to achieve an even distribution of water and ensure all cleaning agents are effectively cleared away.
Drying Techniques
Once rinsing is complete, it’s crucial to dry your vehicle properly to prevent water spots. Microfibre towels are ideal for this task due to their absorbent properties and gentle texture. Start drying from the roof and work your way down, employing a blotting technique rather than dragging the towel across the surface.
Consider using a blower specifically designed for drying vehicles, as it forces air into crevices, helping to eliminate trapped water. Pay particular attention to areas prone to water pooling, such as door handles and wheel arches.
Finalising the process, apply a quick detailer or a spray wax while the surface is still slightly damp. This not only enhances the shine but also adds a layer of protection against contaminants.
Maintaining Your Karcher Pressure Washer After Use
After completing the task, proper care of your cleaning device is paramount. Start by disconnecting the water supply and the power source to ensure safety during maintenance. Allow the machine to cool down if it was in operation for an extended period.
Cleaning the Nozzle
Remove the nozzle and rinse it under warm water. Use a soft brush to eliminate any debris that may obstruct the water flow. This simple step ensures optimal performance for your next cleaning session.
Draining Excess Water

To prevent freezing or damage from residual moisture, drain any remaining water from the system. Locate the drainage plug and let the water out completely. This practice is especially crucial in colder climates to avoid internal freezing during storage.
Inspect the hoses for any signs of wear or damage. If any leaks or cracks are visible, consider replacing the hose to maintain efficiency. Proper storage is essential; keep your device in a dry place, preferably in an upright position to prevent bending or kinking of the hoses.
Regularly check the filter located at the water intake. Clearing any dirt or sediment ensures that your machine functions smoothly. For optimal longevity, consider scheduling a thorough professional maintenance check-up annually.
Final Tip: Always refer to the manufacturer’s manual for specific maintenance instructions tailored to your model, helping you prolong its lifespan and maintain performance.