


For an optimal cleaning experience, I recommend diluting a specific detergent with water in a designated chamber of your high-pressure equipment. This method not only maximises the cleaning effect but also protects components from potential damage caused by overly concentrated solutions.
Before applying the mixture, ensure that the surface is free from loose debris. It’s beneficial to pre-rinse the area, allowing the cleaning agent to work more effectively. Once the surface has been prepared, activate the sprayer and select a fan nozzle to distribute the solution evenly. Keep the nozzle at a safe distance–approximately 30 to 40 centimetres–from the surface to prevent any unintended abrasion.
Allow the cleaning solution to dwell for a few minutes. This contact time is critical; it enhances the product’s effectiveness by breaking down dirt and stains. Following this, switch back to the appropriate rinsing nozzle. Start at the top of the surface and work your way down, ensuring all residues are thoroughly washed away.

Post-cleaning, carefully clean the detergent tank. Residual cleaning product can degrade the equipment’s performance over time, so ensuring all components are free from any remnants will extend the lifespan of your device.
Choosing the Right Cleaning Solution for High-Pressure Equipment

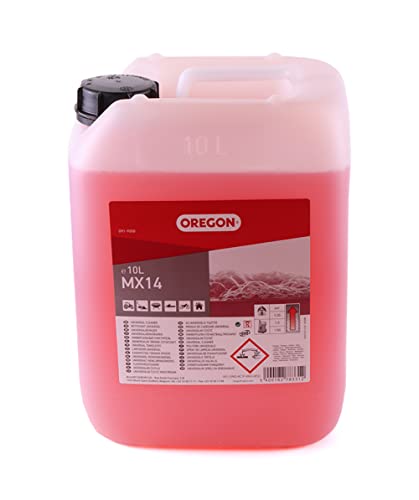
Opt for a formulation specifically designed for your cleaning machine type. Look for biodegradable options to ensure environmental safety. Read the label for compatibility with surfaces, as some mixtures may harm certain materials.
Concentrates often offer a better value, giving more washes per bottle. Check dilution ratios, ensuring you mix as per the manufacturer’s guidelines for optimal performance. Some products are tailored for specific tasks, like vehicle detailing or deck cleaning; selecting the right variant will enhance cleaning efficacy.
Consider pH-neutral solutions to prevent damage to sensitive areas while still providing a thorough clean. A test on a small, inconspicuous area can help confirm that the product will not adversely affect the surface being treated.
In addition, research brand reputations–reviews and recommendations can guide your choice. Some brands might excel in removing tough grime, while others could be better for regular maintenance. Always adhere to proper application methods recommended for the solution to maximise results.
Finally, experiment with different formulations if needed. Finding the optimal one tailored to your cleaning tasks can significantly simplify and enhance each session.
Mixing Cleaning Solution with Water
Follow a precise ratio for optimal results. Typically, a 1:10 mixture of cleaning product to water works effectively for most outdoor cleaning tasks. This means for every 100ml of the solution, add 900ml of water.
Step-by-Step Mixing Guide

1. Gather two containers: one for the concentrate and another for the diluted mix.
2. Measure the required amount of the concentrated cleaning solution.
3. Pour the concentrate into the larger container.
4. Add the precise amount of water gradually, stirring gently to ensure a consistent blend.
5. After thoroughly mixing, let it sit for a few minutes to allow any bubbles to dissipate before use.
Mixing Table
| Concentration Ratio | Concentrated Solution (ml) | Water (ml) | Total Volume (ml) |
|---|---|---|---|
| 1:10 | 100 | 900 | 1000 |
| 1:20 | 50 | 950 | 1000 |
| 1:5 | 200 | 800 | 1000 |
Ensure to verify the manufacturer’s instructions for any specific recommendations based on the type of cleaner being utilized.
Setting up your Karcher pressure washer for shampoo application
Attach the specialised nozzle designed for foam detergent application to the lance. This nozzle allows for a broader spray pattern and better coverage, ensuring even distribution of the cleaning agents.
Connect the detergent tank or reservoir, making sure it is securely fastened. Fill it with the pre-mixed solution of detergent and water, ensuring not to exceed the recommended maximum fill line.
Before beginning, adjust the pressure setting to a lower level. A high-pressure stream can lead to less effective cleaning of surfaces, particularly when lathering agents are involved.
Position the equipment at an appropriate distance from the surface. A distance of around 1 to 2 feet usually provides optimal foam application without causing any damage.
Turn on the model and begin by applying the foam. Move in a smooth, overlapping motion to cover the entire area adequately. Allow the mixture to dwell for a few minutes, which assists in breaking down grime and stains.
After the cleaning solution has taken effect, switch to a high-pressure nozzle to rinse away the foam, ensuring thorough removal of any residues.
Regularly inspect and clean the nozzle and detergent tank to prevent clogs and ensure consistent performance during future applications.
Applying Shampoo Using the Correct Nozzle and Technique
Select the appropriate nozzle for application; I recommend using a detergent nozzle, often marked in green or yellow, which disperses product effectively at lower pressure, ensuring thorough coverage without damage. Attach the nozzle securely to the spray wand before starting.
Hold the sprayer at a 45-degree angle, aiming at the surface to be cleaned. This position allows for better distribution and minimises runoff. Begin at the bottom and work upwards in overlapping strokes to prevent streaks and ensure even saturation.
Maintain a reasonable distance of about 30-40 cm between the nozzle and the surface. This distance helps in achieving a fine mist while promoting even application of the cleaning solution.
For best results, apply in sections, allowing the product to sit for a few minutes to break down grime and stains. Avoid letting the solution dry out; if it begins to dry, reapply lightly as needed. After the recommended dwell time, switch to the rinse nozzle to wash away debris and residues.
Keep in mind, it’s beneficial to frequently check the nozzle for clogs during the process. Regularly cleaning the nozzle ensures a consistent spray pattern for optimal performance.
Finally, following the application, remember to clean the equipment thoroughly to prevent residue buildup, which could affect future performance. Regular maintenance extends the life of your cleaning apparatus.
Removing Residue After Application
Begin rinsing the surface thoroughly with clean water. This step ensures that no cleaning agent remains, preventing potential streaks or damage. Use a wide-angle nozzle to cover a larger area effectively. Position the wand about 30 cm away from the surface to distribute the water evenly.
Steps to Ensure Complete Rinse

- Start rinsing from the top of the surface and work downwards. This method encourages runoff, reducing the likelihood of residues.
- Keep the nozzle moving to avoid concentrating pressure in one spot, which could damage surfaces.
- Pay special attention to seams and edges where residue may accumulate.
Once the surface is rinsed, inspect for any visible remnants of product. If needed, repeat the rinsing process in these areas.
Additional Recommendations
- If residues persist, a diluted vinegar solution can be used as a gentle alternative for further cleaning without damaging surfaces.
- Always follow the manufacturer’s recommendations for the cleaning agent to ensure compatibility with your equipment.
Finally, allow the surface to dry completely. This step helps to reveal any areas that may require additional attention, ensuring a spotless finish.
Maintenance tips for your Karcher pressure washer after using shampoo

Flush the system thoroughly after application. Run clean water through the machine for at least five minutes to eliminate any remaining cleaning solution. This step prevents clogging and damage to internal components.
Inspect the nozzle for residue. Detach it and rinse under running water. If any product is stuck, use a soft brush to gently clean it. Avoid harsh materials that could scratch or damage the nozzle.
Check hoses and fittings. Look for any signs of wear or leaks, especially after using chemical products. Replace any damaged parts immediately to maintain optimal function.
After rinsing, store the equipment properly. Keep it in a dry, covered area to protect it from environmental factors that can cause rust or deterioration.
Run the unit briefly without a nozzle to ensure there’s no remaining moisture in the pump or system. This helps prevent corrosion and extends the lifespan of your machine.
Perform regular maintenance checks. Consider replacing filters and seals periodically, especially if used frequently with detergent. This practice contributes to the longevity and performance of the equipment.
Refer to the user manual for specific care instructions. Manufacturers often provide detailed recommendations tailored to their products, which can aid in maintaining optimal performance.


