


To achieve excellent results when tackling stubborn grime and dirt, I recommend preparing the solution before attaching the cleaning implement. Choose a compatible detergent designed for outdoor cleaning tasks to complement the machine’s capabilities. Proper dilution according to manufacturer directions is critical for optimal performance.
Connect the detergent reservoir firmly and ensure it is sealed to prevent leaks during operation. Adjust the nozzle to a lower pressure setting; this ensures a gentle yet effective foam application. By applying the product from the bottom upward, you allow it to cling and penetrate more effectively, making it easier to remove the soiling.

After letting the foam adhere for a few minutes, begin rinsing from top to bottom. This method lifts dirt while preventing residue from settling into cleaned areas. Regularly check and clean the inlet filter to maintain consistent flow and prevent clogs, ensuring the system operates at peak efficiency. Following these steps will elevate your cleaning experience and enhance the longevity of your equipment.
Using the Cleaning Agent Capability on Your Pressure Cleaner
Fill the detergent reservoir with a suitable cleaning agent. Ensure it is specifically designed for high-pressure applications to avoid damage.
Switch the unit to the low-pressure setting. This is crucial as it allows the cleaning solution to flow out without the high pressure that can cause it to splatter.
Attach the correct nozzle to the lance. A wide fan nozzle works best to distribute the solution evenly on surfaces. Check the manufacturer’s guidelines for specific recommendations on nozzle types.
Begin spraying the cleaning agent on the surface requiring treatment. Keep the nozzle approximately 1-2 feet away from the surface for optimal results. Move in a sweeping motion to ensure even coverage.
Allow the detergent to dwell for a few minutes. This enables the solution to penetrate and lift dirt and grime effectively. Be cautious not to let it dry out, as that may lead to streaks.
Switch back to the high-pressure setting. Rinse the area with clean water to remove the detergent and the loosened dirt. Ensure all residues are washed away thoroughly.
| Step | Action |
|---|---|
| 1 | Fill reservoir with appropriate cleaning agent. |
| 2 | Set unit to low pressure. |
| 3 | Attach the compatible nozzle. |
| 4 | Apply cleaning agent to the surface. |
| 5 | Let it dwell for several minutes. |
| 6 | Switch to high pressure and rinse. |
After rinsing, inspect the surface. If any areas require further cleaning, repeat the application as needed for stubborn stains.
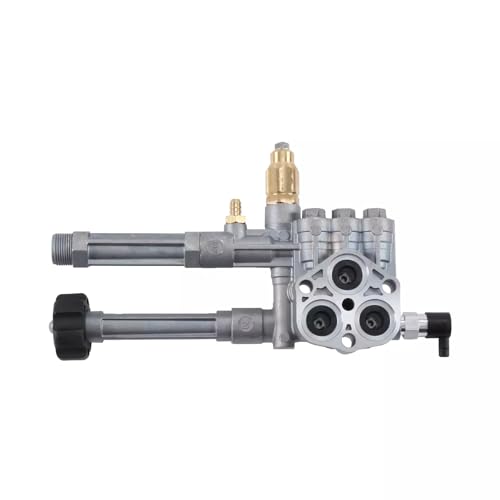
Understanding the Soap Injector Mechanism

The injector system operates by creating a vacuum effect that draws in cleaning solution as water flows through the unit. Recognising this functionality can enhance your overall experience.
Components of the Injector System

- Injector Assembly: This is the component where the liquid is mixed with water. It’s important that it is not clogged to maintain proper flow.
- Strainer: A filter that prevents debris from entering the injector, protecting its functionality.
- Hoses: Ensure these are securely connected and free from kinks to allow for optimal operation.
Maintenance Tips

- Regularly flush the injector with clean water after each use to prevent any buildup of residue.
- Inspect the strainer for any clogs or dirt, cleaning it as necessary to ensure a smooth operation.
- Check connections for leaks or loose fittings that might hinder performance.
A clear understanding of how the injector operates enables more efficient cleaning jobs, ensuring that the right amount of solution is mixed with water without interruptions. Regular maintenance of this mechanism will not only prolong its life but also significantly enhance the cleaning results.
Choosing the Right Soap for Your Pressure Cleaning Equipment
Select a detergent specifically designed for your machine’s type and surface application. For outdoor surfaces like decks or patios, a biodegradable cleaner will effectively remove grime without harming the environment. For vehicles, opt for a non-corrosive formula that prevents scratches on paint. If mould or mildew is present, a cleaner containing a mildewcide will aid in eliminating stubborn growths.
Concentrated formulas often offer better results, allowing for adjustable dilution based on cleaning demands. Always read labels carefully to maximise performance and to avoid damaging surfaces. If uncertain, conduct a patch test on a less visible area.
Moreover, avoid household cleaners, as they can generate excess foam or spray back, creating a mess and potentially damaging equipment components. Stick to professional-grade products designed to work seamlessly with your unit.
It’s also advantageous to check user reviews and manufacturer recommendations for the best results while ensuring compatibility with your equipment. With the right product, enjoy efficient and effective cleaning without unnecessary hassle.
Connecting the Soap Tube to the Pressure Washer

Begin by locating the soap tube, usually a flexible hose designed to attach to the inlet of your machine. Ensure the unit is turned off and unplugged for safety. Identify the designated connection point on the cleaner; this is typically located near the spray gun or on the machine itself.
Firmly insert one end of the soap tube into the appropriate port. You may need to twist or push it slightly to secure it in place. Make sure it sits snugly to prevent leaks during operation. The other end should connect to the container holding the detergent solution. If your model includes a specific bottle, attach it directly; if not, submerge the tube in a separate container filled with the adapted cleaning agent.
After connecting both ends, check the alignment for any visible bends that could impede flow. Once all connections are secure, turn on the machine, starting with the lowest setting. Gradually increase the pressure while observing the foam output. Adjust the amount of detergent accordingly if the application isn’t meeting expectations.
Secure all attachments to avoid disconnections during use. To disconnect the tube after completion, simply reverse the connection process while ensuring the unit remains off. This attention to detail ensures a seamless cleaning experience and prolongs the longevity of both the equipment and cleaning materials.
Adjusting the Soap Setting for Optimal Dispensation
To achieve the best results when applying cleaning agents, calibrating the setting is crucial. I recommend selecting a low setting initially, then gradually increasing it to match the surface’s cleaning needs. This prevents overuse and ensures even application.

- Start by turning the dial or adjusting the lever typically labelled for agent output.
- Observe the flow of the cleaning agent; it should be steady and consistent without excessive drips.
- If the stream appears too diluted, slightly increase the setting for more concentrated application.
Frequent testing on a small area allows you to evaluate the cleaning efficiency without damaging surfaces. Adjust as necessary based on the type of stain and surface material.
For persistent grime, a moderate to high setting might be required. Ensure you are aware of the surfaces being cleaned, as delicate materials may require a softer approach to avoid damage.
- Monitor the application closely to prevent oversaturation, as it can be as counterproductive as underapplication.
- After adjustment, pause periodically to assess the effectiveness; this can guide further calibrations.
Ultimately, finding the ideal setting is a balancing act between adequate coverage and surface protection. I find that keeping a notebook of what works best for specific tasks greatly aids in consistent outcomes.
Applying Soap to Different Surfaces
For optimal results, tailor the cleaning solution to the surface being treated. Each type of material reacts differently, and using the right approach ensures effectiveness without damage.

Horizontal Surfaces
For driveways and patios, begin by applying the cleaning mixture from the bottom to the top. This method prevents streaking and allows the detergent to cling to dirt. Allow the solution to act for several minutes before rinsing with a high-flow nozzle. Avoid using high pressure directly on delicate areas, as it may cause chipping or cracking.
Vertical Surfaces
When tackling walls, fences, or vertical siding, employ a sweeping motion, starting from the bottom and moving upwards. This technique promotes even coverage, and the solution will work its way down as gravity aids in capturing grime and stains. Let it sit on the surface, but ensure to watch for any adverse reactions, especially on painted or textured materials.
For vehicles, use a designated cleaning mix that’s safe for automotive finishes. Apply it gently, and rinse thoroughly to avoid soap residue, which can lead to spotting and streaks. Concentrate on areas that tend to accumulate dirt and contaminants, like wheel arches and lower body panels.
Adjust your strategy according to the surface texture and type, ensuring no damage occurs while achieving the cleanliness desired. Each application may require a different drying time, so factor that into your cleaning routine.
Cleaning and Maintaining the Soap System

Regular upkeep of the detergent system will extend its lifespan and ensure optimal performance. After each use, thoroughly rinse the detergent tube with clean water to eliminate any residual cleaning agents. A quick flush prevents blockages that can arise from dried soap. For stubborn residue, consider soaking the tube in warm, soapy water for a few minutes before rinsing.
Inspecting Components

Check the injector and tubing for cracks or wear. Any deterioration can cause leaks and affect dispensation. Replace worn parts immediately to maintain the effective flow of cleaning solutions. Additionally, examine the connections for tightness; loose fittings can lead to the entrance of air, disrupting the delivery of detergent.
Storage Considerations
When not in use, store the equipment in a dry and cool environment. Protect the system from extreme temperatures, as freezing can damage the components. If you anticipate a long break between uses, consider removing the tubing to prevent any deterioration from prolonged exposure to cleaning agents.


