Choose the right nozzle size based on the surface and the accumulated dirt. For most applications, a 25-degree nozzle strikes an excellent balance between pressure and coverage, ideal for patios and vehicles. For stubborn stains, consider a 15-degree option to deliver concentrated force.
Always maintain a safe distance from the surface being cleaned. Keeping the nozzle about two feet away prevents damage while ensuring effective cleaning. As you work, gradually adjust your distance based on results and the cleaning demands of the surface.
Employ a consistent sweeping motion across the area without lingering too long in one spot. This technique ensures an even clean while minimising the risk of gouging or etching surfaces. Switching angles intermittently can help tackle tough spots that require additional attention.

Engagement with the correct detergent is equally as vital. Some nozzles work more efficiently with specific cleaning agents. Follow the manufacturer’s instructions regarding proper dilution rates and application techniques to maximise the cleaning effect without compromising the equipment or surface.
Regular maintenance checks on your equipment and attachments prevent performance issues. Clean the nozzles after each use to avoid clogging and ensure optimal water flow. Replace any worn-out parts promptly to keep your equipment operating at peak performance.
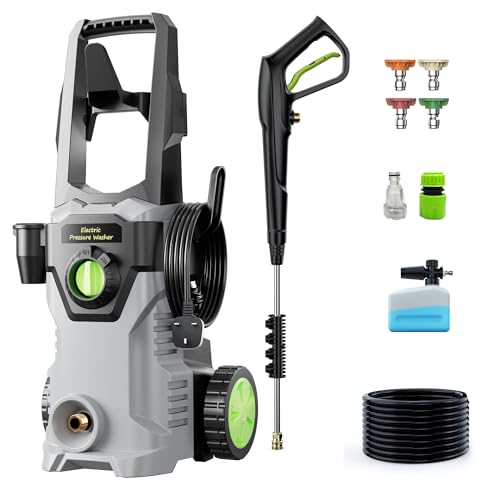
Choosing the Right Spray Attachment for Your Pressure Washer
.jpg "How to use spray attachment on pressure washer")
Select a nozzle based on the surface you’re cleaning. Here’s a quick reference:
- 0-degree: Perfect for high-pressure cleaning of stubborn stains on hard surfaces.
- 15-degree: Ideal for removing paint or tough grime from concrete.
- 25-degree: Suitable for general cleaning tasks like driveways, decks, and siding.
- 40-degree: Best for delicate surfaces like cars and windows.
- Soap nozzle: Utilises lower pressure to apply detergents for deeper cleaning.
Compatibility Considerations
Before acquiring a specific nozzle, ensure compatibility with your device. Check the following:
- Manufacturer’s specifications for size and fitting.
- Pressure rating of the attachment; it should match or exceed the machine’s output.
- Material construction; brass and stainless steel often offer durability.
User Experience
When switching nozzles, always disconnect the equipment to avoid accidents. Aim the nozzle away from yourself or others while adjusting. This simple act prevents unwanted injuries and enhances safety during operation.
Take time to understand how each nozzle affects water flow and coverage patterns. Conduct test sprays on a less visible area to assess the cleaning effectiveness before full application.
Preparation Steps for Your Cleaning Equipment
Start by ensuring the unit is on a stable, flat surface to prevent any movement during operation. Check that all components are secured and functioning properly. Prior to connecting the water source, inspect the hoses for any signs of wear or damage. Replace any frayed or cracked sections to avoid leaks.
Next, fill the detergent tank with the appropriate cleaning solution, taking care to follow the manufacturer’s recommendations regarding dilution ratios. Attach the water supply hose securely, ensuring it is free from kinks that may obstruct water flow.
Check Fuel and Oil Levels
If your model operates on petrol or has a specific oil requirement, confirm that both levels are adequate. Fill the fuel tank with fresh petrol, avoiding any mixes older than 30 days. For oil, use the recommended type and check the dipstick to ensure it’s at the correct level.
Functional Testing
Before beginning a cleaning task, perform a quick check of the equipment’s functions. Turn on the water supply and power it up to confirm everything operates smoothly without any strange noises. This preliminary test can save time and potential headaches during the actual cleaning process.
Connecting the Spray Attachment Properly
To securely attach the nozzle, align it with the connector on the lance, ensuring that the groove fits properly. Push firmly until you hear a click, indicating it is locked in place. If you encounter resistance, check for any debris that could prevent a proper fit.
Next, verify that the connection is tight by gently tugging on the nozzle. It should remain firmly attached. If it feels loose, disconnect and repeat the alignment and locking process.
After securing the nozzle, connect the lance to the cleaning unit, ensuring that the fitting aligns properly. Again, apply pressure until you hear the locking sound. This is critical for maintaining flow and preventing leaks.
Always check the manufacturer’s guidelines for any specific requirements regarding attachments. Following these steps will help prevent accidents and ensure optimal operation.
Adjusting the Spray Pattern for Different Surfaces
For optimal cleaning, it’s critical to modify the nozzle angle according to the surface type. For delicate materials like cars, set the nozzle to a wide fan pattern; this distributes water flow gently, preventing damage. A 40-degree nozzle is ideal in this case.
Concrete and stone surfaces, on the other hand, can handle a more concentrated stream. For these materials, use a 15-degree or 25-degree nozzle to effectively remove grime and stains while ensuring efficiency. The narrow focus works well for tough spots.
When tackling wooden decks or fences, choose a medium setting around 25 degrees. This setting balances pressure and coverage, safeguarding the wood from potential splintering. Always maintain a safe distance from the surface–around 30 cm is recommended–to avoid gouging.
For windows and glass surfaces, employ a low-pressure approach, preferably with a 40-degree setting. This minimizes the risk of shattering and allows for an even wash that removes dirt without streaking.
It’s advisable to test the angle on a small, inconspicuous area first, ensuring that the adjustment works smoothly without causing damage. Adjusting the nozzle in accordance with your surface type ensures thorough cleaning while preserving the integrity of the materials. After each use, don’t forget to clean and store your nozzles properly to maintain their effectiveness for future tasks.
Tips for Maintaining Consistent Water Pressure

Regularly inspect the intake filter and clean it when necessary. Clogged filters restrict water flow, leading to uneven output.
Monitor the hose for kinks or damage. A well-maintained hose ensures unrestricted water movement and stable performance.
Check fittings and connectors for leaks. Even minor leaks can affect the overall water delivery, causing noticeable fluctuations in force.
Ensure that the unit is adequately primed before starting. Air trapped in the system can disrupt the flow, leading to inconsistent water output.
Utilising the Right Nozzle
Selecting the appropriate nozzle for the task at hand is vital. Make sure the chosen nozzle matches the surface and intended cleaning level to maintain an even pressure.
Regular Maintenance of Equipment

Adhere to a routine maintenance schedule. Cleaning and inspecting components regularly can help prevent unexpected drop-offs in performance due to wear and tear.
Avoiding Common Mistakes While Using Spray Attachments

Always check the nozzle size before starting. Using an incorrect nozzle can lead to inadequate cleaning or damage to surfaces.
Ensure the water supply is adequate and free from contaminants. Connection to a garden hose that’s too short or kinked will result in low flow and pressure issues.
Maintain the appropriate distance between the cleaning wand and the surface. Too close can cause damage, while too far reduces effectiveness.
Be mindful of the surface material you’re working on. Using high pressure on delicate surfaces can result in scratches or stripping of paint.
Regularly inspect for leaks in hoses and connectors. A small leak can significantly reduce the efficiency of the cleaning operation.
Utilise a steady motion when applying the stream rather than stationary spraying. This ensures even coverage and prevents water spots.
Follow the manufacturer’s guidelines regarding cleaning solutions. Not all chemicals are compatible and may cause harm to the equipment.
Check for debris in the nozzle before use. Blockages not only impede water flow but can also lead to uneven cleaning.
Be cautious of the angle of the nozzle. Adjusting it incorrectly can cause the cleaning fluid to spray improperly, leading to wastage and less effective cleaning.
Lastly, ensure that protective gear is worn at all times. This minimises risk of injury from high-pressure water or debris. Always prioritise safety in every cleaning task.
Cleaning Specific Areas with Appropriate Spray Techniques
For effective cleaning of various surfaces, selecting the correct angle and nozzle type is key. Here’s how I tackle specific areas:
- Driveways: I opt for a narrow fan pattern at a low pressure, ensuring that dirt and oil stains are lifted without damaging the concrete. Maintaining a distance of around 12 inches helps to concentrate the water where it’s needed.
- Wood Decks: A wider fan setting works best here, set to a lower intensity. This prevents splintering while removing grime. Always follow the wood grain for optimal results.
- Car Exteriors: A 25-degree angle nozzle is my go-to for vehicles. This allows for effective dirt removal without stripping wax finishes. Keeping a distance of around 16 inches aids in achieving a gentle wash.
- Patios and Outdoor Furniture: I utilize a rotating nozzle for these surfaces. The circular motion helps to eliminate stubborn dirt and mildew quickly and efficiently.
- Gutters: A zero-degree nozzle is highly effective for deep cleaning gutter interiors. Aiming directly at the debris and working in short bursts clears out clogs, but caution is vital to avoid damage.
Always remember that wetting the surface before applying pressure allows for easier cleaning results. For stubborn stains, applying a cleaning solution prior to rinsing can yield a cleaner finish.

Don’t forget to assess the area for any delicate features, such as plants or loose fixtures, and cover them if necessary to prevent any unintended damage.
Safety Precautions When Operating a Pressure Cleaner
Always wear appropriate personal protective equipment (PPE). This includes safety goggles to protect your eyes from debris, gloves to shield your hands, and sturdy footwear to prevent slips or injuries. Closed-toe shoes are a must to ensure full protection from accidental splashes or falling objects.

Ensure the work area is clear of obstacles. Before starting, inspect the surrounding environment for items that could obstruct your movement or create hazards. This includes garden tools, debris, or cords that could trip you while in operation.
Inspect the equipment carefully. Before every use, check for any visible signs of wear or damage. Ensure hoses are secure and free from kinks. Also, verify that the nozzle is correctly attached and not clogged, as blockages can lead to unexpected surges in water pressure.
Maintain a safe distance from surfaces and people. Operating any high-pressure equipment requires maintaining a minimum distance to avoid injury. Keep others at least 10 to 15 feet away from the area while working. Always point the cleaning wand away from yourself and others.
Do not aim the stream at people, pets, or anything delicate. The force can cause serious harm, even at a distance. Use caution when working near windows, vehicles, or any fragile items that may be susceptible to high-pressure water.
Be cautious with chemical cleaners. If using any detergents or solutions, read the manufacturer’s instructions. Always wear gloves and goggles to prevent chemical burns or irritation. Additionally, wash hands thoroughly after handling these substances.
Follow electrical safety guidelines. When operating electrically powered tools, ensure all connections are secure and avoid using them in wet conditions. Protect the electrical components from moisture to prevent shocks or damage.
In case of emergency, turn off the equipment immediately. Familiarise yourself with the location of the power supply and ensure you can quickly disconnect it if any hazards arise.
| Precaution | Description |
|---|---|
| PPE | Always wear goggles, gloves, and sturdy footwear. |
| Clear Area | Remove obstacles to avoid trips or falls. |
| Equipment Check | Inspect for wear, secure hoses, and clean nozzles. |
| Safe Distance | Maintain distance from surfaces, people, and pets. |
| Chemical Safety | Read instructions and wear protection when using disinfectants. |
| Electrical Safety | Avoid wet conditions and check connections to prevent shocks. |
| Emergency Protocol | Know how to shut off the equipment quickly in case of danger. |