For optimal results, select a unit that operates at least 2000 PSI. This pressure is pivotal in dislodging dirt particles embedded deeply in the fibres. Prior to commencing, ensure that you have a suitable nozzle, ideally a 25-degree or 40-degree spray tip, to prevent damage while still providing effective cleaning.
Begin by vacuuming the textile thoroughly to remove loose debris. This step is crucial, as it reduces the amount of dirt and grime that may turn into mud during the cleaning process. Always check the manufacturer’s guidelines on your product to confirm it’s suitable for pressure treatment.
When ready, utilise a cleansing solution specifically designed for synthetic materials. Apply this using a low-pressure spray on a small section, allowing it to sit for 5–10 minutes. Following this, direct your equipment at a distance of approximately 12 inches, moving in a sweeping motion to cover the area uniformly. Avoid remaining in one spot too long to prevent saturating the fibres excessively.

After completing the cleaning, rinse with clean water, ensuring any soap residue is entirely eliminated. Once finished, allow the item to dry completely before placing it back in its original spot. Doing so will not only refresh its appearance but also extend its lifespan significantly.
Tips for Cleaning a Textile Floor Covering Using a High-Pressure Machine
Before starting, ensure the fabric is suitable for high-velocity water cleaning. Always check the manufacturer’s guidelines or labels for care instructions. Begin by shaking or vacuuming the material to remove loose dirt and debris.
Set the equipment to a low-pressure setting (around 1500-2000 PSI) to avoid damaging the fibres. Attach a dual-spray nozzle for an even application while keeping a safe distance of at least 18 inches from the surface.
Prepare a cleaning solution specifically designed for fabrics. Attach the solution tank to the device, if available, and spray it evenly across the area. Allow the formula to dwell for approximately 10-15 minutes for optimal penetration.
Using sweeping motions, start rinsing from one end, moving towards the other, ensuring even coverage. Maintain a consistent speed to prevent streaks. Rinse the area thoroughly to eliminate soap residue, which could attract dirt over time.
After rinsing, use a squeegee or broom to help remove excess moisture. If possible, hang the item or lay it flat to air-dry completely before placing it back in its original position.
| Step | Action |
|---|---|
| 1 | Check fabric care instructions |
| 2 | Shake/vacuum to remove debris |
| 3 | Set equipment to low pressure |
| 4 | Prepare suitable cleaning solution |
| 5 | Apply cleaning solution evenly |
| 6 | Rinse thoroughly |
| 7 | Remove excess moisture |
| 8 | Allow to air-dry completely |
For enhanced results, consider using an attachment designed for fabrics to provide a deeper clean. Regular maintenance every few months will prolong the lifespan and appearance of the textile covering.
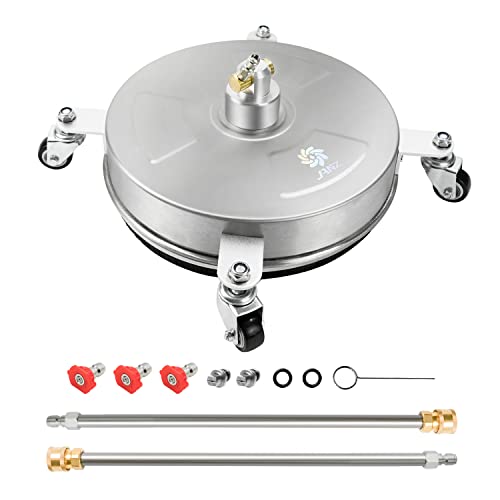
Choosing the Right Pressure Washer for Your Rug
Prioritise a machine with adjustable pressure settings. Aim for a model that allows you to lower the output to around 1300 to 1500 PSI, preventing damage to fibres. This flexibility ensures effective cleaning while protecting the material from potential harm.
Consider the type of nozzle included. A fan spray nozzle is invaluable for broad coverage and gentle cleaning. A 25-degree nozzle works well for deeper stains without compromising the integrity of the fabric.
Evaluate the weight and portability of the equipment. A lightweight unit with wheels facilitates movement, especially if the area to be cleaned is expansive. Electric models offer convenience, but a gas-powered option might be necessary for larger projects where mobility and power are priorities.
Check for features such as a detergent tank. These integrated systems allow for seamless application of cleaning solutions, enhancing the overall results while saving time.
Lastly, ensure the washer comes from a reputable brand known for durability and support. A reliable model will save you from headaches in the long run, ensuring consistent performance over time. Reading user reviews can provide insights into reliability and effectiveness that specifications alone may not convey.
Preparing Your Fabric for Cleaning
Remove any loose debris from the surface. Use a broom or handheld vacuum to eliminate dirt, dust, or pet hair. This will prevent larger particles from getting stuck during the cleansing process.
Check for stains and pre-treat them. Applying a suitable stain remover to affected areas can enhance overall removal. Allow the solution to sit according to product instructions before continuing.
Assess the Material

- Consult care labels or manufacturer recommendations regarding fabric types. Different materials might react differently to high-pressure techniques.
- Perform a small patch test in an inconspicuous area to ensure the fabric withstands the cleaning method.
Consider waterproofing solutions, particularly for delicate textiles. Application of a protective spray helps to seal fibres, making them more resilient to future stains.
Lay Out and Secure
Ensure the item lies flat on a suitable surface. If it’s large, consider working outdoors on a clean, even area such as a patio or driveway.
To prevent slippage or movement during the procedure, secure the item with weights or anchors. This will help maintain stability and ensure even coverage while applying any cleansers or cleaning techniques.
Adhere to local regulations regarding water usage and cleaning solutions to maintain environmental standards. Being responsible not only helps in achieving a better outcome but also supports local conservation efforts.
Selecting the Appropriate Cleaning Solution
For optimal results, opt for a solution specifically designed for synthetic or natural fibres, depending on the material of the item you are treating. Check the label carefully; pH-neutral cleaners are preferable to prevent damage or fading.
For heavily soiled textiles, a diluted mixture of vinegar and water can effectively break down grime. Use a ratio of one part vinegar to three parts water for a mild yet effective agent. Alternatively, commercial products with enzyme-based formulas work well in breaking down organic stains.
Consider Stain Types
Address specific stains with targeted solutions. For grease or oil spots, a degreaser will yield better results than a general cleaner. For pet-related marks, look for enzymatic cleaners that neutralise odours and break down biological materials. Always conduct a patch test in an inconspicuous area to ensure no adverse reactions occur.
Application Tips

Utilise a spray bottle to apply the cleaner evenly across the fabric, allowing it to soak for 5-10 minutes before the cleaning process begins. This enhances the solution’s effectiveness. As you apply, ensure thorough coverage but avoid saturating the fibres excessively to prevent damage.
Setting Up the Pressure Washer Safely
Ensure a stable and dry surface for the unit to avoid slips or falls during operation. Before starting, check for any damages or leaks in the hose and connections. Verify that the electrical outlets are suitable for the equipment to prevent any electrical hazards.
Protective Gear
Put on proper protective gear including goggles and gloves. This prevents injuries from debris and high-pressure water. A sturdy pair of non-slip footwear is also advisable.
Clear the Area

Remove any obstructions near the working area. This includes furniture, toys, or any other items that could interfere with cleaning. It is also wise to cover nearby plants or surfaces that could be damaged by the force of the water.
Position the nozzle at an appropriate distance to avoid damage to the fabric. Low-pressure settings are recommended for delicate materials. Lastly, always keep a safe distance from the device’s spray during operation to minimise the risk of injury.
Techniques for Washing Different Rug Materials
Cotton fabric benefits from a lower pressure setting, ideally around 1300-1500 PSI. Maintain a distance of approximately 12-18 inches to avoid damage. Pre-treat stains using a gentle solution and allow it to sit for a short while before rinsing. Ensure the fabric dries thoroughly to prevent mildew.
Wool Care Guidelines
For wool items, opt for the lowest possible PSI level, typically no more than 1000. Use a wide-angle nozzle to disperse water evenly. Rapidly saturate the surface, then follow up with a solution appropriate for delicate fabrics. Thoroughly rinse while being cautious not to over-saturate the fibres.

Synthetic Materials Approach
Synthetic options like polypropylene withstand higher pressures, around 1500-2000 PSI. These can handle direct spray more effectively. Use a more robust cleaning solution to tackle tougher stains and dirt. Ensure to rinse thoroughly to wash away any residues from the detergent.
Tips for Drying and Maintaining Your Textile
For optimal results, hang your item outdoors to dry. Ensure it is placed in a shaded area, as direct sunlight can cause colour fading and material degradation.
Airflow is Key
Maximise airflow by positioning the item so air can circulate freely around it. If possible, use a fan to speed up the drying process, making sure to flip the textile periodically to prevent damp spots.
Regular Care to Extend Lifespan

Incorporate vacuuming into your routine to eliminate dust and debris. For stubborn stains, address them immediately with a suitable cleaner to avoid permanent marks. Rotating the item every few months not only helps to prevent wear but also maintains an even look.
Common Mistakes to Avoid When Using a Pressure Cleaner
Avoid using high pressure on delicate fabrics. It can lead to fraying or tearing. Always test on a small area first.
Neglecting Safety Precautions
- Never operate the equipment without proper safety gear, including goggles and gloves.
- Ensure the area is free of obstacles and other people to prevent accidents.
- Disconnect power sources when changing settings.
Ignoring Manufacturer Guidelines
- Each appliance is built with specific pressure standards; exceeding these can damage the item.
- Use the recommended nozzles for your cleaning task. Incorrect nozzles can lead to poor results or damage.
Using an unsuitable cleaning solution can also lead to issues. Always follow instructions on compatibility with your specific tool and fabric type.
Finally, monitor your distance from the surface. Keeping the nozzle too close can cause lasting damage, while staying too far may not yield satisfactory outcomes.