Begin by gathering your materials: a high-pressure unit, appropriate detergent, a wide spray nozzle, and safety gear like goggles and gloves. This setup facilitates the removal of dirt and grime, significantly enhancing your home’s exterior appearance.
Ensure the surface is free of dust and debris prior to commencing. This initial step prevents scratching or damaging the cladding during the cleaning process. Select a lower pressure setting on your equipment, as excessive force can cause harm. Maintain a distance of approximately 3 to 4 feet from the surface to achieve an even clean while avoiding any potential damage.
Apply a specially formulated cleaner designed for this type of material, allowing it to sit for several minutes to penetrate stubborn stains. Work in sections, rinsing with clean water starting from the top and moving downwards, which prevents unsightly streaks. Take care to avoid directing the spray upwards, as this may force water into gaps and cause issues.

Finally, inspect your work. If certain areas still appear tarnished, repeat the cleaning steps as necessary. Proper maintenance at regular intervals not only preserves the aesthetic appeal but also extends the lifespan of your home’s exterior.
Steps to Clean Exterior Cladding Using High-Pressure Equipment

Always adjust the nozzle to a wide spray pattern to prevent damage. The typical distance from the surface should be around 3 to 4 feet. Choose a fan spray nozzle, which disperses water rather than concentrating it into a narrow stream.
Recommended Detergent Mixtures

Prepare a cleaning solution using a blend of one part bleach and three parts water. This approach effectively eradicates mould, mildew, and stains. Ensure you wear gloves and protective eyewear during the mixing process.
| Component | Ratio |
|---|---|
| Bleach | 1 part |
| Water | 3 parts |
Once the mixture is ready, apply it to the surface using a garden sprayer or a low-pressure setting on your equipment. Allow it to sit for approximately 10-15 minutes, which assists in breaking down stubborn grime.
Shooting Technique
Begin washing from the bottom and work your way up. This technique prevents streaking and ensures thorough penetration of the cleaning solution. Keep the nozzle moving to avoid concentrated water pressure on any spot.
After rinsing with a wider spray pattern, inspect for any remaining stains or spots, applying additional solution where necessary and repeating the rinsing. Limit usage to areas that require cleaning, focusing on heavy-soiled sections.
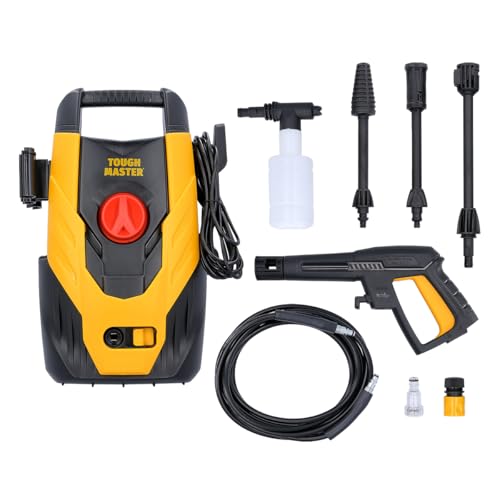
Choosing the Right Pressure Washer for Vinyl Siding
Select a unit with a PSI range of 1300 to 2000 for optimal results on exterior cladding. Higher pressures can risk damage, while lower settings may not remove stubborn stains effectively.
Motor Type and Portability

Consider electric models for home usage; they offer adequate power and are quieter. For larger areas or professional tasks, opt for gas-powered machines. These are typically more mobile and provide higher pressure capabilities but come with added noise and weight.
Accessories and Nozzle Selection
Look for versatile nozzle options, ideally including adjustable or turbo nozzles. These allow for different spray patterns, enabling you to switch from a wide spray for cleaning to a narrow one for targeted applications. A surface cleaner attachment can greatly enhance efficiency over large areas.
Lastly, evaluate the weight and build of the system. Lightweight machines are easier to manoeuvre, particularly for extended usage, while robust construction ensures longevity. Balancing these factors will deliver both functionality and convenience.
Preparing the Area Around Your Exterior Cladding

Clear the vicinity of any items that could be damaged or obstruct the cleaning process. Move furniture, planters, and decorations at least 10 feet away from the walls. This space helps prevent accidental impact or water exposure to delicate materials.
Protect Surrounding Surfaces
Use drop cloths or tarps to shield flower beds, shrubs, and other plants nearby. Cover air conditioning units, electrical outlets, and light fixtures to prevent water or cleaning solutions from entering them. This step is vital for preserving the integrity of these components.
Ensure Safe Water Drainage
Check that gutters and downspouts are functioning properly. Clear any debris that may hinder water drainage. This ensures that dirty water does not pool around the foundation or landscaping, preventing possible damage or erosion.
- Inspect for any cracks or weaknesses in the ground.
- Use barriers like plastic sheets if necessary to redirect water.
Assess your surroundings for any fragile objects that could be affected by the force of the water spray. This includes window screens, garden ornaments, and decorative light fixtures. Stowing these items safely away guarantees a smoother operation.
Lastly, check your equipment, ensuring hoses are in good condition, and connections are secure. Having all set lets the task proceed without interruptions, leading to better results.
Selecting the Appropriate Cleaning Solution

For optimal results, select a cleaner specifically formulated for soft materials like plastic. These solutions are gentle yet effective in removing dirt and mildew. Avoid harsh chemicals that can damage the surface or degrade the integrity of the material.
Make sure the chosen cleaner is biodegradable. This ensures that runoff does not harm your landscaping or local waterways. A pH-balanced solution is also advisable; it will be effective against grime without causing wear to the surface.
Concentrated solutions can be more economical. Dilute them according to the manufacturer’s instructions for best results. Generally, mixing ratios often fall between 1:10 and 1:50, depending on the product’s strength.
Here’s a comparison table of common cleaning solutions suited for your task:
| Cleaning Solution | Type | Usage Instructions |
|---|---|---|
| Oxygen Bleach | Eco-friendly | Mix 1 cup with 1 gallon of water |
| Commercial Vinyl Cleaner | Specialised | Follow label instructions for dilution |
| Homemade Vinegar Solution | Natural | Combine equal parts vinegar and water |
| Dish Soap | General Purpose | Mix ¼ cup with 1 gallon of water |
Conduct a patch test on a small area before proceeding with the entire surface. This helps ensure compatibility and prevents any potential damage. Always adhere to the manufacturer’s recommendations for the cleaning solution to maintain warranty and structural integrity.
Setting Up the Pressure Washer for Optimal Results
Begin by selecting the correct nozzle size for your task; a 25-degree nozzle is typically effective for most surfaces. This option strikes a balance between pressure and coverage, ensuring dirt is removed without damage.
Adjust the pressure settings next. For cleaning surfaces, aim for a pressure range of 1500 to 2500 PSI. Higher pressures may strip away protective finishes or damage materials.

Fill the tank with a recommended cleaning solution. Be cautious not to over-concentrate the mixture, as this can leave behind residue. A diluted mixture is usually sufficient and helps avoid streaks.
Ensure all fittings are securely attached, checking for leaks. Check the hose for kinks, and replace it if damaged. It’s vital to work with equipment in optimal condition, as this directly impacts performance.
Before commencing, run the system briefly to remove any air trapped in the lines. This also clears any debris that may have accumulated, ensuring a smooth operation.
Position yourself properly when cleaning. Maintain a consistent distance of about 2 to 3 feet from the surface while keeping the nozzle perpendicular to it. This technique enhances effectiveness and prevents any unintended splatter or streaking.
Always have a safety routine in mind. Wear appropriate personal protective equipment (PPE), including goggles and gloves, to safeguard against debris and chemical exposure. Final checks on the workspace for obstructions can also help avoid accidents.
Techniques for Washing Vinyl Siding Safely
Prioritise safety by maintaining a distance of at least 3 to 5 feet from the surface to prevent damage. Adjust the nozzle to a wide spray pattern to evenly distribute the cleaning solution without forcing it into seams or gaps.
Use a low-pressure setting initially to test how the surface responds. Start at the top and work downwards, ensuring that you don’t miss any areas while cleaning. This technique prevents streaks and allows dirty water to flow down without hindering the cleaned areas.
Coordinate Movement
Keep a consistent horizontal or vertical movement while operating the equipment. Take your time to cover each section thoroughly before moving on. If stubborn stains persist, consider pausing after initial cleaning to let the detergent work effectively on tough marks.
Final Rinse
After applying the cleaning solution, a final rinse at a safe distance is essential. Use clear water to wash away any residue. This ensures no cleaning agents remain that could damage the surface over time.

Rinsing and Inspecting Your Vinyl Siding Post-Cleaning
Immediately after the cleaning process, thoroughly rinse the surface with a garden hose or a low-pressure setting on your sprayer. Start at the top and work your way down to ensure that any remaining cleaning solution and dirt flow away from the surface, preventing streaking or residue.
Inspection for Damage
Once you’ve rinsed, conduct a thorough inspection of the exterior. Look for any signs of wear, such as cracks, chips, or loose sections. Pay close attention to seams and joints, as these are common areas for potential issues. If you notice any damage, consider addressing it promptly to avoid more significant problems in the future.
Final Touch-Up
If any spots persist after rinsing, use a sponge or soft-bristled brush with a mild detergent solution for spot cleaning. After touching up, make sure to rinse the areas again to ensure no cleaning products remain. This step is crucial to maintain the integrity and appearance of the surface.
By following these steps, you’ll ensure your exterior remains in excellent condition, enhancing its overall aesthetic and longevity.
Maintaining Your Exterior After Cleaning
After successfully refreshing your home’s exterior, a few maintenance steps can enhance longevity and appearance.
- Inspect regularly for any signs of wear. Look for cracks, discoloration, or mould. Early detection prevents larger issues.
- Schedule a light rinse every few months to prevent dirt accumulation. This keeps your surface looking pristine with minimal effort.
- Apply a protective sealant if recommended for your specific material. This can prolong the lifespan and reduce staining.
- Trim back any foliage or plants that touch the exterior. This prevents moisture retention and reduces the risk of pest infestations.
- Consider a routine cleaning, at least annually. Use a gentle method to remove built-up grime without harsh effects on your home’s surface.
Maintaining the cleanliness and integrity of your exterior is crucial. Regular inspections and light maintenance can save time and effort in the long run.
Utilising the right tools and techniques ensures the surface remains in excellent shape, enhancing your property’s value and curb appeal.