

Draining the water from the system is the first step. Remove any residual fluid by running the unit for a few minutes until the pump runs dry. This prevents freezing and potential damage during the cold months.
Next, add a pump saver solution. This lubricant ensures that the seals remain intact and protects the internal components from corrosion. Simply follow the manufacturer’s instructions for appropriate usage to achieve optimal results.
Inspect the hoses thoroughly for cracks or wear. Replace any damaged sections, as they can lead to leaks or burst when temperatures drop. Make sure all connections are secure to prevent any unintentional disconnections during storage.
Storing the machine properly is also crucial. Keep it in a dry, sheltered location, ideally indoors, to minimise exposure to moisture and extreme temperatures. Cover the unit with a breathable fabric to protect it from dust and debris while allowing any remaining moisture to evaporate.
Preparing Your Cleaning Equipment for Cold Months
Begin by emptying the water tank. Connect a garden hose to the inlet, run water until it’s clear, and then disconnect. This ensures no residual moisture remains that could freeze and damage internal parts.
Next, use a high-quality pump protector. This lubricates seals and prevents corrosion. Simply add it through the inlet, and then run the machine briefly to circulate the fluid throughout the system.
Fuel System Maintenance
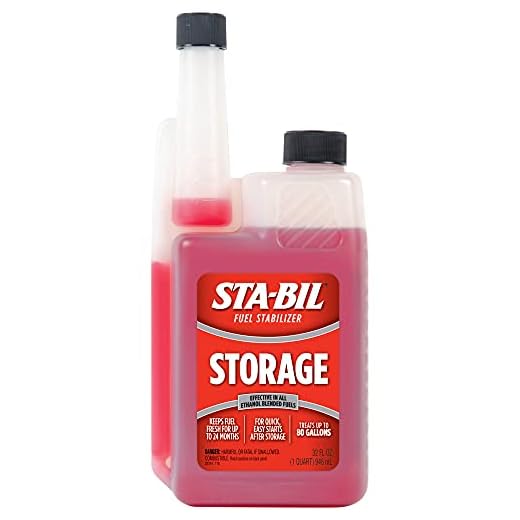
Drain any remaining fuel in the tank and carburettor. Leaving fuel can lead to degradation and clogging. For optimal results, use a fuel stabiliser to treat the remaining fuel in the tank, ensuring it remains usable when the warmer weather returns.
Storage Guidelines
- Store the unit in a temperature-controlled environment.
- Cover the equipment with a breathable cover to protect it from dust and moisture.
- Place it on a shelf or platform rather than directly on the ground to avoid contact with cold surfaces, which could lead to condensation.
Before storing, check all hoses and connections. Replace any that show signs of wear or damage, as they can deteriorate if left unused in cold conditions.
Following these steps allows for reliable and efficient operation when it’s time to bring your equipment back into service.
Draining the Water from the Pump

To ensure longevity, it’s crucial to eliminate any residual water from the pump. First, turn off the unit and disconnect the hose from both the water supply and the spray gun. Position the machine on a flat surface to facilitate the draining process.
Step-by-Step Process
Locate the pump drain plug, typically situated at the bottom or side of the pump housing. Using an appropriate tool, carefully remove this plug and allow the remaining water to flow out completely. Keep a container handy to catch any excess fluid during this stage.
Final Checks
After draining, inspect the drain plug for any dirt or debris. Clean it if necessary before securely replacing it to prevent leaks. Additionally, holding the spray gun trigger open while the water drains can help expel more fluid from the pump and hoses.
Stabilizing the Fuel System

To ensure the fuel system remains in optimal condition during cold months, it’s crucial to treat the fuel with a stabiliser. Adding a fuel stabiliser now can extend the life of the gasoline and prevent varnishing within the system. I recommend using a stabiliser specifically designed for small engines. The correct dosage is typically indicated on the product label.
After adding the stabiliser, run the engine for about 10 minutes to circulate the treated fuel throughout the system, including the carburettor. This step ensures every part of the fuel system is protected and helps in preventing any blockages caused by old fuel during storage.
Once treated, if any fuel remains in the tank, fill it to the top. A full tank reduces air space and minimises condensation, which can lead to rust and water accumulation within the tank. If you plan to store the equipment for an extended period, consider draining the fuel from the system for absolute peace of mind.
Lastly, do not forget to check the fuel filter; replacing it if clogged will enhance engine performance when you resume usage.
Changing the Oil Before Storage

Draining and replacing the oil is a key maintenance step prior to long-term storage. I recommend the following procedure for optimal results:
- Start with the engine warm to ensure the oil flows easily. Run the unit for a few minutes.
- Secure the pressure-cleaning machine on a flat surface, ensuring stability during the process.
- Locate the oil drain plug, usually found at the base of the engine. Have an appropriate container ready to collect the used oil.
- Carefully unscrew the drain plug and allow the oil to fully drain into the container. This step is crucial to avoid contamination.
- Once drained, replace the drain plug and ensure it’s tightened securely.
- Fill the crankcase with fresh, high-quality oil. Check the owner’s manual for the recommended oil type and quantity.
- Run the engine briefly again to circulate the new oil, then check the oil level to confirm it’s within the acceptable range.
Completing this process prevents the risk of engine damage caused by old, contaminated oil. Make it a part of your seasonal maintenance routine for longer equipment lifespan.
Inspecting and Cleaning the Nozzles
.jpg)
Inspect nozzles carefully for any signs of blockage or wear. Use a soft brush to remove debris that can accumulate inside. A good practice is to soak the nozzles in warm, soapy water for a few minutes, then rinse them thoroughly to dislodge any stubborn contaminants. For stubborn clogs, a thin wire can gently clear the opening, but take care not to damage the nozzle tip.
Check the orifice size of each nozzle. If you’ve switched them frequently, it’s easy to lose track of which nozzles are meant for which tasks. A clogged or damaged nozzle can severely impact performance; consider replacing any nozzles that show significant wear. Keep a small storage container to neatly archive unused or seasonal nozzles, maintaining easy access and organisation.
After cleaning, test them by running water through each nozzle to ensure proper function. Make sure to do this before storing, as moisture left in the nozzles can lead to corrosion. Store them in a cool, dry place, away from direct sunlight, to prolong their life and effectiveness in future use.
Protecting the Hoses from Freezing
Remove all hoses from the machine and drain any remaining water. Store hoses in a warm, dry area, preferably indoors, to prevent freezing. If hoses must remain outside, insulate them using foam pipe insulation or blankets, ensuring that no water is trapped inside.
Using a Hose Protector
Consider investing in hose protectors designed to shield them from cold weather. These are available at most hardware stores and effectively prevent freezing temperatures from affecting the materials. Wrap the protectors around the hoses where they will be exposed to the elements, allowing for protection without bulkiness during storage.
Regular Inspection
Before using the hoses again, inspect them for any signs of damage or wear that may have occurred during the cold months. Look for cracks or leaks that may have developed due to freezing. Address any issues promptly to ensure optimal performance and prevent further damage.
Storing the Equipment Safely
Position the unit in a dry, well-ventilated area to prevent moisture accumulation. A garage or utility room works best, away from any sources of heat that could cause damage over time.
Covering for Extra Protection
Utilise a breathable cover specifically designed for outdoor equipment. This will shield the machinery from dust and abrasives without trapping moisture underneath, which can lead to corrosion.
Securing the Cables and Hoses
Coil the power cords and hoses neatly, avoiding any sharp bends or kinks. Secure them with Velcro straps or similar fasteners to prevent entanglement. Store the hoses in a manner that keeps them off the ground to minimise exposure to cold temperatures.
Preparing the Electric Components for Winter

Disconnect the power supply before starting any maintenance on electrical components. Inspect the cord for any signs of wear or damage. If any frays or exposed wires are found, replace the cord to prevent electrical hazards. Store the unit in a dry environment to protect the entire electrical system from moisture that can lead to corrosion.
Additionally, apply a small amount of dielectric grease to the connectors and terminals. This step helps to prevent oxidation and ensures a reliable connection when the machine is used again. If your model has a battery, remove it and store it in a cool, dry place, making sure to charge it every couple of months to maintain its lifespan.
To further safeguard the electronics, consider enclosing the unit in a protective cover or tarp. Ensure that this covering is breathable to prevent moisture buildup, which can damage internal components over time.
| Task | Description |
|---|---|
| Disconnect Power | Unplug the machine from the electrical outlet. |
| Inspect Power Cord | Look for any signs of damage and replace if necessary. |
| Apply Dielectric Grease | Seal connectors and terminals to prevent oxidation. |
| Battery Maintenance | Remove battery and store in a cool, dry place, charging regularly. |
| Cover for Protection | Use a breathable cover to keep the unit dry and protected. |
FAQ:
What steps should I take to winterize my Honda pressure washer?
To winterize your Honda pressure washer, follow these steps: First, ensure the machine is turned off and cooled down completely. Disconnect the water supply and drain any remaining water from the pump and hoses. You can do this by running the washer for a few minutes without water. Next, add pump protector or antifreeze specifically designed for pressure washers into the pump to prevent internal damage. Additionally, check the oil level and change it if necessary, making sure to use the oil recommended in the user manual. Finally, store the washer in a dry, sheltered location to protect it from extreme temperatures.
How can I protect my Honda pressure washer from freezing temperatures?
To protect your Honda pressure washer from freezing temperatures, it’s essential to winterize it properly. Start by draining all water from the system, since any residual water can freeze and cause damage. It’s important to use an appropriate antifreeze for pressure washers to safeguard the pump. Additionally, consider storing the washer indoors in a garage or shed where it will not be exposed to harsh weather conditions. If indoor storage isn’t possible, covering the washer with a heavy tarp can provide some protection. Regular maintenance throughout the winter season, like checking the oil and ensuring no moisture is left in the fuel tank, will extend the life of your equipment.


