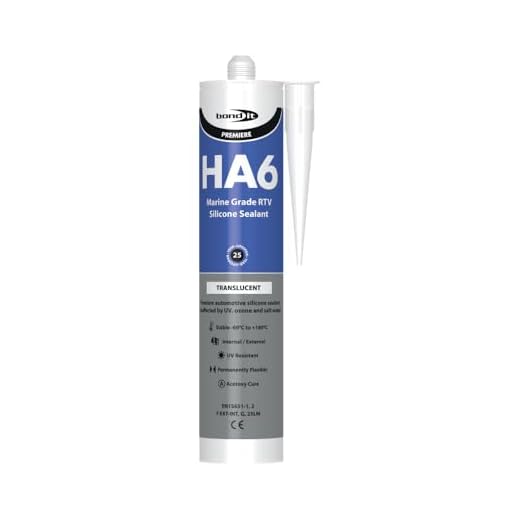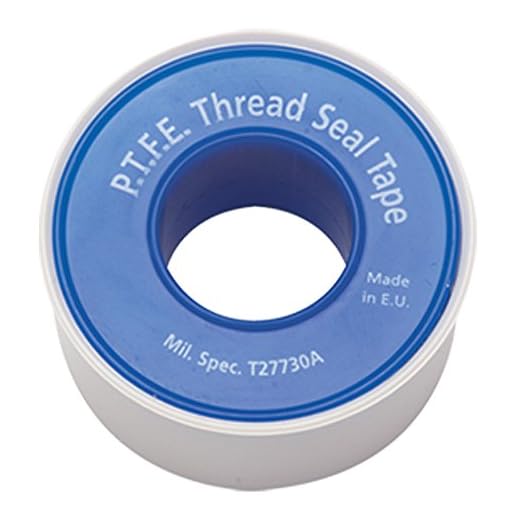


To maintain the functionality of a pressure cleaning device, I recommend using a combination of Teflon tape and silicone sealant. Teflon tape, applied to threaded connections, prevents leaks by creating a tight bond. Simply wrap a few layers around the threads, ensuring an even distribution, and then tighten the connections securely.
In scenarios where more robust sealing is necessary, silicone sealant provides an excellent alternative. Choose a high-quality product designed for outdoor use, as it can withstand water exposure and temperature variations. Apply it generously around the fittings and any potential leak points, and allow adequate curing time before using the machine again.
Regular inspection of seals and connections is crucial to identify wear and tear. By routinely tightening fittings and replacing worn-out seals, I’ve found that equipment longevity and performance improve significantly. Proper maintenance not only prevents leaks but also enhances overall cleaning efficiency.
Choosing the Right Sealant for High Pressure Machines
For optimal performance and durability, I recommend using silicone-based sealants specifically designed for pressurised systems. These sealants exhibit excellent adhesion and flexibility, allowing them to withstand vibrations and thermal expansion without cracking.
Key Properties to Look For
Focus on sealants that are resistant to water, chemicals, and extreme temperatures. Some formulations include additives that enhance durability against UV light, which is beneficial if the equipment may be exposed to sunlight. Ensure that the selected product cures quickly to minimise downtime.
Application Tips
Before applying any sealant, clean the surfaces thoroughly to remove dirt, grease, or old sealant residues. This ensures a strong bond. Apply a consistent, even bead to prevent leaks and allow proper curing time per manufacturer instructions. Regular maintenance checks post-application can help catch any potential issues early on.
Step-by-Step Guide to Sealing Hose Connections
Begin with disconnecting the hose from the unit to avoid accidental operation. Examine both ends for any debris or damage. Clean the threads thoroughly using a brush or a cloth to ensure a tight fit.
Preparation
Next, choose the appropriate connector type for your hoses. Ensure compatibility with the equipment specifications. If you’re using threaded connections, apply thread seal tape or paste. Wrap tape around the male threads, leaving the first thread exposed to prevent blockage.
Securing Connections
Carefully screw the hose back onto the unit, ensuring it aligns correctly without cross-threading. Use pliers or a wrench for a snug fit but avoid overtightening to prevent damage. After securing, check for leaks by running the unit at a low setting. If you see any leaks, gently tighten the connections further.
Preventing Leaks: Tips for O-Ring Maintenance
Regular inspection of O-rings is crucial. Look for cracks, deformation, or wear. Replace any damaged O-ring immediately to prevent leaks.
Apply a thin layer of silicone grease or petroleum jelly on O-rings during installation. This ensures a snug fit and enhances longevity by reducing friction wear.
Ensure proper sizing when replacing O-rings. Use a caliper to measure dimensions accurately. An improperly sized O-ring can lead to persistent leaks.
Clean the grooves where O-rings sit before installation. Debris or old sealant can compromise the seal, leading to failures.
Store O-rings in a cool, dry place away from direct sunlight. Heat and moisture can accelerate deterioration. Use airtight containers for better preservation.
Consider using O-rings made from durable materials like nitrile or EPDM, which are more resistant to temperature changes and chemicals.
Inspect connections frequently, especially after prolonged use. Tighten fittings to avoid any potential movement that may cause leaks over time.
Test for leaks by pressurising connections without using any water. This method can highlight weak spots without wasting resources.
How to Properly Seal the Pump and Its Components
Ensure comprehensive protection by meticulously applying the correct technique while securing the pump and its associated parts. Follow these detailed steps to achieve a tight fit.
1. Preparation
- Gather necessary tools: wrenches, screwdrivers, and a clean cloth.
- Choose a quality sealant specifically designed for water applications.
- Inspect all components for wear or damage before assembly.
2. Applying Sealant
- Clean all bonding surfaces thoroughly with a degreaser to remove dirt and contaminants.
- Apply a uniform layer of sealant to the threads of the pump connections. Ensure adequate coverage without excess.
- Assemble the components carefully, aligning them properly to avoid cross-threading.
- Hand-tighten the connections and then use the wrench for final tightening, ensuring not to over-torque and cause damage.
After completion, allow the sealant to cure as per manufacturer instructions before usage. Regular inspections can prevent premature failures and leaks.
Best Practices for Storing Sealed High Pressure Washers
Always empty the water from the unit before storage. Residual moisture can lead to corrosion and damaging growth of mold within the system.
Drain hoses completely after use. Coiling wet hoses can cause kinks and promote internal mildew. Store them straight or loosely coiled in a dry location.
Keep all components in a cool, dry place. Extreme temperatures can compromise materials and joints, resulting in leaks upon future usage.
Cover the machine with a protective tarp or dedicated cover to reduce exposure to dust and environmental elements, which can degrade seals and components over time.
Periodically inspect all gaskets, O-rings, and connectors during off-seasons. Replace any brittle or worn pieces immediately to ensure that performance remains uncompromised.
Treat plastic and rubber parts with appropriate conditioners to help maintain flexibility and prevent cracking over time.
Store the unit upright if possible. This prevents oil and fluids from pooling incorrectly which can lead to issues with the engine or pump.
Maintain a record of service and maintenance performed. Understanding what has been checked or replaced aids in better upkeep practices moving forward.
Use a heavy-duty extension cord when needed, ensuring it is rated for the load, and store it neatly without tangles to maintain its longevity.
When winter approaches, consider draining antifreeze through the pump system to prevent winter freeze damage, particularly in climates prone to low temperatures.
Ensure all parts are clean before storage, removing any debris or chemical residues that could affect functionality. A good cleaning now can save issues later.
Identifying Common Seal Failures and Their Solutions
Leaks often stem from wear and tear on components. Examine all joints and connections for signs of damage or deterioration. A cracked fitting or frayed hose can result in substantial fluid loss. Regular inspection eliminates these issues before they escalate.
Worn O-Rings
O-rings play a crucial role in maintaining a secure connection. If you notice dripping at connection points, inspect the O-rings for cracks or deformation. Replacing them with high-quality replacements immediately resolves leaks. Keep a spare set on hand to minimise downtime.
Pump Seals**
Pump seals can deteriorate due to excessive heat and pressure. Signs of failure include fluid pooling around the pump area. To address this, ensure proper lubrication and use seals designed for high-stress conditions. Regularly check the integrity of the seals and replace them as necessary to maintain optimal performance.
FAQ:
What materials are best for sealing a high pressure washer?
To seal a high pressure washer effectively, consider using materials such as silicone sealant, rubber gaskets, or Teflon tape. Silicone sealant is resistant to water and can withstand high pressures, making it suitable for sealing joints and connections. Rubber gaskets provide a reliable seal for components that fit together, while Teflon tape can be used on threaded connections to prevent leaks. Each material serves a specific purpose, so choose one that fits the area you need to seal.
How often should I check and maintain the seals on my pressure washer?
Regular maintenance of the seals on your pressure washer is crucial for optimal performance. It is advisable to check the seals every few months, especially if the washer is used frequently. Signs of wear, such as cracks or brittleness, indicate that the seals need replacing. Additionally, after any intensive use or exposure to harsh conditions, inspecting the seals should be a priority to prevent leaks and ensure the longevity of the machine.
Can I use duct tape to seal my high pressure washer?
While duct tape may provide a temporary solution for minor leaks, it is not a recommended long-term sealing method for high pressure washers. Duct tape can easily degrade under high pressure and temperature, leading to potential failures. Instead, it’s better to use materials designed for high-pressure applications, such as silicone sealant or Teflon tape, which provide a secure and durable seal under strenuous conditions.
What signs indicate that the seals on my high pressure washer need replacing?
There are several signs that suggest the seals on your high pressure washer may need replacement. Look for visible wear, such as cracks, tears, or dry rot in the material. Additionally, if you notice water leaks around connections or a loss of pressure during operation, these could be indicators of compromised seals. Unusual noises while the washer is running can also signal that the seals are not functioning correctly and may require attention.
Is it possible to seal leaks in a pressure washer without professional help?
Yes, you can seal leaks in a pressure washer without professional assistance, provided you have the right materials and a basic understanding of the components involved. Start by identifying the source of the leak, then clean the area thoroughly before applying a suitable sealant, such as silicone or replacing gaskets. There are numerous guides and tutorials available that can guide you through the sealing process step by step, enabling you to carry out the repair effectively. However, if you feel uncertain about the process, consulting a professional is advisable.


