If you’re experiencing diminished output, the first thing to check is the inlet filter. Clogged filters restrict flow and can lead to inadequate performance. Cleaning or replacing this component often resolves the issue quickly.
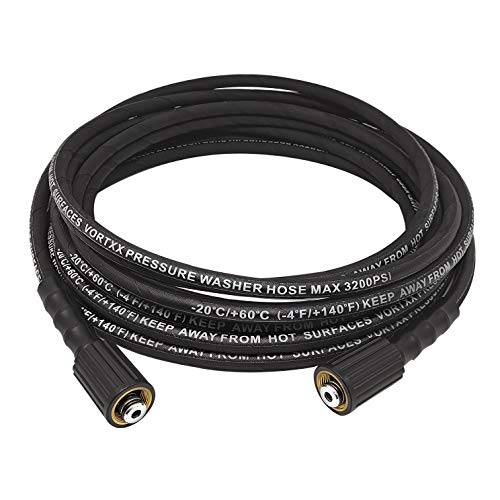
Next, inspect the high-pressure hose. Look for kinks, leaks, or damage that could affect water flow. Even minor imperfections can cause significant drops in output. If any faults are found, replacing the hose will likely restore optimal functionality.
It’s also wise to examine the spray gun. A malfunctioning or dirty gun may not maintain pressure effectively. Regular maintenance, including cleaning nozzles and ensuring seals are intact, can prevent a loss of force during operation.
Lastly, consider the water supply. Insufficient supply can hinder performance dramatically. Ensure the source delivers a steady and adequate flow, as variability can impact how well your device operates.
Common causes of pressure loss in cleaning devices

First, inspect the inlet filter for clogs. Debris accumulation can obstruct water flow, resulting in inadequate output. I recommend cleaning this filter regularly to ensure optimal performance.

Check the high-pressure hose for leaks or kinks. A damaged hose can lead to significant drops in performance. If you find any perforations, replacing the hose is necessary to restore full functionality.
Examine the nozzle for blockages. A dirty or clogged nozzle can reduce the spray and effectiveness. You should clean or replace the nozzle based on its condition, as this can make a significant difference.
Pump issues

Pump integrity plays a vital role. If the pump is worn or damaged, it may not maintain the necessary pressure. Regular maintenance and oil changes will extend the life of the pump. If problems persist, consider consulting a technician.
Incorrect detergent usage
Utilising the wrong detergent can affect performance. Always use the manufacturer’s recommended solution to avoid complications and ensure the unit works effectively. Improper mixtures might also lead to build-up, negatively impacting the cleaning process.
How to check for clogs in the nozzle
Begin by disconnecting the unit from the power source and the water supply to ensure safety. Remove the nozzle from the lance by twisting it counter-clockwise; most models allow for quick removal. Inspect the nozzle visually for any visible blockages or debris.
To be more thorough, soak the nozzle in warm, soapy water for about 15 minutes to help dissolve any grime. After soaking, use a soft brush or an old toothbrush to gently scrub the opening, ensuring you reach into any tiny crevices.
If you encounter stubborn clogs, employ a needle or a pin to carefully clear the nozzle tip. Be cautious not to damage the internal structures, as this could lead to further issues. Once cleaned, rinse the nozzle thoroughly under running water to remove any residue.
Reattach the nozzle and reestablish connections. Test the equipment to assess if the cleaning has improved performance. Regular inspections and cleaning of the nozzle after each use can prevent accumulation of dirt and maintain optimal functionality.
Identifying leaks in hoses and fittings
Check all hoses and connections regularly for signs of damage or wear. Common indicators include split sections or bent fittings. If you spot any imperfections, they usually need replacement.
To specifically identify leaks, follow these steps:
- Visual Inspection: Examine hoses and fittings for visible cracks, holes, or separation from connectors. A thorough look can reveal minor issues before they lead to bigger problems.
- Pressure Test: With the machine turned off, inspect fittings. Connect the machine to water, and then turn it on briefly. Monitor where the water first begins to drip or spray.
- Run Your Hand Along Hoses: While the equipment functions, slowly move your hand along the hoses. You may feel the spray or mist from a leak, indicating an area of concern.
Common trouble spots include:
- Junction Points: Where hoses connect to fittings often wear out due to constant movement.
- Couplings: Inspect these closely; they can develop leaks from improper threading or cross-threading.
- Hose Ends: The point where the hose meets the nozzle is a frequent failure area, particularly if hoses are frequently detached or reattached.
If leaks are found, replace the affected parts promptly to maintain optimal functionality. Consider using hose clamps for better sealing and longevity at connection points.
Understanding the Role of the Water Supply
Ensure your water source provides sufficient flow and pressure. A minimum flow rate of 5-8 litres per minute is typically required for optimal functionality. Check if your supply line is free from kinks or obstructions, as these can dramatically affect fluid delivery.
A water supply with low pressure can create significant problems. If the source is dependent on gravity, verify that it’s elevated and capable of delivering water effectively. Using a water pump to enhance pressure can be beneficial if the existing system falls short.
Monitor the temperature of your water as well. If using hot water models, ensure the input doesn’t exceed specified limits, usually around 60°C. Higher temperatures can damage internal components or reduce performance.
Testing the supply hose for leaks or blockages is also crucial. Any flaws can diminish performance. Regular inspection of connectors and the inlet screen is essential to maintain a consistent flow.
| Water Source Factors | Recommended Practices |
|---|---|
| Sufficient Flow Rate | Ensure a minimum of 5-8 litres per minute |
| Pressure Level | Check for adequate inlet pressure (typically 20-100 psi) |
| Temperature | Keep input water below 60°C to avoid damage |
| Hose Condition | Inspect regularly for leaks and blockages |
Make adjustments based on these factors to enhance functionality and maintain optimal operation. Regular monitoring and maintenance of your water source will yield more effective outcomes.
Inspecting the Pump for Damage or Wear
Begin with a thorough examination of the pump assembly. Look for any signs of external damage, such as cracks or dents, that could indicate a serious problem. Pay close attention to the mounting bolts; ensure they’re tight and in good condition, as loose bolts can lead to alignment issues.
Next, I recommend removing the pump from the unit for a detailed inspection. Look inside for signs of wear on seals and O-rings. If these components appear worn or degraded, replace them immediately to avoid further complications. Listen for unusual noises when running the unit; grinding sounds may indicate internal wear and tear.
Check the pump’s connecting rods and pistons for any visible damage. Any scoring or pitting on the surfaces can severely affect performance. If necessary, refer to the manufacturer’s manual for specific tolerances and replacement parts.
Additionally, examine the inlet and outlet ports for obstructions or damage. Clear any debris and inspect the gaskets for proper sealing. A faulty gasket can lead to significant water loss and decreased performance.
Finally, test the pressure relief valve. A malfunctioning valve can result in inconsistent performance and erratic pressure readings. If it’s stuck or damaged, replacing it is essential for optimal operation.
With these steps, you can ensure that the pump continues to function correctly and delivers the performance you expect.
Troubleshooting the pressure switch and unloader valve

First, verify the pressure switch’s functionality. Disconnect the unit from the power source and locate the switch. Manually test it by applying pressure; if it activates with pressure applied but fails otherwise, it’s likely defective and needs replacement.
Next, examine the unloader valve. This component regulates pressure during operation and relieves excess pressure when the trigger isn’t engaged. If the valve is stuck or malfunctioning, it can lead to fluctuating output. Remove the valve and clean it thoroughly; ensure no debris obstructs its operation. If cleaning does not restore proper function, consider replacing the valve.
Check for proper adjustment of both components. If too much pressure is released or not enough is allowed, adjustments may be necessary. Refer to manufacturer specifications for the correct settings; improper settings can drastically affect performance.
Conduct a visual inspection for signs of wear or damage. Cracks or corrosion on the pressure switch or unloader valve can be indicative of severe issues that compromise integrity. Replace any damaged parts immediately to prevent further complications.
Restore power and conduct a test run. Watch for any irregularities; sustained pressure during operation without excessive fluctuations indicates successful troubleshooting. If issues persist, further investigation into the electrical system or pump assembly may be required.
Maintenance Tips to Prevent Future Pressure Loss

Regular maintenance is key to ensuring optimal performance and longevity of your cleaning equipment. Here are specific actions to consider:
1. Regularly Inspect and Clean Components
- Check the nozzle for clogs and clean it as needed to ensure a consistent spray pattern.
- Examine hoses and fittings for wear or leaks; replace any damaged parts immediately.
- Inspect the inlet filter often; a clean filter prevents blockages that can reduce efficiency.
2. Maintain the Water Supply

- Use adequate water flow with the correct pressure; take note of manufacturer specifications.
- Ensure there are no restrictions in the hose leading to the unit, as this can lead to insufficient flow.
3. Care for the Pump
- Change the oil periodically based on the manufacturer’s recommendations, paying attention to the pump condition.
- Run the machine without any attachments for a few minutes regularly, allowing the pump to self-prime and clear any potential air locks.
4. Test Essential Components
- Check the pressure switch and unloader valve frequently for any signs of malfunction.
- Ensure connections are tight, and that seals are in good condition; replace any worn seals to maintain consistent pressure.
Consistent attention to these maintenance practices can significantly reduce the risk of compromising the effectiveness of your cleaning gear, ensuring that it runs smoothly and reliably for years to come.
FAQ:
What are the common reasons my power washer is losing pressure?
There are several common reasons why your power washer may be losing pressure. One primary cause could be a blockage in the nozzle or hose, which prevents water from flowing properly. Additionally, a faulty or damaged pump can result in reduced pressure. Check for any leaks in the hoses or connections, as these can also significantly affect performance. A dirty or worn-out filter may further inhibit pressure, so it’s important to inspect and clean or replace it as needed. Finally, ensure that you are using the correct nozzle for the job, as using one with too wide a spray pattern can lower pressure output.
How can I determine if there’s a problem with the pump of my power washer?
If you suspect that the pump of your power washer may be the issue, there are a few signs to look for. First, listen for any unusual noises when the machine is running, as grinding or rattling sounds may indicate internal problems. Additionally, check for leaks around the pump area. If you notice that water is leaking from the pump itself, it may need to be repaired or replaced. You can also conduct a pressure test using a pressure gauge attached to the outlet of the pump; if the reading is significantly lower than the manufacturer’s specifications, it is likely that the pump is not working correctly. Regular maintenance and cleaning can also help prevent pump issues from arising.
What should I do if my power washer keeps losing pressure during use?
If your power washer loses pressure while in use, first stop the machine and carefully inspect it. Check for any blockages in the nozzle or hoses and clean them thoroughly. Ensure all connections are tight and free from leaks. If the issue persists, try changing the nozzle to a different size—sometimes, a different spray pattern can improve pressure. Examine the water supply; ensure that you have a high enough flow rate and that the water source is not running out. If none of these steps resolve the issue, consider consulting the user manual for troubleshooting specific to your model, or contact a professional for further assistance.